7
Once the installaon of the opener and controller is complete it is me to test the operaon. Make sure the door is away from
the ground or the top door stops (mid open posion). This will prevent damage to the door in the event that the door direcon is
reversed in relaon to the controller (see below changing door direcon).
Checking power
Ensure the unit is powered by checking that the POWER ON
indicator on the controller is lit.
If a Key Switch variant is installed, ensure the key posion is
ON or MAN.
You should also noce that the LIMIT ERROR indicator
(orange) is lit which signies that there are no limits set.
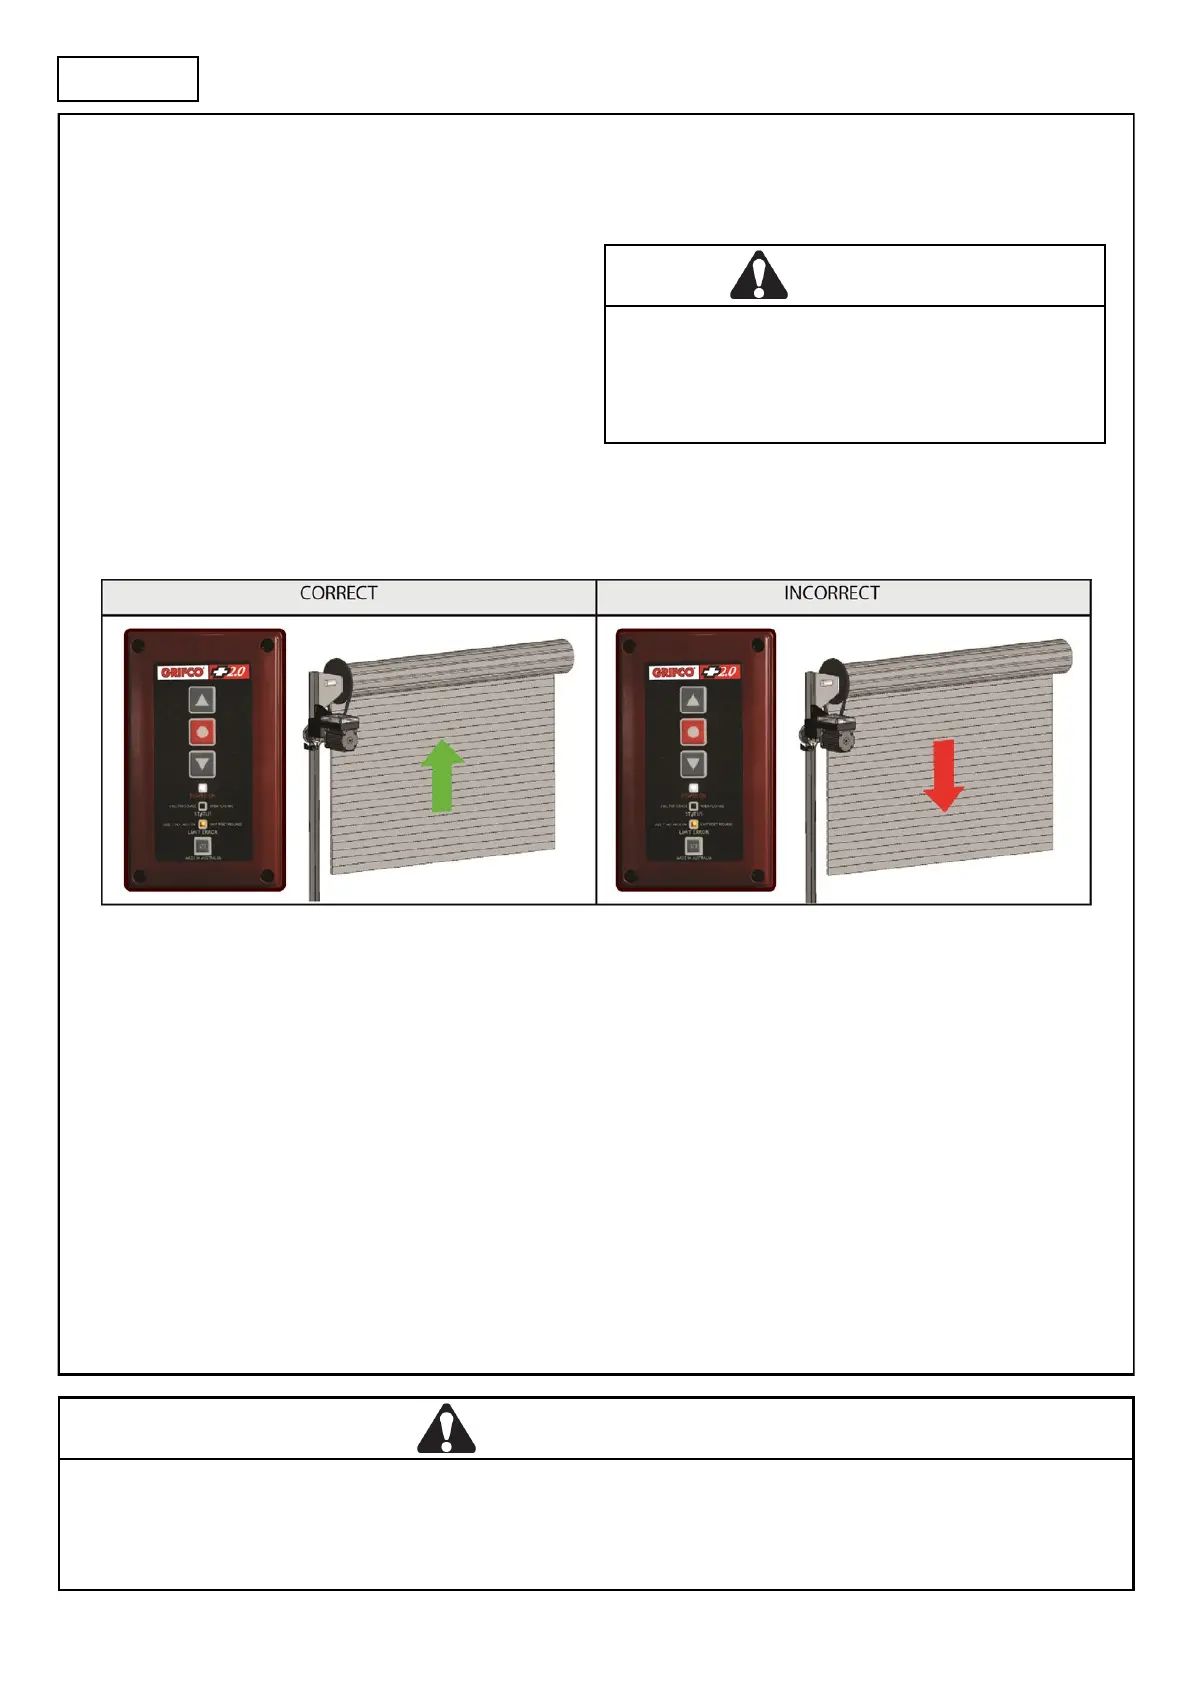
Door direcon
Check the direcon of the door movement. If the direcon of the door is incorrect, refer below to Changing door direcon.
Changing door direcon
To change the door direcon rst put the unit into ‘limit seng mode’. To do this:
1. While holding STOP, press the SET buon 3 mes.
The LIMIT ERROR indicator will start ashing signifying ‘limit seng mode’
2. Press and hold STOP for 10 seconds unl the LIMIT ERROR indicator ashes quickly.
The direcon of the door movement will now be reversed.
The LIMIT ERROR indicator will remain ashing as the unit is sll in limit seng mode. You can now set limits (go to step 2 on
next page)
Or to exit, press STOP.
CAUTION
On new installaons, the orange limit light should be lit
aer inial power up. If not, DO NOT operate door unless
in limit seng mode or serious damage or injury may
occur.
WARNING
On new installaons, the orange limit light should be lit aer inial power up. If not, DO NOT
operate door unless in limit seng mode or serious damage or injury may occur.
OPERATION