LEAK TESTING VENTURI TUBE
All factory-made connections have been thoroughly tested
for gas leaks. However, shipping and handling may have
loosened a gas fitting.
AS A SAFETY PRECAUTION:
TEST ALL FITTINGS FOR LEAKS BEFORE USING
YOUR GAS SMOKER.
TEST THE CYLINDER VALVE FOR LEAKS EACH
TIME THE CYLINDER IS FILLED.
TEST FOR LEAKS EVERY TIME YOU CONNECT A
GAS FITTING.
DO NOT SMOKE!
NEVER TEST FOR LEAKS WITH A LIGHTED MATCH
OR OPEN FLAME.
TEST FOR LEAKS OUTDOORS.
TO TEST FOR LEAKS:
1. Extinguish any open flame or cigarettes in the area.
2. Be sure that cylinder valve and appliance valves are
"off".
3. Connect LP gas cylinder. See "Hose and Regulator".
4. Prepare a soap solution of one part water, one part
liquid detergent.
5. With a full gas cylinder, open cylinder slowly.
6. Brush the soap solution on each connection.
7. A leak is identified by a flow of bubbles from the area of
the leak.
8. If a leak is detected, close the gas cylinder "shut-off"
valve, tighten the connection and retest (Step 5).
9. If the leak persists, contact your smoker dealer for
assistance. Do not attempt to operate appliance if a
leak is present.
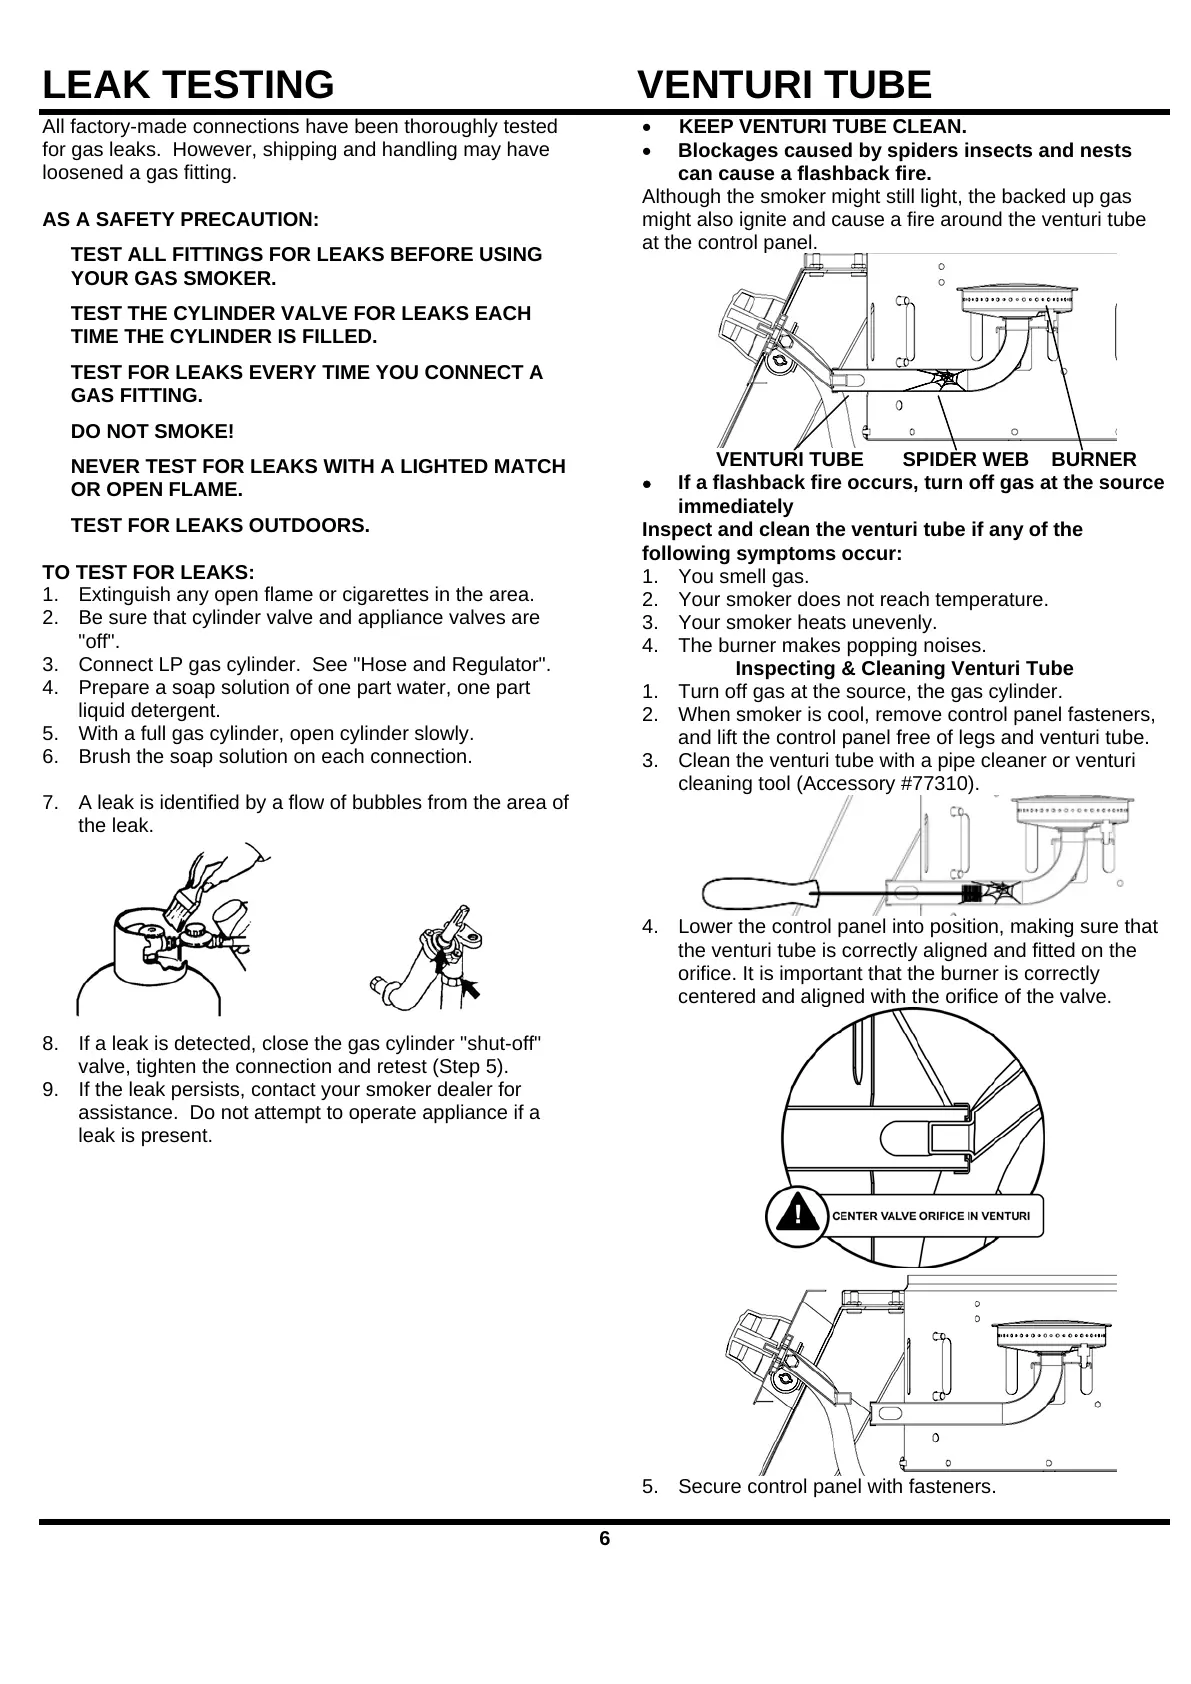
• KEEP VENTURI TUBE CLEAN.
• Blockages caused by spiders insects and nests
can cause a flashback fire.
Although the smoker might still light, the backed up gas
might also ignite and cause a fire around the venturi tube
at the control panel.
VENTURI TUBE SPIDER WEB BURNER
• If a flashback fire occurs, turn off gas at the source
immediately
Inspect and clean the venturi tube if any of the
following symptoms occur:
1. You smell gas.
2. Your smoker does not reach temperature.
3. Your smoker heats unevenly.
4. The burner makes popping noises.
Inspecting & Cleaning Venturi Tube
1. Turn off gas at the source, the gas cylinder.
2. When smoker is cool, remove control panel fasteners,
and lift the control panel free of legs and venturi tube.
3. Clean the venturi tube with a pipe cleaner or venturi
cleaning tool (Accessory #77310).
4. Lower the control panel into position, making sure that
the venturi tube is correctly aligned and fitted on the
orifice. It is important that the burner is correctly
centered and aligned with the orifice of the valve.
5. Secure control panel with fasteners.
6