Do you have a question about the Grizzly EXTREME G0513X2 and is the answer not in the manual?
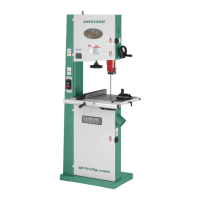
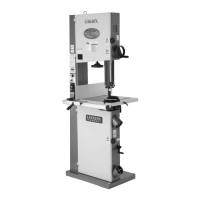
General introduction to the bandsaw and customer satisfaction.
How to contact Grizzly Industrial for comments or service.
Diagram identifying parts of the bandsaw from the front.
Diagram identifying parts of the bandsaw from the back.
General safety guidelines and warnings for operating machinery.
Specific safety advice and precautions tailored for bandsaw operation.
Safety warning regarding connecting power before setup is complete.
Importance and procedure for electrical grounding to prevent shock.
Recommendations and precautions for using extension cords with the machine.
Advice for using phase converters with 3-phase power supply.
Warnings and precautions to ensure safe machine setup procedures.
List of tools and accessories required but not included for setup.
Instructions for unpacking the machine and checking contents for damage.
List of all parts and hardware included with the bandsaw.
Guide to identifying and matching hardware components during assembly.
Instructions for cleaning the machine and protecting its surfaces.
Factors for choosing a machine location and minimum working clearances.
Safe methods for moving and positioning the heavy bandsaw unit.
Recommendations for securing the machine to the floor or a mobile base.
Instructions for safely installing the bandsaw table onto the trunnions.
Procedure for adjusting the blade to run correctly on the wheel crown.
Installing a mechanism to quickly return the table to the 0-degree position.
Instructions for connecting a dust collection system to the bandsaw.
Steps for assembling and installing the fence assembly.
Procedure for testing the machine's operation after assembly.
How to properly tension the bandsaw blade for accurate cuts.
Adjusting bearings behind the blade for proper support during cutting.
Aligning blade guides for proper side-to-side support and cutting accuracy.
Ensuring the miter slot is parallel to the bandsaw blade for accuracy.
Aligning the fence parallel to the miter slot for accurate cuts.
Calibrating the miter gauge for accurate 90-degree cuts.
Essential safety precautions to follow during machine operation.
Introduction to the bandsaw's capabilities and functions.
Location and function of the machine's power switch.
Adjusting the guide post for optimal blade support during cuts.
Final adjustments for ensuring the blade tracks accurately.
Correcting issues where the blade wanders off the intended cut line.
Adjusting the table angle for various cutting operations.
Technique for cutting wood along the grain or length.
Technique for cutting wood across the grain or width.
Process of cutting boards into thinner sections.
How to cut curved shapes with the bandsaw accurately.
Method for cutting multiple workpieces simultaneously.
Adjusting the bandsaw blade speed for different cutting tasks.
Details on blade length, width, tooth style, and curve cutting radii.
Proper maintenance practices to extend blade life and performance.
Common causes and prevention methods for bandsaw blade breakage.
Procedures for safely removing and replacing saw blades.
Lists of available carbon steel and carbide tipped blades for the bandsaw.
Recommended maintenance checks and their frequency.
Instructions for cleaning the bandsaw and its components.
Tips for protecting and maintaining unpainted cast iron surfaces.
Information on bearing lubrication and adjustment controls.
Maintenance and adjustment of the lower wheel brush.
Diagnosing and resolving common machine issues and symptoms.
Inspect the V-belt for condition, wear, and proper tension.
Adjusting the V-belt tension for optimal power transmission.
Step-by-step instructions for replacing a worn or damaged V-belt.
Adjusting the tension lever mechanism for proper blade release.
Proper contact adjustment for the lower wheel brush.
Ensuring wheels are coplanar for optimal blade tracking.
Diagram showing the wiring connections for the main switch.
Diagram illustrating the wiring connections to the motor.
Wiring diagram for 220V power connection.
Wiring diagram for 110V power connection.
Component layout for the main power supply connection.
Wiring details for the machine's control panel.
Wiring diagram for the magnetic switch assembly.
Wiring diagram for 220V single-phase power connection.
Component layout for the main power supply connection.
Wiring details for the machine's control panel.
Wiring diagram for the magnetic switch assembly.
Wiring diagram for 220V motor connection.
Wiring diagram for 440V motor connection.
Identifies the specific model number label for the G0513X.
Label indicating the Grizzly brand logo on the machine.
Various operational and safety labels found on the machine.
Identifies the specific model number label for G0514X/G0514X3.
Various operational and safety labels found on the machine.
Details of the product warranty, coverage, and limitations.
Instructions on how to obtain a return number for service.
| Type | Band Saw |
|---|---|
| Miter Gauge | Included |
| Blade Width Capacity | 1/8" - 1" |
| Table Tilt | 10 degrees left, 45 degrees right |
| Dust Port Size | 4" |
| Cutting Height | 12 inches |
| Cutting Width | 18 inches |
| Cutting Capacity (Resaw) | 12 inches |