Do you have a question about the Grizzly G1023RL and is the answer not in the manual?
Explains efforts for instruction accuracy and potential manual-machine differences.
Provides Grizzly Industrial's contact details for service and general inquiries.
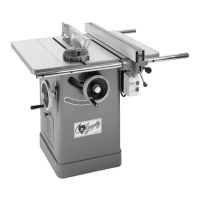
Details the table saw's cabinet, table, motor, and included accessories.
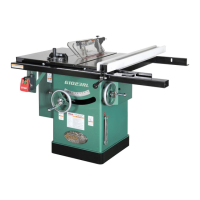
Identifies key components of the base G1023RL model.
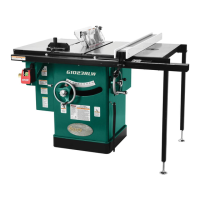
Identifies key components of the G1023RLX model.
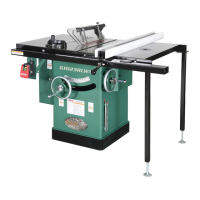
Identifies key components of the G1023RLW/RLWX models.
Safety advisory to read the manual before operating the saw.
Presents detailed specifications for G1023RL series models.
Explains the meaning of safety symbols (Danger, Warning, Caution, Notice).
Provides essential safety guidelines for operating machinery.
Emphasizes power disconnection and use by trained operators.
Covers safe operating environments, intended use, and accessory choices.
Ensures safe work area, tool removal, and proper workpiece feeding.
Covers guards, stability, positioning, and maintenance for safe operation.
Advises inspecting parts and contacting support for issues.
Advises keeping hands away from the blade path during operation.
Stresses using the blade guard for through cuts and riving knife for non-through cuts.
Defines kickback and outlines prevention methods like feeding and fence use.
Recommends push sticks and warns against running blade adjustments.
Covers safe blade practices and cutting only intended materials.
Lists precautions like smooth edges, parallel cuts, and fence alignment.
Highlights kickback as a common cause of table saw accidents.
Advises standing aside, wearing eye protection, and using push sticks.
Defines the shaft holding the saw blade.
Describes tilting the blade for angled cuts.
Explains the function of the blade guard.
Defines cutting across the workpiece width with a miter gauge.
Describes blades used for grooves and rabbets.
Defines cutting a groove with a dado blade.
Explains the use of featherboards for workpiece control.
Defines the gap left by the blade.
Defines kickback as workpiece ejection.
Describes a cut not going through the workpiece.
Defines being an equal distance apart.
Defines intersecting at right angles.
Defines a safety device for pushing workpieces.
Defines cutting an L-shaped channel.
Defines cutting across the widest width using the fence.
Defines the plate behind the blade for kerf maintenance.
Defines the plate behind the blade for kerf and hand shielding.
Defines a tool for checking flatness or parallelism.
Defines a blade with a thinner kerf.
Defines a cut that goes completely through the workpiece.
Discusses power supply circuit requirements for installation.
Explains the machine's amperage draw at full power.
Defines a power supply circuit and lists its specifications.
Details plug type and grounding for these models.
Explains permanent connection requirements for this model.
Lists necessary tools and supplies not included with the machine.
Guides on removing packaging and inspecting for damage.
Provides a visual guide to identify hardware during assembly.
Lists box contents for the main table saw unit (Figures 3-5).
Lists hardware and tools for assembly not depicted in figures.
Lists components for fence/rail installation for G1023RL/W/WX.
Lists hardware for fence/rail mounting.
Lists components for router table/guard installation.
Lists components for fence/rail installation for G1023RLX.
Lists hardware for G1023RLX fence mounting.
Recommends a cleaner for removing rust preventative.
Provides a step-by-step guide for cleaning.
Advises considering machine and workpiece weight for placement.
Discusses providing adequate space for operation and maintenance.
Recommends operating in a dry environment within specific temperature/humidity ranges.
Advises placing machine near power, protecting cords, and ensuring disconnect access.
Stresses adequate lighting and avoiding distracting effects.
Provides numbered steps for assembling the table saw unit.
Warns about the weight of extension wings and the need for help.
Instructions for installing the fence rails and Shop Fox Classic fence.
Instructions for installing router table and legs.
Instructions for installing the extension table and legs for G1023RLX.
Instructions for installing the saw blade.
Steps for installing and adjusting the table insert.
Verifies fence parallelism with the blade/miter slot.
Instructions for installing the blade guard.
Instructions for installing the fence scale and cursor.
Instructions for mounting router guard and router.
Warns against operating without adequate dust collection.
Lists required components for dust collection.
Advises on CFM requirements and factors affecting it.
Provides steps for connecting the dust hose.
Steps for connecting these models to power.
Explains permanent connection requirements for this model.
Provides steps to ensure the machine runs correctly.
Lists factory settings to verify for accurate cuts.
Emphasizes reading and understanding the manual before operation.
Warns about gear importance and general saw operation safety.
Disclaimer on training and overview of basic controls.
Describes disabling the switch with a padlock for safety.
Outlines the sequence of actions for a typical cutting operation.
Explains how to disable the switch using a padlock for safety.
Warns about securing the switch when unattended.
Provides minimum shaft diameter for padlock engagement.
Defines and illustrates cut types, noting risks.
Lists inspection points for workpieces before cutting.
Lists specifications for safe blade installation.
Details features of blades best for ripping.
Details features of blades best for crosscutting.
Details features of combination blades.
Advises caution and gloves when installing blades.
Step-by-step guide for installing a new saw blade.
Explains the spreader's function and alignment importance.
Describes the guard's purpose and maintenance.
Step-by-step instructions for installing the guard and spreader.
Explains pawl function and resting position.
Discusses pawl disabling and safety warnings.
Specifies when the blade guard must be used.
Specifies when the blade guard cannot be used and riving knife must be installed.
Stresses safe riving knife alignment and adjustment.
Details when the riving knife should be used.
Details when the riving knife should not be used.
Refers to Blade Guard installation for riving knife mounting.
Provides step-by-step instructions for making a rip cut.
Warns about kickback during ripping operations.
Step-by-step guide for performing a crosscut.
Warns to stop the saw before removing cut-offs.
Step-by-step guide for performing a miter cut.
Explains blade tilting for angled cuts.
Warns about higher kickback risk with dado blades.
Prohibits through cuts with dado blades.
Warns against dadoing warped boards.
Step-by-step guide for installing a dado blade.
Demonstrates sequential cuts for dadoes.
Guides on cutting dadoes using a standard blade.
Details cutting rabbets with a dado blade and sacrificial fence.
Warns about kickback risk with dado blades.
Guides on cutting rabbets with a standard blade.
Warns about increased kickback risk during resawing.
Advises extra care and specific procedures for resawing.
Provides instructions for building a resaw barrier.
Lists materials for building an auxiliary fence.
Lists tools required for building the resaw barrier.
Step-by-step instructions for building an auxiliary fence.
Lists components needed for resawing operations.
Advises safety precautions for resawing.
Provides steps for performing resawing operations.
Explains featherboards and their construction.
Details how to make a featherboard.
Emphasizes correct finger cuts for featherboard strength.
Notes that steps 1-3 are for clamp-mounted featherboards.
Explains how to use push sticks for safety.
Describes the feeding technique with a push stick.
Explains using a second push stick for support.
Provides a template for making a push stick.
Explains how to use push blocks for safety.
Provides a template for making a push block.
Guides on making a push block for an auxiliary fence.
Details how to use the auxiliary fence and push block together.
Explains the benefits of outfeed and support tables for safety and ease.
Describes the use of a crosscut sled for safety and accuracy.
Warns about improper accessory installation risks.
Advises referring to the catalog for available accessories.
Describes the zero clearance insert.
Lists various power feeders available.
Describes the features of the tenoning jig.
Describes alignment tools for table saws.
Describes the dust collector's features.
Details table saw attachments.
Describes the overarm blade guard.
Recommends a book on table saw fundamentals.
Lists various eye protection options.
Describes a miter slot featherboard.
Lists recommended products for table top protection.
Describes a safety kit including jigs.
Outlines a maintenance schedule (Ongoing, Weekly, Monthly).
Provides instructions for cleaning the table saw.
Advises on protecting unpainted cast iron surfaces.
Warns to disconnect power before lubrication.
Guides on cleaning and lubricating trunnion slides.
Guides on cleaning and lubricating gears.
Guides on cleaning and lubricating elevation components.
Lists common symptoms, causes, and solutions.
Troubleshoots issues preventing the motor from starting.
Troubleshoots vibration and noise issues.
Troubleshoots issues with handwheel movement.
Troubleshoots blade tilt accuracy issues.
Troubleshoots blade interference with the insert.
Troubleshoots blade height adjustment issues.
Troubleshoots workpiece binding or burning.
Troubleshoots dust collection and guard issues.
Troubleshoots arbor movement issues.
Lists tools required for adjusting blade tilt stops.
Step-by-step guide to set the 90° blade tilt stop.
Step-by-step guide to set the 45° blade tilt stop.
Describes the arbor height limit bolts.
Lists tools for adjusting miter slot parallelism.
Step-by-step guide to adjust parallelism.
Lists tools for adjusting blade alignment.
Steps to align the blade by moving the table.
Steps to align the blade by moving the trunnion.
Guides to check spreader/riving knife alignment.
Details adjusting the spreader/riving knife position.
Lists tools for fence adjustments.
Guides on checking and adjusting fence height.
Details adjustments for clamping pressure and parallelism.
Steps to verify fence parallelism.
Steps to adjust fence clamping pressure and parallelism.
Steps to calibrate the fence scale indicator.
Lists tools for miter gauge adjustments.
Guides to check and set 90° stops on the miter gauge.
Guides to check and set 45° stops on the miter gauge.
Details adjusting the miter bar for snug fit in the T-slot.
Lists tools required for belt tensioning and replacement.
Step-by-step guide for tensioning the drive belt.
Detailed steps for replacing the drive belt.
Lists tools for adjusting the elevation slide gib.
Step-by-step guide to adjust the gib for smooth movement.
Safety instructions for working with wiring.
Warns about danger from electrified parts.
Warns against modifications and stresses connection integrity.
Emphasizes circuit adherence and replacing damaged components.
Notes motor wiring variations and capacitor charge warning.
Directs users to contact tech support for wiring issues.
Recommends viewing diagrams in color online.
Shows electrical components for 3HP models.
Shows electrical components for the 5HP model.
Wiring diagram for 3HP models.
Wiring diagram for the 5HP model.
Exploded view and parts list for the main assembly.
Exploded view of Arbor & Motor components.
Detailed parts list for Arbor & Motor.
Exploded view of Blade Guard & Miter Gauge components.
Exploded view of Fence components.
Exploded view of Fence Rails for G1023RL/W/WX.
Exploded view of Fence Rails for G1023RLX.
Exploded view of Router Table & Guard components.
Illustrates and lists various warning and ID labels on the machine.
Details warranty terms, conditions, and return procedures.
| Type | Table Saw |
|---|---|
| Motor | 3 HP |
| Blade Diameter | 10 in |
| Arbor Size | 5/8 in |
| Max. Rip Capacity | 30 inches |
| Table Size | 27 in x 40 in |
| Table Height | 34 in |
| Amps | 15 A |
| Max. Depth of Cut @ 90 Degrees | 3-1/8 inches |
| Max. Depth of Cut @ 45 Degrees | 2-1/4 inches |