EasyManua.ls Logo

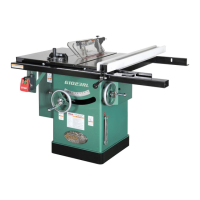
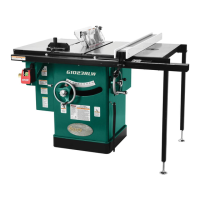
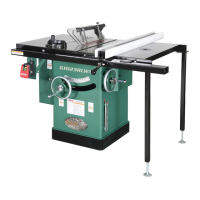
Grizzly G1023RLWX User Manual

Grizzly G1023RLWX
96 pages
To Next Page IconTo Next Page
Page #1 background imageLoading...
Page #1 background image
COPYRIGHT © MAY, 2010 BY GRIZZLY INDUSTRIAL, INC. REVISED OCTOBER, 2014 (BLMN)
WARNING: NO PORTION OF THIS MANUAL MAY BE REPRODUCED IN ANY SHAPE
OR FORM WITHOUT THE WRITTEN APPROVAL OF GRIZZLY INDUSTRIAL, INC.
#BL12898 PRINTED IN TAIWAN
G1023RL
G1023RLX
G1023RLW/RLWX
177335
MODEL G1023RL SERIES
10" LEFT-TILT TABLE SAW
WITH RIVING KNIFE
OWNER'S MANUAL
(For RL/RLW/RLX models manufactured since 12/11)
(For RLWX models manufactured since 10/14)
V3.10.14

Table of Contents

Questions and Answers:

Grizzly G1023RLWX Specifications

General IconGeneral
TypeTable Saw
Blade Diameter10 inches
Table Height from Floor34 inches
Max Cutting Depth at 90 Degrees3-1/8 inches
Max Cutting Depth at 45 Degrees2-1/4 inches
Maximum Rip Capacity Right of Blade30 inches
Maximum Rip Capacity Left of Blade12 inches
Dust Port Size4 inches
Motor3 HP
Arbor Size5/8 inches
Table Size27 inches x 40 inches
Table Size with Extension Wings27 inches

Summary

SECTION 1: SAFETY

Key Machinery Safety Instructions

Provides essential safety guidelines for machinery, covering electrical, environment, mental alertness, and eye protection.

DETAILED SAFETY GUIDELINES

Personal Safety & Work Practices

Covers safety related to apparel, dust, hearing, tool use, body positioning, children, and guards.

Operational & Machine Safety Rules

Details rules for safe operation, machine stability, accessory use, maintenance, and handling difficulties.

ADDITIONAL TABLE SAW SAFETY

Safe Operation Practices

Covers hand/body positioning, blade guard, riving knife, and proper feeding techniques.

Kickback Prevention and Mitigation

Explains how to prevent kickback and protect yourself if it occurs.

Material and Blade Condition Safety

Advises on inspecting workpieces, using correct blades, and avoiding damaged materials.

PREVENTING KICKBACK AND SELF-PROTECTION

Common Kickback Causes and Prevention

Lists precautions to avoid kickback, such as workpiece preparation and fence alignment.

Protecting Yourself from Kickback

Provides specific measures to protect yourself during a kickback event, emphasizing body positioning and safety devices.

SECTION 2: POWER SUPPLY

Power Supply Requirements and Availability

Details electrical requirements, circuit considerations, and voltage for safe operation.

Grounding and Plug/Receptacle Information

Explains grounding requirements and the typical 6-15 plug and receptacle.

ELECTRICAL CONNECTIONS AND EXTENSION CORDS

G1023RLWX Power Requirements

Specifies the electrical circuit requirements for the G1023RLWX model, including voltage and amperage.

SECTION 3: SETUP

Inventory Check

COMPONENT INVENTORY

ADDITIONAL COMPONENT INVENTORY

Assembly

ASSEMBLY PROCEDURES

CONTINUING ASSEMBLY STEPS

RAILS & FENCE INSTALLATION

Table Insert Installation

Checking Fence Parallelism

Blade Guard

Scale & Cursor Installation

Dust Collection System

Power Connection

Connecting to Power Source

Details the final step of connecting the machine to the power supply after assembly is complete.

Test Run

Verifying Machine Operation

Outlines the steps for a test run, checking motor function and safety switch operation.

Switch Disabling Lock Test

Explains how to test the switch disabling mechanism with a padlock for safety.

Recommended Adjustments

SECTION 4: OPERATIONS

General Operation Safety Warning

Emphasizes reading and understanding the entire manual before any operations to avoid serious injury.

Personal Protective Equipment (PPE)

Advises wearing safety glasses, respirator, and hearing protection for eye, lung, and hearing safety.

Basic Table Saw Controls

Identifies and explains the function of basic controls like the ON/OFF switch, blade height, and fence locks.

OPERATION OVERVIEW

Disabling & Locking Switch

Securing the Machine with a Padlock

Explains how to disable and lock the switch using a padlock to prevent unauthorized use.

Non-Through & Through Cuts

Stock Inspection

Blade Requirements

Blade Installation Procedure

BLADE GUARD ASSEMBLY AND INSTALLATION

Blade Guard Components and Safety Functions

Details the blade guard, spreader, and pawls, explaining their roles in safety and preventing kickback.

Installing the Blade Guard System

Provides step-by-step instructions for installing the blade guard and spreader using the quick release mechanism.

ASSEMBLE BLADE GUARD AND SPREADER

Securing the Blade Guard to Spreader

Describes how to connect the blade guard to the spreader using pins and a knob.

Installing and Verifying Spreader Lock

Guides on inserting and securing the spreader, checking its lock, and verifying blade alignment.

ANTI-KICKBACK PAWLS

Pawl Function and Resting Position

Explains how anti-kickback pawls work and their correct resting position.

Disabling and Enabling Pawls

Details how to disable pawls for delicate work and the safety implications.

Blade Guard Usage Guidelines

When to Use the Blade Guard

Specifies when the blade guard must be used, emphasizing through cuts for maximum safety.

When Not to Use the Blade Guard

Explains situations where the blade guard cannot be used, like non-through cuts, and the importance of the riving knife.

Riving Knife Function and Installation

Riving Knife Purpose and Height

Describes the riving knife's role in preventing kickback and its height relative to the blade.

When to Use and Not Use the Riving Knife

Guides on when to use the riving knife for non-through cuts and when not to use it, like with small dado blades.

Installing the Riving Knife

Refers to blade guard installation instructions for mounting the riving knife.

Ripping Operation

Making a Rip Cut

Step-by-step guide for performing a rip cut, including safety precautions and using a push stick.

Rip Cut Safety Warnings

Highlights dangers of kickback during ripping and the importance of blade guards.

Crosscutting and Miter Cuts

Performing a Crosscut

Details how to make a crosscut using the miter gauge, including blade height and fence positioning.

Performing a Miter Cut

Guides on making angled crosscuts (miters) using the miter gauge and proper workpiece alignment.

Blade Tilt/Bevel Cuts

Dado Cutting Procedure

Installing a Dado Blade System

Steps for installing a dado blade, including table insert and guard removal.

Dado Cutting Safety Warnings

Highlights increased kickback risk with dado blades and advises on cut depth and stock condition.

CUTTING DADOES WITH DADO BLADE

Sequential Dado Cuts with Dado Blade

Demonstrates making multiple, light cuts for dadoes with a dado blade for progressive depth.

CUTTING DADOES WITH STANDARD BLADE

ADDITIONAL DADO CUTTING TECHNIQUES

Rabbet Cutting

Rabbet Cutting Safety Warnings

Emphasizes safety for dado blades, kickback risk, and stock condition during rabbeting.

CUTTING RABBETS WITH STANDARD BLADE

Standard Blade Rabbet Safety

Warns against cutting tall boards on edge with a standard blade and suggests using a dado blade instead.

Resawing Safety and Recommendations

Resawing Kickback Risks

Highlights the increased risk of kickback and serious injury associated with resawing on a table saw.

Resawing Procedures and Warnings

Emphasizes extra care, flat stock, and avoiding workpiece tilting during resawing.

Making a Resaw Barrier

AUXILIARY FENCE AND RESAWING COMPONENTS

Resawing Operations and Safety

Performing Resawing Operations

Guides on performing resawing, including motor load, blade choice, and safety precautions like face shields.

IDEAL RESAW SETUP AND CUT

Setting Up for Resawing

Explains how to set up the workpiece with auxiliary fence and resaw barrier for optimal resawing.

Completing the Resaw Cut

Details the process of making multiple passes, achieving an ideal cut, and finishing the resaw.

SECTION 5: SHOP MADE SAFETY ACCESSORIES

FEATHERBOARD CONSTRUCTION DETAILS

MOUNTING FEATHERBOARDS

Push Sticks for Safety

Using Push Sticks Safely

Explains how to use push sticks to keep hands away from the blade while cutting.

Push Blocks for Enhanced Safety

Using Push Blocks for Feeding

Details how push blocks can be used to apply firm pressure and feed workpieces safely.

NARROW-RIP AUXILIARY FENCE & PUSH BLOCK

USING THE AUXILIARY FENCE AND PUSH BLOCK

SECTION 7: MAINTENANCE

Unpainted Cast Iron Care

LUBRICATION PROCEDURES

SECTION 8: SERVICE

Troubleshooting Common Issues

Provides a table of common symptoms, their possible causes, and solutions for troubleshooting.

TROUBLESHOOTING GUIDE CONTINUED

Addressing Handwheel and Blade Tilt Issues

Lists solutions for handwheel binding, blade not reaching 90°/45°, and blade contact with inserts.

Resolving Feeding and Sawdust Issues

Provides troubleshooting steps for workpiece burning, excessive sawdust, and arbor movement problems.

Blade Tilt Stops Adjustment

Miter Slot to Blade Parallelism

PARALLELISM ADJUSTMENT PROCEDURES

Blade Alignment by Table Movement

BLADE ALIGNMENT ADJUSTMENTS

Spreader or Riving Knife Alignment

ALIGNMENT ZONE AND ADJUSTMENT

ADJUSTING BENT SPREADER/RIVING KNIFE

Fence Adjustments Overview

FENCE HEIGHT ADJUSTMENT

CLAMPING PRESSURE AND PARALLELISM

ADJUSTING FENCE CLAMPING AND PARALLELISM

Fence Scale Calibration

Miter Gauge Adjustments

MITER GAUGE ADJUSTMENT PROCEDURES

BELT TENSION & REPLACEMENT

BELT REPLACEMENT STEPS

ARBOR AND BELT REASSEMBLY

Gib Adjustment

SECTION 9: WIRING

Wiring Safety Instructions Overview

Provides critical safety guidelines for working with electrical wiring, covering shock hazards and component damage.

G1023RL/RLX/RLW ELECTRICAL COMPONENTS

G1023RL/RLX/RLW WIRING DIAGRAM

3HP Motor and Switch Wiring

Presents the wiring diagram for the 3HP motor, on/off switch, and magnetic switch assembly.

G1023RLWX ELECTRICAL COMPONENTS

G1023RLWX WIRING DIAGRAM

5HP Motor and Switch Wiring

Presents the wiring diagram for the 5HP motor, on/off switch, and magnetic switch assembly.

G1023RL (All) Blade Guard & Miter Gauge Parts

Related product manuals