55
GB
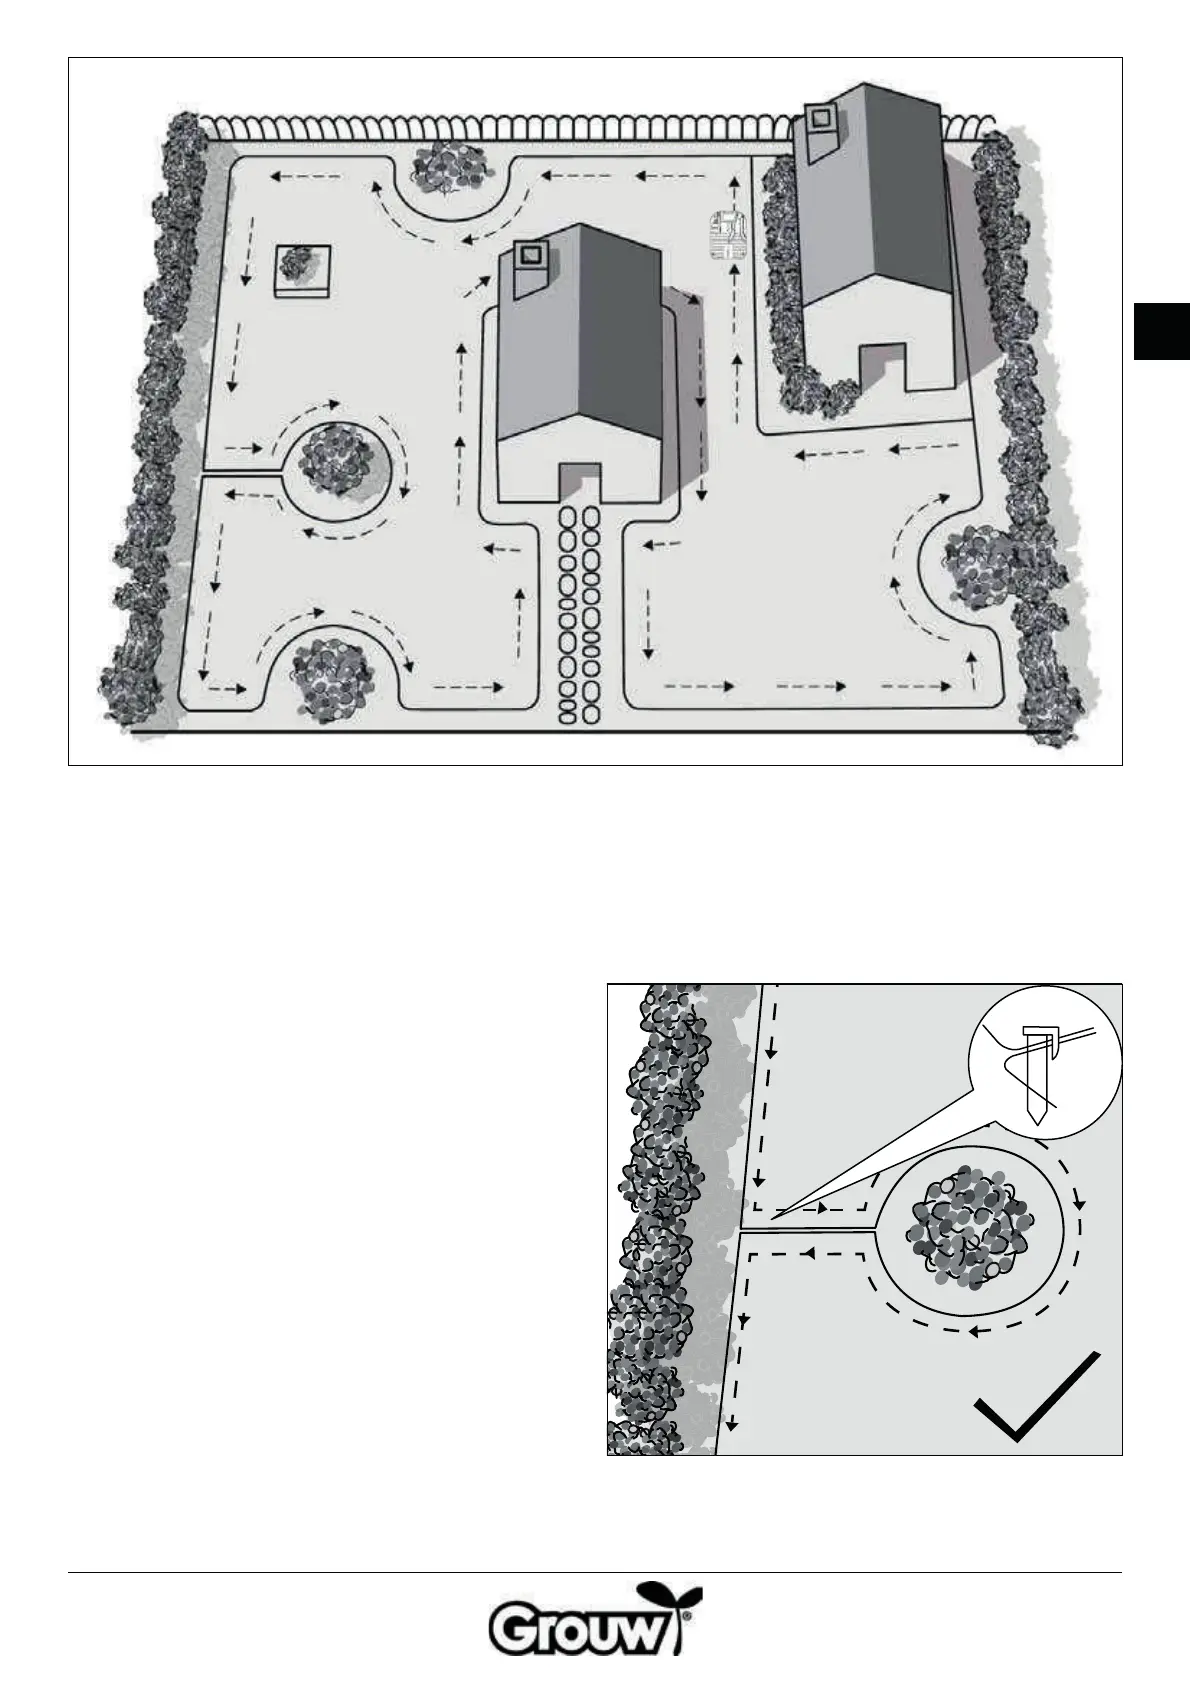
Step 2: Laying out the boundary cable
Follow your sketch of the garden and lay out the
boundary cable anticlockwise so that you create
“islands” clockwise around any obstacles. Avoid 90
degree corners. Instead, divide them up in two 45
degree angles.
Use a rubber mallet to secure the boundary cable with
a plastic peg at least once every metre. If the pegs break
or are dicult to knock in because the ground is hard, it
may help to water the lawn rst.
Secure the boundary cable as close to the ground as
possible, preferably right down by the grass roots. The
boundary cable must be taut, and there must be no
gaps under it. It is important that the robot lawnmower
cannot touch the boundary cable with its blades, which
would cut the cable.
Over the course of a few weeks, the lawn will grow
up around the boundary cable so that you cannot
immediately notice it in the garden.
If you are able to use a scarier or verticutter on the
lawn, you should instead dig the boundary cable down
into a groove no more than 5 cm deep so that it is
protected under the soil surface. Remember to adjust
the scarier or verticutter so that the blades/rakes
cannot reach down to the boundary cable.
The boundary cable can be left on the grass in some
places and under the ground in others, or under paving
stones with a thickness of up to 5 cm.
Obstacles must be enclosed as “islands”
The boundary cable running to and from an island
must be laid quite close together and must be secured
using the same pegs. This ensures that signals from
the boundary cables to and from the island oset one
another so that the robot lawnmower does not register
them as a barrier.
 Loading...