16 / 28
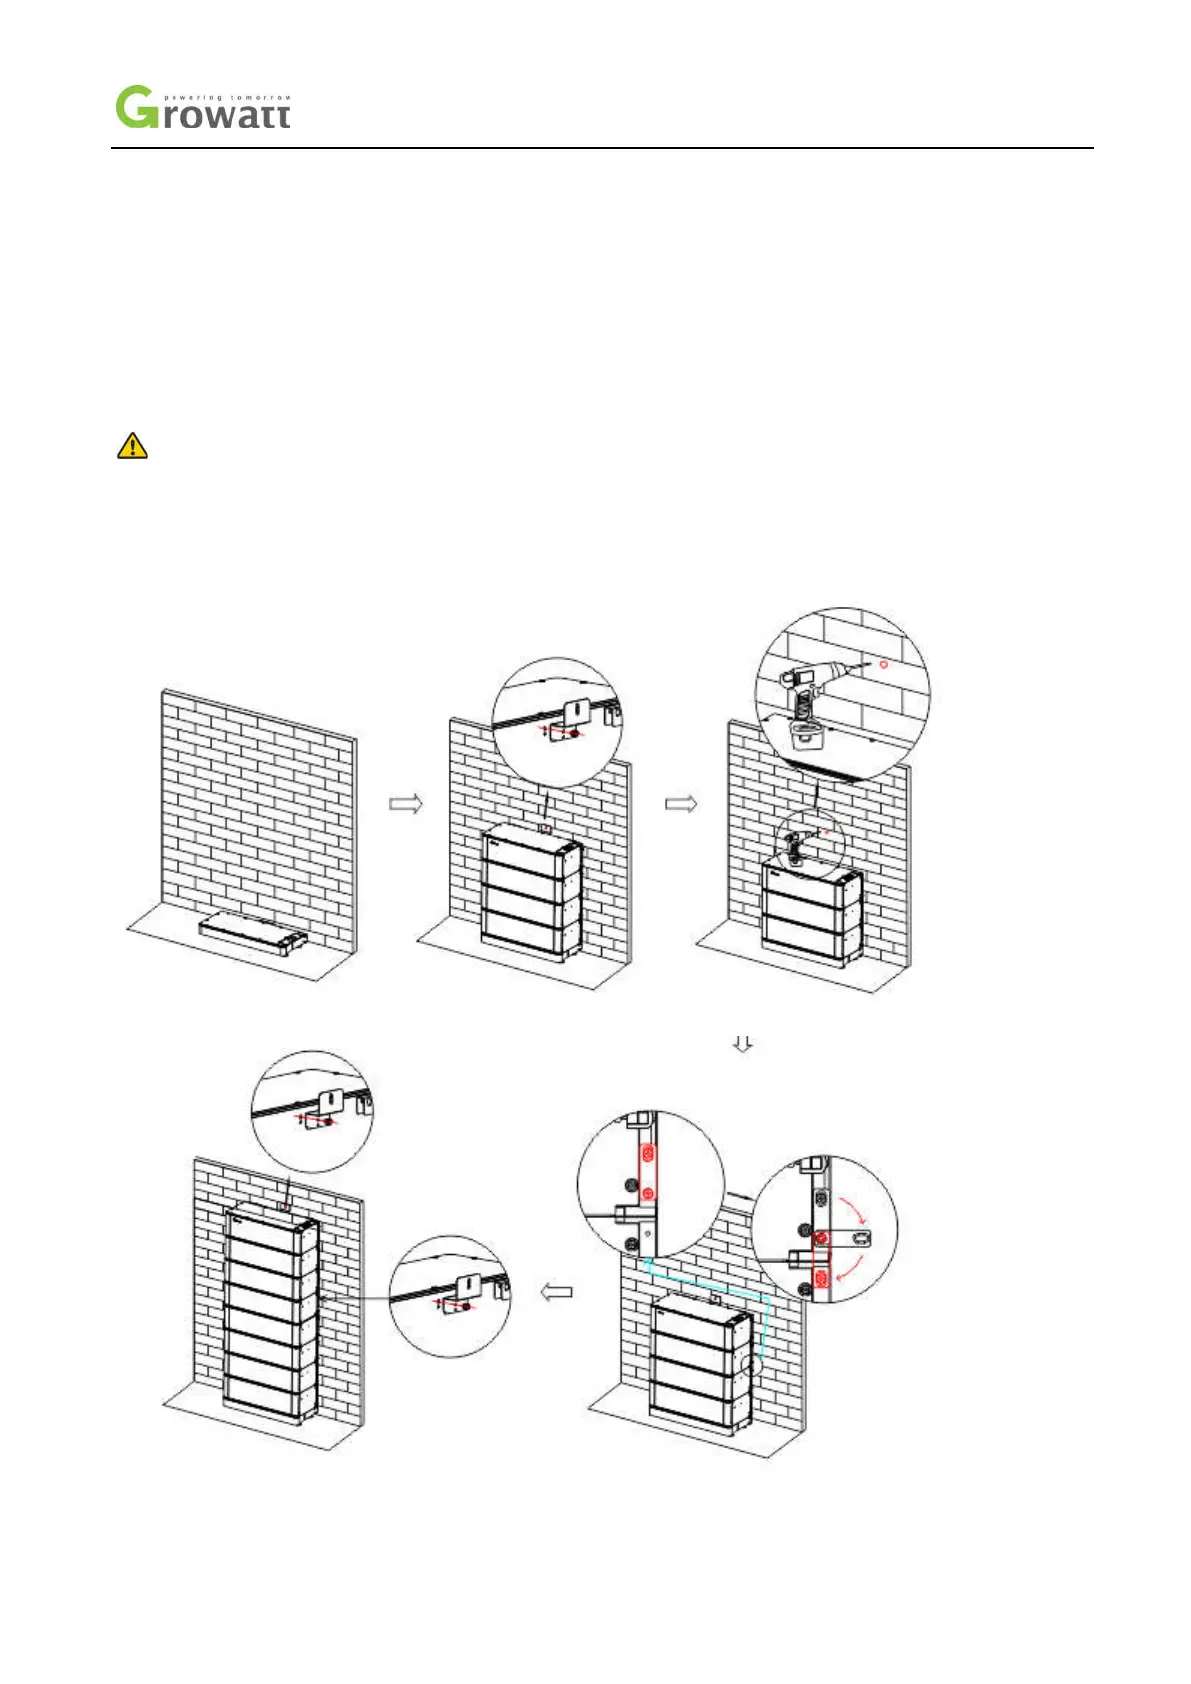
Figure 14: Wall mounted installation process
Step 1:
Please make sure that the weight capacity of the wall should exceed 150kg.
Step 2: Put bracket on wall and mark drilling spots. Keep a minimum distance of 300mm between the wall and bracket; a minimum
distance of 500mm between bracket and ground.
Step 3: Choose an alloy drill with a diameter of 8mm, and drill at least 60mm mounting holes in the wall. Clean the soil and insert the
expansion tube into the hole, then screw in the screw to fix the wall mount.
Step 4: Fix the battery on the wall mount, make sure that the battery will not shake, and then lock the safety screw.
Notice
The number of wall-mounted installations should not exceed 4 (including high voltage controllers).
If there are more than 4, please install them in two lines, and the spacing should be greater than or equal to 300mm
4.3.3 Floor Standing Installation
Figure 15:
Floor standing installation process
 Loading...