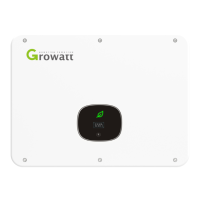
The Growatt MID TL3-X and MID TL3-XL series photovoltaic inverters are designed to convert direct current generated by photovoltaic panels into alternating current, delivering it to the grid in three phases. These inverters are suitable for connecting two strings of panels and feature two maximum power point trackers, making them adaptable to different panel array configurations.
Function Description:
The primary function of these inverters is to facilitate grid-connected power generation from solar panels. They take the DC power from PV modules, convert it into AC power, and feed it into the utility grid. A complete PV grid-connected system typically includes PV modules, the inverter, an AC circuit breaker, an energy meter, and the utility grid. The inverter acts as the central component in this system.
The device also includes various protection mechanisms to ensure safe and reliable operation. These include DC reverse-polarity protection, a built-in DC switch, DC and AC surge protection (Type II), insulation resistance monitoring, and AC short-circuit protection. Grid monitoring and anti-islanding protection are standard features, along with a residual-current monitoring unit. For enhanced safety, string fuse protection and AFCI (Arc Fault Circuit Interrupter) protection are available as optional or standard features depending on the model.
Communication and monitoring capabilities are integral to the inverter's functionality. It provides two RS485 ports: one for monitoring one or more inverters and another for connecting to a smart meter, enabling an anti-backflow function. Additionally, the inverters support DRM (Demand Response Mode) communication. A USB-A port is available for connecting external monitoring modules like Shine WIFI-X, Shine 4GX, Shine LAN-X, or for firmware updates.
The inverter operates in several modes:
- Normal mode: The inverter works as expected, converting DC to AC and feeding it to the grid when DC voltage is sufficient (above 250V) and grid conditions are met. A green LED indicates normal operation.
- Failure mode: If unexpected conditions or system failures occur, fault information is displayed on the OLED screen, the indication window turns red, and the inverter output is disconnected from the grid.
- Shutdown mode: When light is weak or absent, the inverter automatically stops running, consuming minimal energy, and its display and LEDs turn off.
Usage Features:
The Growatt MID TL3-X and MID TL3-XL inverters are designed for ease of installation and operation.
- Installation: The installation process involves securing a wall mount, hanging the inverter, and connecting the AC and DC wiring, as well as signal lines. The wall must be sturdy enough to support the inverter's weight, and the installation location should allow for easy inspection and maintenance. It is recommended to install the inverter in a sheltered, rain-proof location, away from direct strong sunlight to prevent overheating and power derating. Adequate clearance around the inverter is crucial for proper ventilation and operation.
- OLED Display and Touch Buttons: The inverter features an OLED display that shows operating status and various parameter information. A touch button allows users to switch display interfaces and set parameters.
- Touch once: Switches function, moves to the next page, or selects an option.
- Touch twice: Confirms a function, enters a setting item, or confirms a setting.
- Touch three times: Returns/exits a function, moves to the previous menu, or exits the current setting.
- Long press 5S: Activates power-up country selection or clears initial data values.
The OLED display automatically turns off after 5 minutes of normal operation to save energy but can be reactivated by touch.
- Debugging: The debugging process involves closing the DC switch, checking for AC connection errors (indicated by a red LED), and then closing the AC circuit breaker to initiate a self-test. Once the self-test is complete and normal, the inverter connects to the grid, and the indication window turns green.
- Parameter Setting: The OLED display allows for both general and advanced parameter settings, including language, address, date, time, country/region, voltage level, anti-backflow function, zero ground detection, off-grid setting, manual off-grid setting, and energy storage settings. Advanced settings require a password for access.
- Start and Shut Down: To start the inverter, close the AC circuit breaker, then the DC switch. The inverter will automatically start if the input PV voltage is above 250Vdc. To shut down, disconnect the AC circuit breaker, then turn off the DC switch, and wait for the LEDs and OLED display to turn off.
Maintenance Features:
Maintenance is crucial for the longevity and optimal performance of the inverter.
- Fan Maintenance: The inverters are equipped with a cooling fan that activates when the external temperature is high to prevent power derating. Regular maintenance of the fan is recommended.
- Cleaning: Before cleaning or replacing the fan, ensure both DC and AC sides of the inverter are disconnected. This involves turning off the DC switch, removing the DC side terminal, and disconnecting the AC side switch. The fan, fan net, and heat sink can be cleaned with a gas pump, brush, or damp cloth.
- Replacement: If a fan is damaged, it can be replaced using a Phillips screwdriver.
- Troubleshooting: If the inverter experiences issues, the OLED screen will display error messages. Users are advised to contact Growatt customer service, providing information such as the serial number, model, error message, a description of the problem, grid voltage, DC input voltage, environmental conditions, and details about the PV panels.
- Troubleshooting: The manual provides a comprehensive list of warning and error codes with corresponding fault descriptions and suggestions for resolution. These range from string faults and communication errors to hardware malfunctions. Many issues can be resolved by checking wiring, restarting the inverter, or reducing load. For persistent issues, contacting the manufacturer is advised.
- Warranty and Repair: The manual outlines the repair process, which can involve on-site repair or transport to a Growatt Service Center. It also specifies that the warranty does not cover recycling costs or installation/reinstallation costs associated with faulty devices.