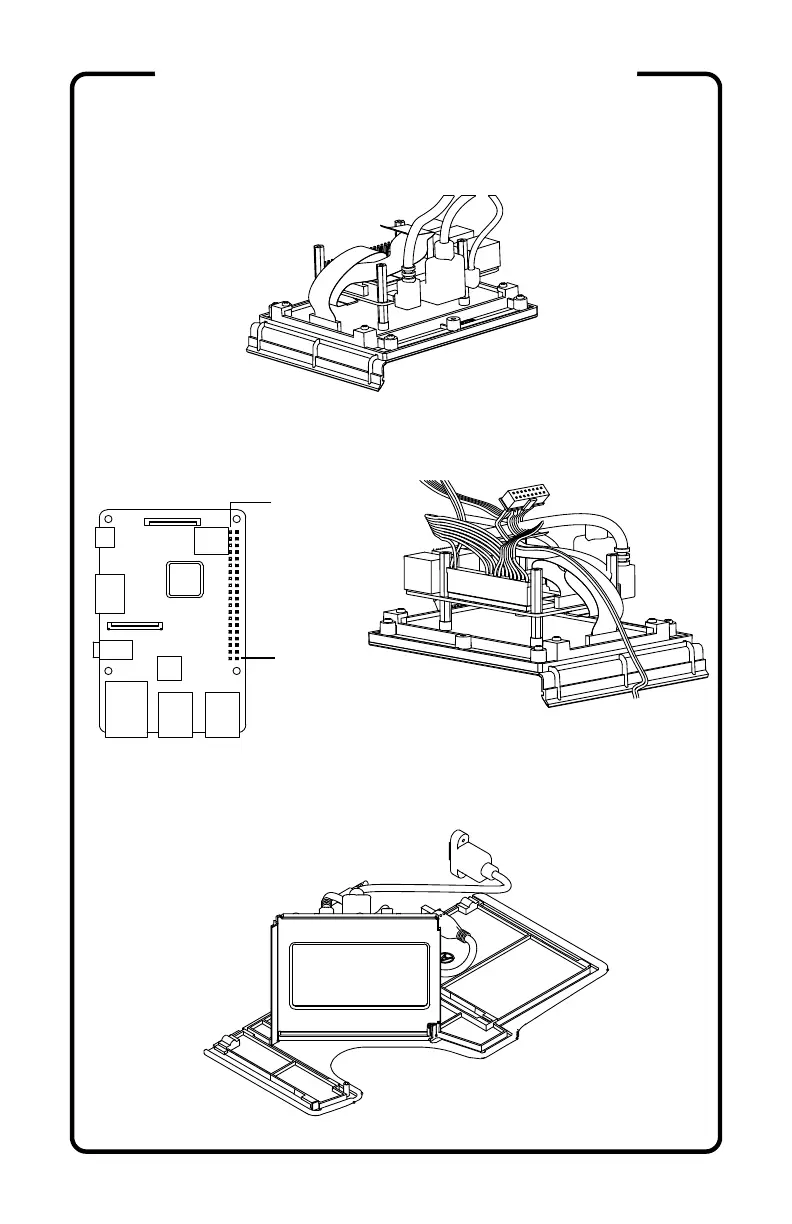
11) Plug all side mounted cables into the Raspberry Pi™;
power (W2), HDMI (W5) Pi 3 only, and audio (W3).
12) Attach the WIRING HARNESS (W1) to the GPIO pins
of the Raspberry Pi™ with Pin 40 at the bottom right of
the header.
13) Lay the LEFT SIDE (A) down on a flat surface and
insert the SCREEN ASSEMBLY into its slot.
Pin 1
Pin 40
(continued)
ASSEMBLY INSTRUCTIONS