6. Ensure all circuit breakers are in the “on” position.
7. Make sure the discharge manifold pump isolation
valves are closed. Switch on main power. CAUTION:
The pumps may start at this time.
8. Turn the Function Selector on the PFU 2000 to “Max.”
(see drawing with Step 7 on previous page) (full clock-
wise rotation). If the pumps did not start in Step 7, they
will start after approximately 15 seconds.
9. Vent the system by opening the vent plug on each
pump (as in Step 4). Venting with the pumps running
ensures all air is removed from the suction. Do not run
the system with the discharge manifold pump isolation
valves closed more than five minutes to prevent over-
heating of the pump liquid.
10. Turn the PFU 2000 Function Selector to “Stop” (full
counter-clockwise). As the pumps stop, check the
pump rotation. If the area is dark, a flashlight may be
required, or remove a coupling guard on each pump
for better visibility. Disconnect the main power when
removing coupling guards. Do not touch the couplings
while the pumps are turning as injury may result.
Replace all coupling guards after the rotation check.
Disconnect main power when removing and replacing
coupling guards (or open service disconnect switches if
this option was supplied). If the rotation is incorrect on
any 3 phase pumps, switch any 2 of the 3 power main
wires supplied to the control panel (L1, L2, L3). If that
doesn’t correct the rotation, call your Grundfos repre-
sentative.
11. Open the discharge manifold isolation valves for each
pump. Turn the PFU 2000 Function Selector clockwise
approximately 50% of full rotation, allow the system
to come up to speed, then slowly adjust the Function
Selector until system maintains the desired set-point
pressure as read on the discharge pressure gauge.
This is done for two reasons. If the PMU 2000 (fol-
lowing set-up steps) should fail or get damaged, the
PFU 2000 will automatically operate the system. Also,
if the Function Selector is left in the “Stop” or “Max.”
positions, the PFU 2000 will not allow the PMU 2000 to
control the system. If there is a power outage, the PFU
will control the system for approximately 30 seconds
before the PMU settings are engaged. Therefore it is
important that the PFU is set correctly.
NOTE: If you are filling an empty piping system, do not
allow the pumps to run with the valves wide open as
cavitation may occur.
12. Turn off the main circuit breaker.
13. Replace the PMU 2000 plug which was removed in
Step 2.
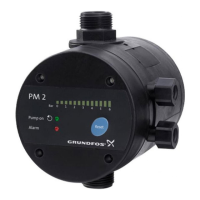
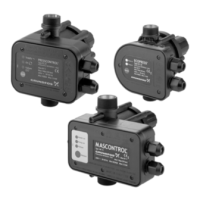
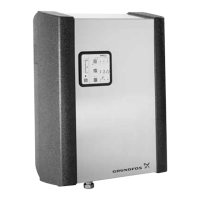
PMU 2000 Startup
1. Have a qualified person
check for proper power
supply and plumbing con-
nections. Make sure the
main power is off.
2. Remove the PMU
2000 BUS plug
(see drawing at
right). Drawing
shows view of
the back of the
PMU 2000, which
is mounted on
the control cabi-
net door. Leave
the panel door
open until after
Step 13.
3. Check that the air pressure in the diaphragm tank is 0.7
times the required discharge pressure set-point (0.9
times for MS and MSH systems). System pressure must
not be applied to the tank connection during the tank
pre-charge process. If water is supplied to the tank
from the system, close the tank valve during the pres-
surizing process.
4. Prime the system as follows.
Suction Pressure System (pumps are flooded at least as
high as the highest part of the pumps)
a. Close all discharge manifold pump isolation valves
and open all inlet manifold pump isolation valves.
b. Open the vent plug on top of each pump. It is a small
hex head screw in a large vent plug. Air and water
will escape from the pump through a small hole in
the large vent plug. When the air is out and water is
flowing steadily, tighten the small hex head screw
on the vent plug to stop the flow.
Suction Lift System (the water source is below the
pumps or does not flood the pumps to the highest
point on the pumps)
a. Close all discharge manifold pump isolation valves
and open all inlet manifold pump isolation valves.
b. For suction lift applications, a foot valve must be
placed on the inlet piping at the water source (tank,
etc.). If there is a fill point above the highest point of
the pumps, you may fill the system from this point.
If there is no fill point above the highest point of the
pumps, remove the large vent plug on each pump.
Fill each pump until the water is up to the vent plug,
then replace the vent plugs.
5. Check the inlet manifold pressure gauge. There should
be positive pressure on the gauge (at least 5 - 10 psig if
a transducer is used). If another type of dry run protec-
tion is used, ensure that sufficient suction pressure is
available for safe operation of the pumps.
1. Electricity Supply
2. Operating Signal Output
3. Fault Signal Output
4. BUS (connection plug)
8
PMU 2000
 Loading...