English (GB)
6
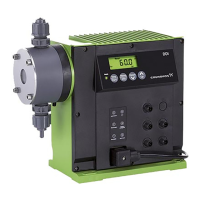
Fig. 3 Setting the relief pressure
5.2 Setting the opening pressure
The opening pressure of the pressure loading valve is factory-set
to 3 to 4 bar, and should not be adjusted unless absolutely
necessary.
For DDI pumps with flow monitor or DDA FC/FCM pumps,
a counterpressure of 3 to 4 bar on the pressure loading valve is
required.
If the factory-set pressure of 3 to 4 bar is to be changed,
proceed as follows (see fig. 4).
1. Remove the protective cap from the black knob
(pressure loading side).
2. Press the safety bolts against each other with a pair of
needle-nosed pliers.
3. Remove the knob.
4. To reduce the opening pressure, use a pair of needle-nosed
pliers to turn the threaded thrust part counterclockwise out of
the housing, until the required counterpressure is reached,
e.g. 1 to 2 bar.
5. Refit the knob. Both safety bolts must engage.
6. Refit the protective cap.
Fig. 4 Setting the opening pressure
5.3 Deaerating the pump
Before starting up the pump, it can be depressurised and
deaerated using the multi-function valve (see fig. 5).
• To deaerate the pump, turn the green deaeration knob (1)
clockwise (direction of arrow on protective cap) as far as it will
go.
• As long as the deaeration knob (1) is turned as far as it will go,
the dosing medium can flow through the relief line (7) to the
tank.
• When released, the deaeration knob automatically returns to
its original position.
5.4 Draining the discharge line
Proceed as follows (see fig. 5).
• Simultaneously turn the green deaeration knob (1) and the
black knob (4) clockwise (direction of arrow on protective cap)
as far as they will go. The dosing medium flows through the
relief line (7) back to the supply container.
• The two knobs must be held in this position until all the
medium has flown into the container.
• When released, both knobs automatically return to their
original positions.
Fig. 5 Multi-function valve components
TM04 1221 1211
Pos. Description
1 Adjusting mark
2 Adjusting slot for relief pressure
Approx. relief pressure [bar]
Slot upper edge (A) 7 + 2
Slot centre (B) 10 + 2
Slot lower edge (C) 16 + 2