CCF 23 Allgemeiner Teil / General Section
GRUNDIG Service 1 - 5
Operating Instructions
This chapter contains excerpts from the operating instructions. For further particulars please refer to the
appropriate user instructions the part number of which is indicated in the relevant spare parts list.
GB
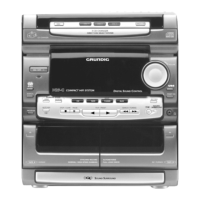
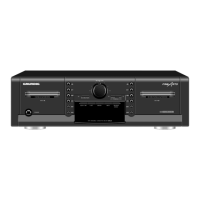
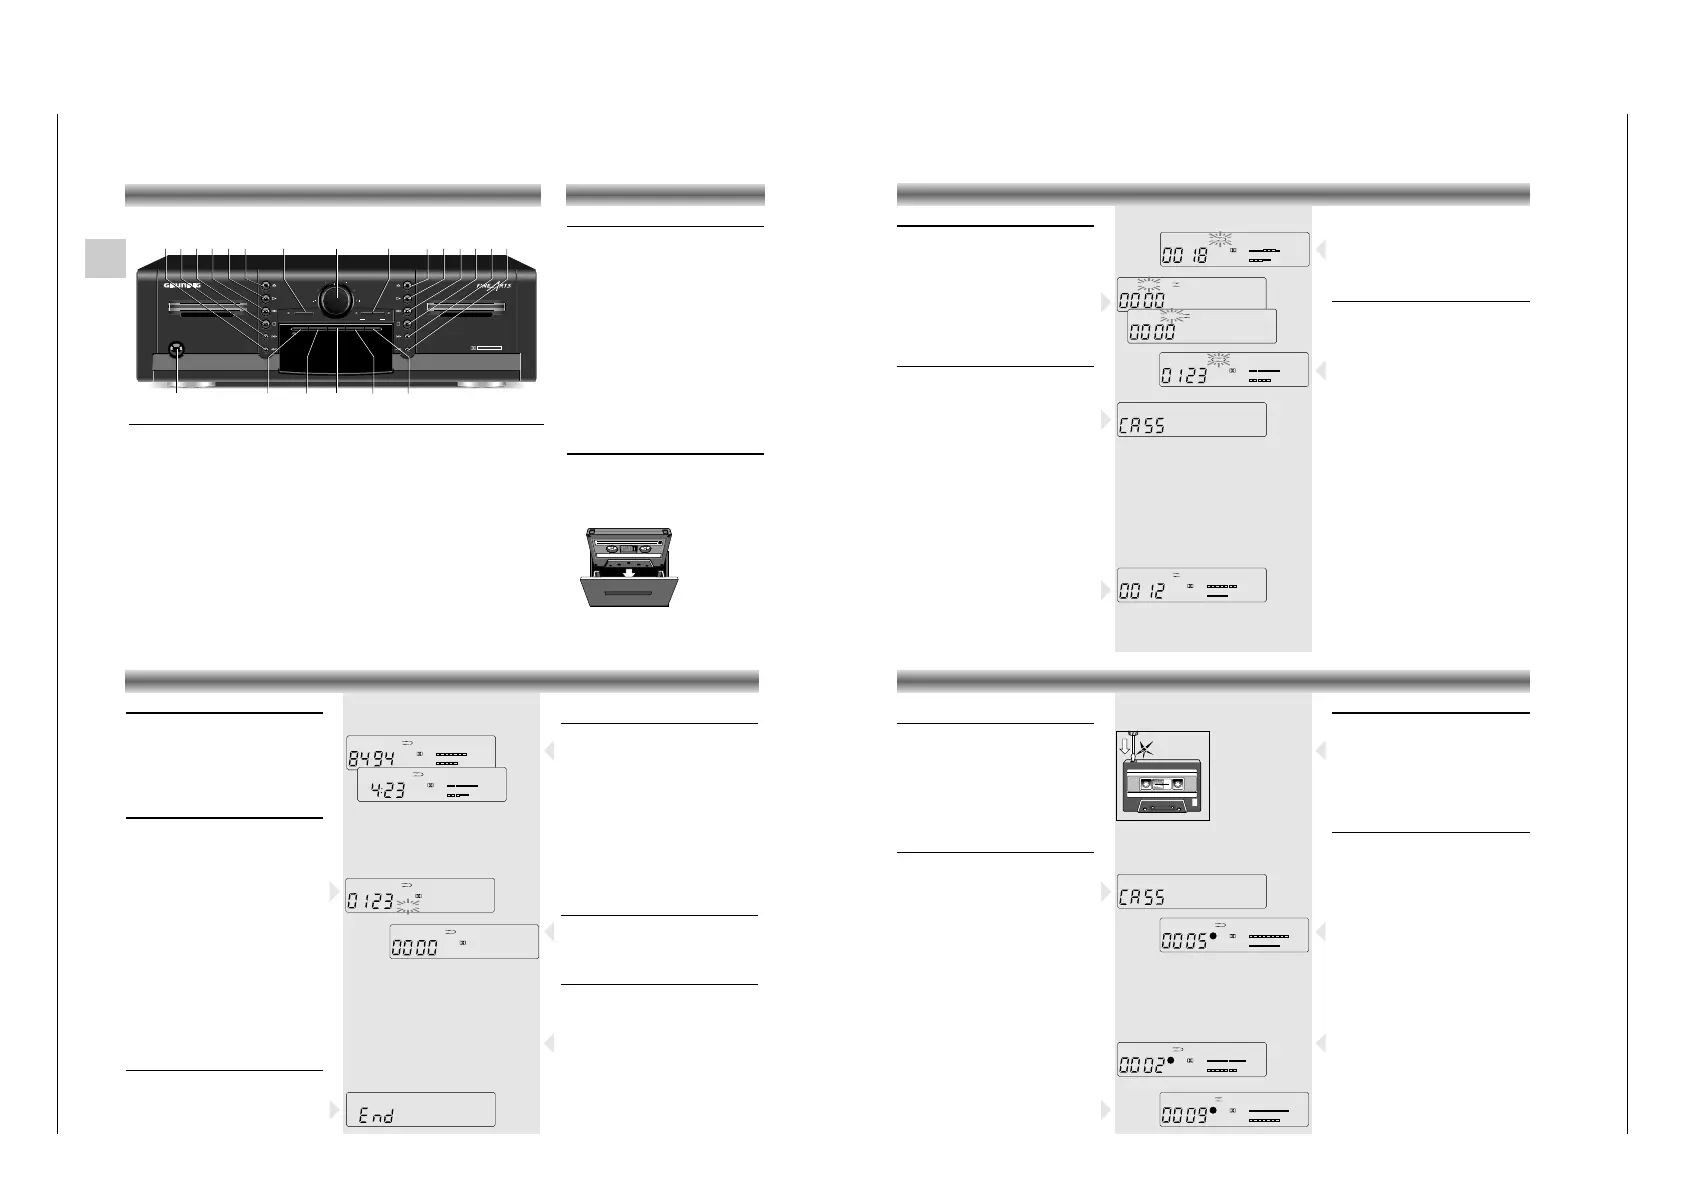
Front of the cassette deck
POWER To switch the cassette deck on and off.
Cassette drive operating buttons for Deck A and B:
QR
When the unit is in STOP mode: fast winding forward or backward.
When pressed during playback: MUSIC SEARCH forward (music search to the begin
-
ning of next tracks) or backward (music search to the beginning of the previous tracks).
9 To stop all functions.
A B To select the playback direction (side) of the cassette.
B To start playback.
? Opens the cassette compartment.
RECORD/MUTE To start the recording function.
RECORD LEVEL For setting the recording level.
DUBBING For dubbing cassettes: NORMAL: at normal speed HIGH at high speed.
d B-C NR To select the noise reduction system.
0-SET For setting the tape counter to zero.
MEMO This button is used for storing a tape position (only deck B)
INFO This button is used for switching between the COUNTER (tape counter) and TIME (real
time in minutes and seconds) display.
REVERSE MODE Reverse mode selector:
å – The tape stops at the end of each side.
∂ – Playback (or recording) of both cassette sides; after which the tape stops
at the end of the second side.
∫ – Continuous playback of both cassette sides.
HIFI DOUBLE CASSETTE DECK CCF23
POWER
RECORD/MUTE
RECORD LEVEL
DECK A
PLAYBACK/AUTOREVERSE
DECK B
RECORD/PLAYBACK/AUTOREVERSE
0-SET
MEMOB-C NR INFO
DUBBING
NORMAL HIGH
REVERSE
MODE
DOLBY B - C NR HX PRO
9ABB B??
Q
R
9AB
Q
R
RECORD/MUTE RECORD LEVEL DUBBING
INFO REVERSE MODE0-SETPOWER MEMO
d B-C NR
Switching on and off
• When you want to switch your cassette deck
on, press the POWER button. The yellow light
in the middle of the button indicates that the
unit is on.
button depressed: POWER ON
button not depressed: POWER OFF
• When you want to switch the unit off, simply
press the POWER button again.
•
If the mains plug of your cassette deck is
connected
to one of the AC OUTLETS on the
amplifier, the
POWER button of the amplifier
serves as the central
switch for all units
connected to the AC OUTLETS.
– After switching on, your unit is always in the
STOP mode. The d B-C NR switch and the
REVERSE MODE selector remain in the setting
they were in when the unit was switched off.
The last tape counter position is also stored.
Inserting a cassette
• Press the ? button to open the cassette
compartment.
• Insert the cassette, with the open side down,
into the compartment.
• Close the cassette compartment by hand.
GENERAL
Selecting the tape side
If you place a cassette with side A facing you,
you should select the direction FWD for
playback/recording of side A and REV for
playback/recording of side B.
• The tape travel direction for both decks is
selected with the buttons AB.
The direction is indicated on the display as
FWD or REV.
• After closing the compartment the unit always
automatically selects the FWD direction.
Playback
• Playback can only be started if there is a
cassette in the cassette compartment.
–
If you press B, Q, R, A B, RECORD/-
MUTE or DUBBING, and the compartment is
empty,
CASS appears on the display for 1.5
seconds
.
Playback of one side (deck A or B)
• Open the cassette holder by pressing the
corresponding ? button.
• Insert a recorded cassette with the open side
facing down and close the cassette holder
• Press the REVERSE MODE selector until å
appears on the display.
•
With d B-C NR, select the noise reduction system
with which the cassette recording was made.
• Select the playback direction with AB.
• Now, press B on deck A or B.
– The bargraph in the display shows the sound
level of the recorded music.
– The deck plays one cassette side and stops
automatically at the end.
• If you want to stop the tape before it reaches
the end, simply press 9.
B
+80-6-12-18 +4dB
L
R
B
FWDDECK A
B
+80-6-12-18 +4dB
L
R
B
FWDDECK A
➥
➥
+80-6-12-18 +4dB
L
R
+80-6-12-18 +4dB
L
R
REV
FWDDECK A
DECK A
B
+80-6-12-18 +4dB
L
R
B
FWDDECK A
PLAYBACK
Playback of both sides (deck A or B)
• If you want to play both sides of the cassette,
press the REVERSE MODE selector until ∂
appears on the display.
– The deck plays both cassette sides and the
tape stops at the end of the second side.
Continuous playback
Continuous playback with two cassettes
• Insert a recorded cassette into both cassette
holders and close the cassette holders.
• Press the REVERSE MODE button until ∫
appears on the display.
• Select the playback direction of deck A with
the respective ABbutton.
• Press B on deck A.
– Deck A plays both cassette sides and then
deck B plays both cassette sides.
– Deck A starts again and both decks keep
playing both cassette sides continuously.
• Press 9 on the playing deck to stop continuous
playback.
Note: If you wish to start with deck B, first select
the playback direction of deck B with the respec-
tive ABbutton and then press B on deck B
Continuous playback with one cassette
• Insert only one recorded cassette into one of
the cassette holders and close the cassette
holder.
• Press the REVERSE MODE button until ∫
appears on the display.
• Select the playback direction with the
respective ABbutton.
• Press B (on deck A or B).
– The selected deck keeps playing both cassette
sides until you press
9 on the playing deck.
Fast winding
These functions are only possible when in the
STOP mode.
• Press
Q or R.
– The winding starts in the selected direction and
the indication Q or R lights up on the
display.
• To stop: press 9.
MUSIC SEARCH function
The Q and R keys also enable you to select
directly a desired track on a cassette by skipping
one or more tracks. This can be done by briefly
pressing the QRkeys during playback. Up
to 15 tracks can be skipped in each direction.
• If you press R once, the tape will wind to
the beginning of the next track. If you press
Q once, the tape will rewind to the
beginning of the current track.
• If you press R twice, the tape will advance
to the second track in forward direction,
pressing three times advances to the third
track, and so on to a max. of 15 tracks.
– The tape will wind to the beginning of the
selected track and playback will start
automatically.
The only requirement for this function is a 4-
second pause between each of the tracks.
Note: On some music tapes, the search function
may recognize extremely quiet passages as pauses.
Stop at the end of the tape
At the end of a tape, the cassette deck
automatically switches to "STOP."
• If you, being at the end of the tape, attempt to
start playback or fast winding in the wrong
direction, END is shown in the display.
PLAYBACK OTHER FEATURES
B
+80-6-12-18 +4dB
L
R
MEMO
FWDDECK A
B
+80-6-12-18 +4dB
L
R
B
R
FWDDECK A
R
➥
➥
+80-6-12-18 +4dB
L
B
B
+80-6-12-18 +4dB
L
R
B
B
FWDDECK A
FWDDECK A
Switching from the tape counter to
the real time display
• You can use the INFO button to switch
between the tape counter and the real time
display (minutes and seconds).
Calculation of the time
When you begin playback with real time
display, the colon between the minutes and
seconds field
(-:--) briefly blinks.
During this time the tape thick-ness and other
values are calculated. When this process is
concluded, the real time is displayed.
After this, the displayed time is also correct during
fast forward and fast reverse winding.
Resetting the tape counter
• Press the 0-SET button, for example at the
beginning of a recording, to reset the tape
counter to 0.
Storing tape positions (only deck B)
• You can store the current tape position by
pressing MEMO.
– The indication MEMO appears in the display.
• When you press Q (in stop mode), the
cassette deck rewinds and stops at the stored
position.
• Pressing MEMO again ends this function.
Protecting cassettes against
unintentional erasure
Every time you record onto a tape, its contents is
erased and replaced by the new recording.
In order to avoid unintentional erasure of a
recording, carefully remove its safety tabs with,
for example a screw driver.
Original recordings are already protected
against unintentional erasure.
If you wish to record on a 'protected' cassette, place
a small strip of tape over the corresponding holes.
Preparing to record (deck B)
Copyright: Making recordings from a prerecor-
ded sound track is only permissible insofar as the
Copyright or the rights of third parties are not
infringed upon.
Recording on protected cassettes is not possible,
CASS appears in the display for 1.5 seconds,
and recording is prevented.
• Insert an unprotected cassette in the cassette
compartment of deck B and wind to the
desired tape position.
• Switch on the noise reduction system with
d B-C NR.
– The display indicates the selected setting.
• Select on the amplifier or receiver the source
from which you want to record
• Press RECORD/MUTE: the unit switches to
‘RECORD PAUSE’
– The red REC LED lights up.
–
The display shows the REC and ; indications.
– The Bargraph indication on the display shows
recording level which can be adjusted with the
RECORD LEVEL control.
RECORDING (deck B)
REC
B
+80-6-12-18 +4dB
L
R
B
MEMO
FWDDECK B
;
REC
B
+80-6-12-18 +4dB
L
R
FWDDECK B
REC
B
+80-6-12-18 +4dB
L
R
B
MEMO
FWDDECK B
Recording level adjustment
The recording level of your recording should be
properly adjusted.
This means that the loudest passages should not
exceed "0" in the recording level (dB) bargraph
display (= 100% modulation).
• You can set the correct recording level with the
LEVEL controller.
Starting recording
Recording on both sides of a cassette
•
Select the first side of the cassette in deck B onto
which you want to record with the button AB.
• Press the REVERSE MODE button until ∂
appears on the display.
• Press
B on deck B to start the recording.
–
The display shows the REC and B indications.
– The red REC LED lights up.
• If desired you can fade a recording out, by
slowly turning the REC LEVEL counter clock-
wise; to fade a recording in turn clockwise to
the desired recording level.
– The drive automatically changes the side of the
cassette after the first side has been recorded;
this is followed by recording on the second
side.
• Press
9 to stop recording at an earlier point.
Recording on one side of a cassette
• If you only want to record on one side of the
cassette, proceed as described above but
press the REVERSE MODE button until å
appears on the display.
– The unit automatically stops recording when
the end of the tape is reached.
OPERATING ELEMENTS
 Loading...