Chapter 4: Duct Installation
Installing the Duct Elbows
The duct elbows attach to the duct pass-thru window and the bottom of the duct columns.
Before You Begin
Install the duct pass-thru windows into the dryer prior to installing the duct elbows.
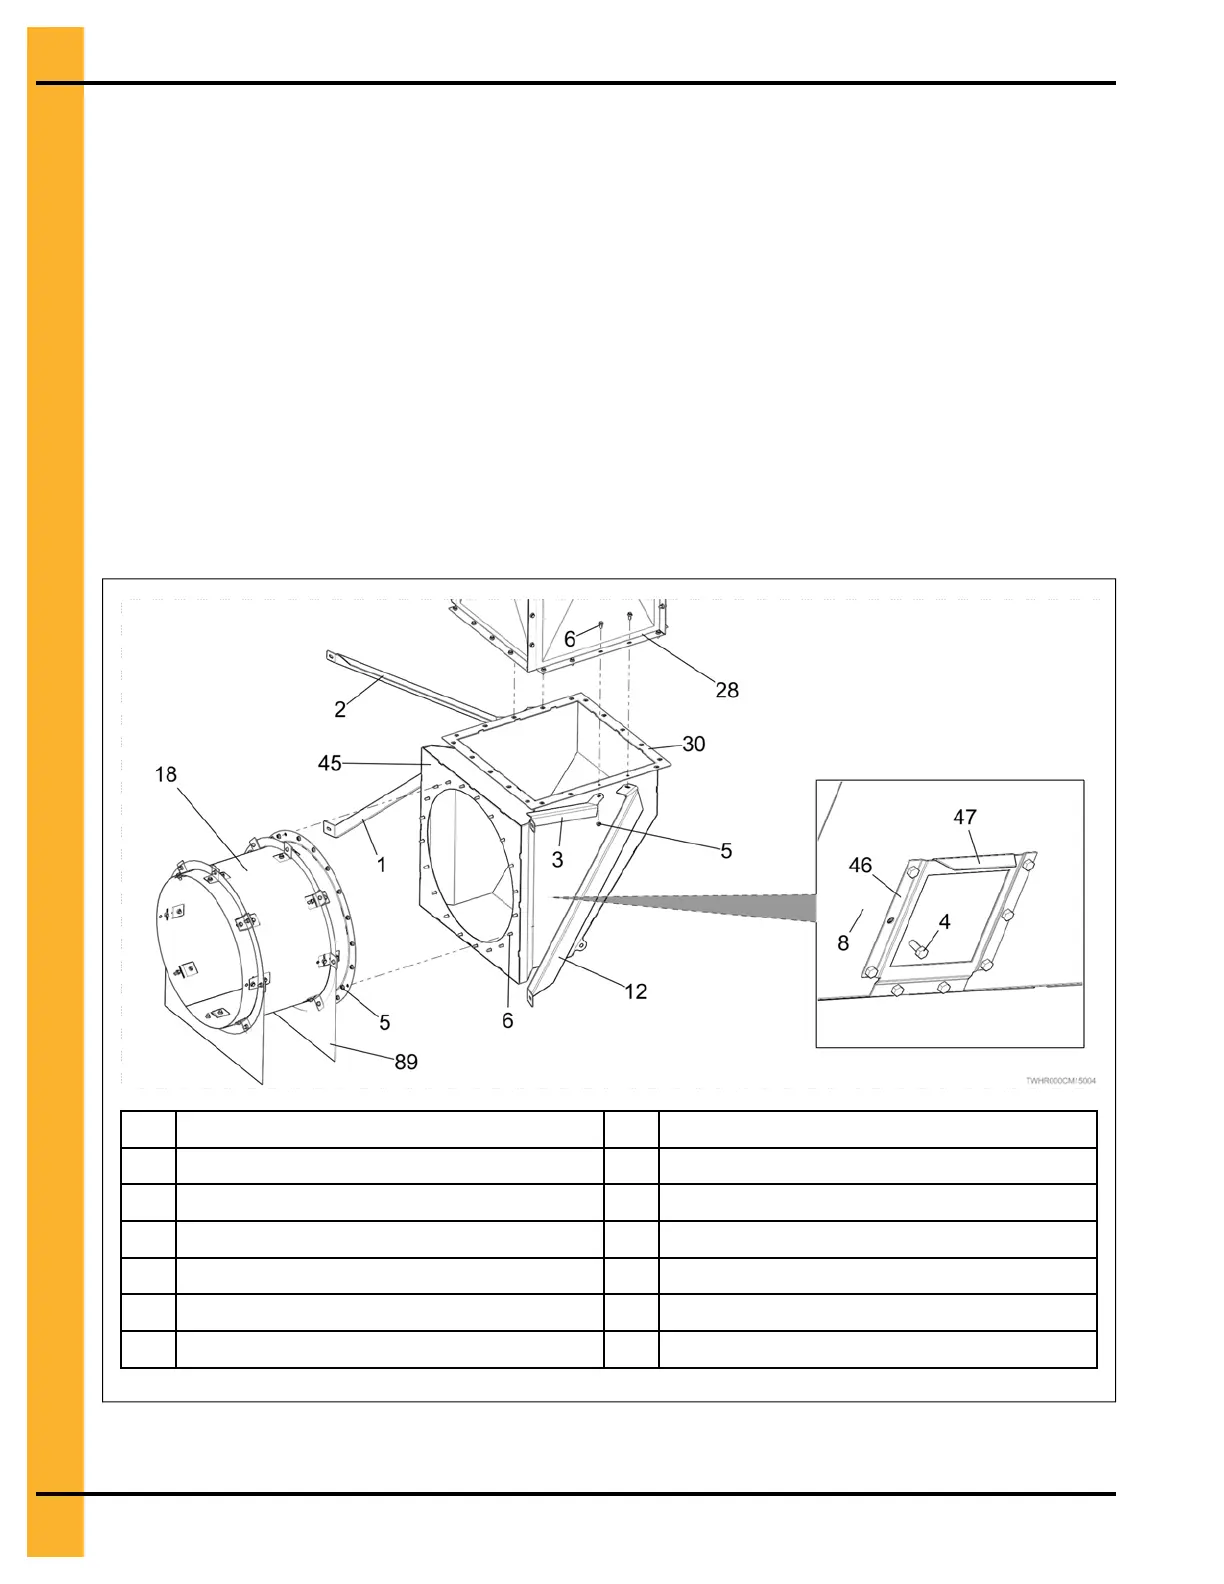
1. Attach the discharge port (46) to the slanted side of the duct elbow (30) using bolts (4) and nuts (8).
2. Slide discharge plate (47) into discharge plate port (46).
3. Align the duct elbow (30) to the duct pass-thru window (18) and secure using bolts (6) and nuts (5).
4. Install the 40” straight duct section (28) to the duct elbow (30) to using bolts (6) and nuts (5).
NOTE: Install the duct supports (1, 2, 3, and 12) at the same time.
NOTE: One end of the 40" straight duct section assembly has slots. Install the duct section
assembly so that the flange with slots is mating with the duct elbow.
Figure 4-3 Duct elbow installation
1
Lower left duct support (GT1-2380)
12
Lower right duct support (GT1-2382)
2
Upper left duct support (GT1-2379)
18
Duct pass-thru window (GT1-2204)
3
Upper right duct support (GT1-2381)
28
40 in. straight duct section (GT4-1533)
4
5/16 x 3/4 in. flange bolt SS (S-8956)
30
Duct elbow (GT4-1534-BS)
5
5/16 in. flange nut (S-10268)
45
Duct elbow package (GT4-1535)
6
5/16 x 3/4 in. flange bolt (S-6606)
46
Discharge port (GT1-0074)
8
5/16 in. flange nut waxed (S-8452)
47
Discharge plate (GT1-0075)
56
PNEG-2016 Tower Dryer Heat Reclaimer


 To Next Page