185
PART 3
(B) Tool driven Quick Release
8. Install Front Wheel
GT Bicycle Owner’s Manual
(B) Tool driven Quick Release
5mm hex security Quick Release
This is a design that uses standard Quick Release assembly parts but is clamped by a special nut that is
tightened by a 5mm allen wrench. This system was developed for urban bikes to reduce the risk of theft
of the front wheel. By requiring a tool to remove the front wheel, it is slower for the thief and he may pick
another target.
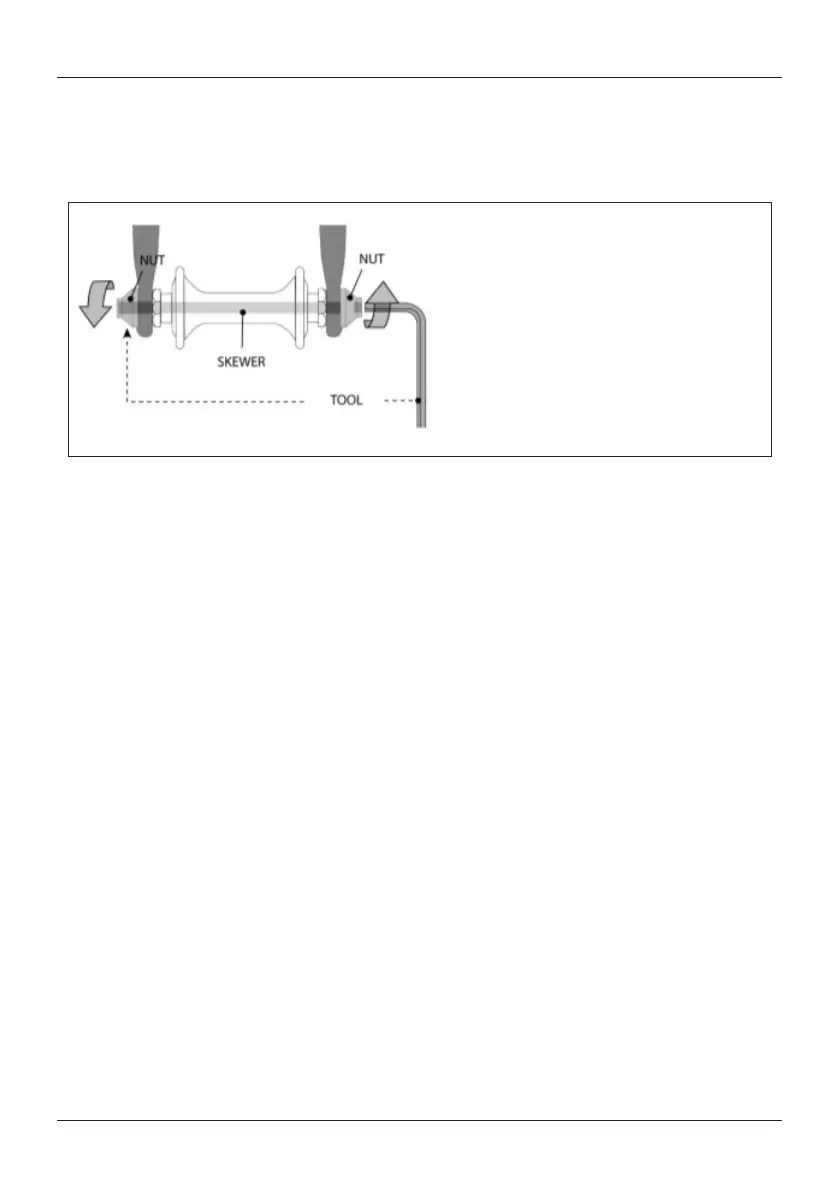
First properly install the 5mm quick release assembly into the hub. Pick up the 5mm quick release
assembly and note the sequence and orientation of parts: adjusting nut, conical spring, skewer, a second
conical spring and finally the special nut that is turned by a 5mm allen wrench.
• Remove the adjusting nut and the first conical spring.
• Pick up the front wheel. Examine the sidewall of the tire to see if the tread design is directional. If it
is directional, you will see a forward rotation arrow.
• Insert the skewer though the hollow axle in the center of the hub. On a bike with disc brakes position
the 5mm nut on the side opposite the brake disc.
• Reinstall the conical spring over the threaded end of the skewer, small end first.
• Reinstall the adjusting nut, threading it onto the threaded end of the skewer. Turn the adjusting nut
only a few turns at this stage. Tightening the 5mm nut will be done after the wheel is installed in the
fork.
If your bike has Rim brakes- Before installing the front wheel, if the front brake is V Brake (aka Linear
pull) or Caliper it may need to be released to allow the tire to fit between the brake pads. See Section
8.