198
PART 3
Assembly, Adjustment
138692 Rev 0 (04/22)
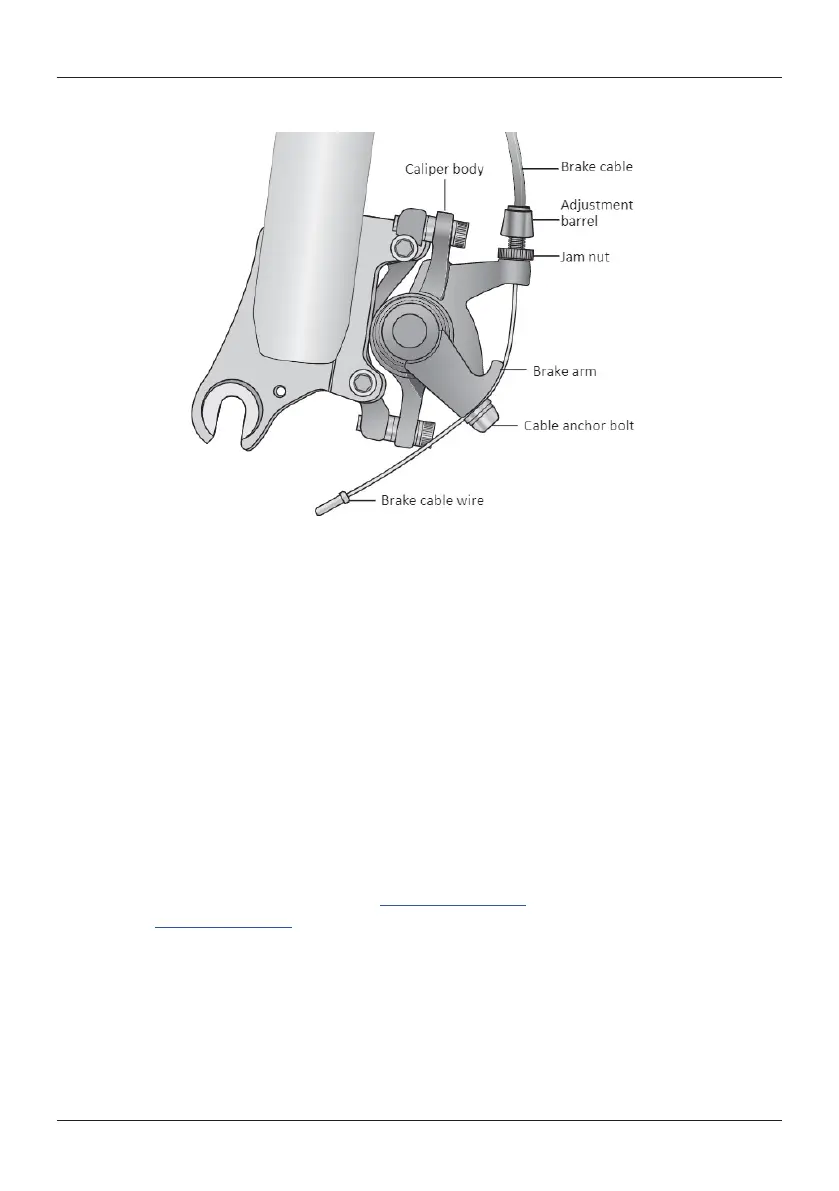
STEP 9. Front Brake
GT Bicycle Owner’s Manual
Next fit a cable end over the cut cable end. These cable ends are small soft aluminum caps that fit over
the cable. Slide the cable end over the cable until it stops. Then crimp the cable end onto the cable. To
crimp use pliers or the crimping part of the bicycle cable cutter to crimp the cable end in place. These
cable ends are important for two reasons (1) They protect your hands and clothing from the sharp cut
cable (2) They prevent the cable strands from separating, fraying.
Pro Tip: We urge you to borrow or buy a proper bicycle cable cutter. These tools have a v-shaped or
circular jaws that keep the cable strands together as it cuts, resulting in a clean cut. Using conventional
diagonal cutters will usually result in a frayed cable as the jaws force the cable strands apart.
The front brake is now connected but will almost certainly need adjustment.
Pick up the front of the bike and spin the front wheel. Do you see or hear dragging from the front brake?
If yes, adjustment is needed.
See disc brake assembly adjustment videos at www.cannondale.com, Help Center, Owner Manuals &
Assembly or www.gtbicycles.com , Support, Assembly. “