4. Push RUN.
5. Repeat the process until the particle counts return to zero.
Charge the batteries in the particle counter
Batteries in the 3400 will begin to charge when the AC power cord is connected. A complete charge
in the instrument takes approximately 10 hours. The battery is considered to be fully charged when
they display shows the charge between 95% and 100%.
Prerequisite: Install the batteries in the instrument. Refer to Install the batteries on page 10.
N O T I C E
Discard the used batteries according to local regulations or contact the manufacturer. Do not put exhausted
batteries in the domestic waste.
1. Attach the power supply to the unit. Refer to Figure 3 on page 10.
2. Connect the unit power supply to the external power through the AC power adapter.
The battery status light will show the level of power in the battery. Refer to Table 3.
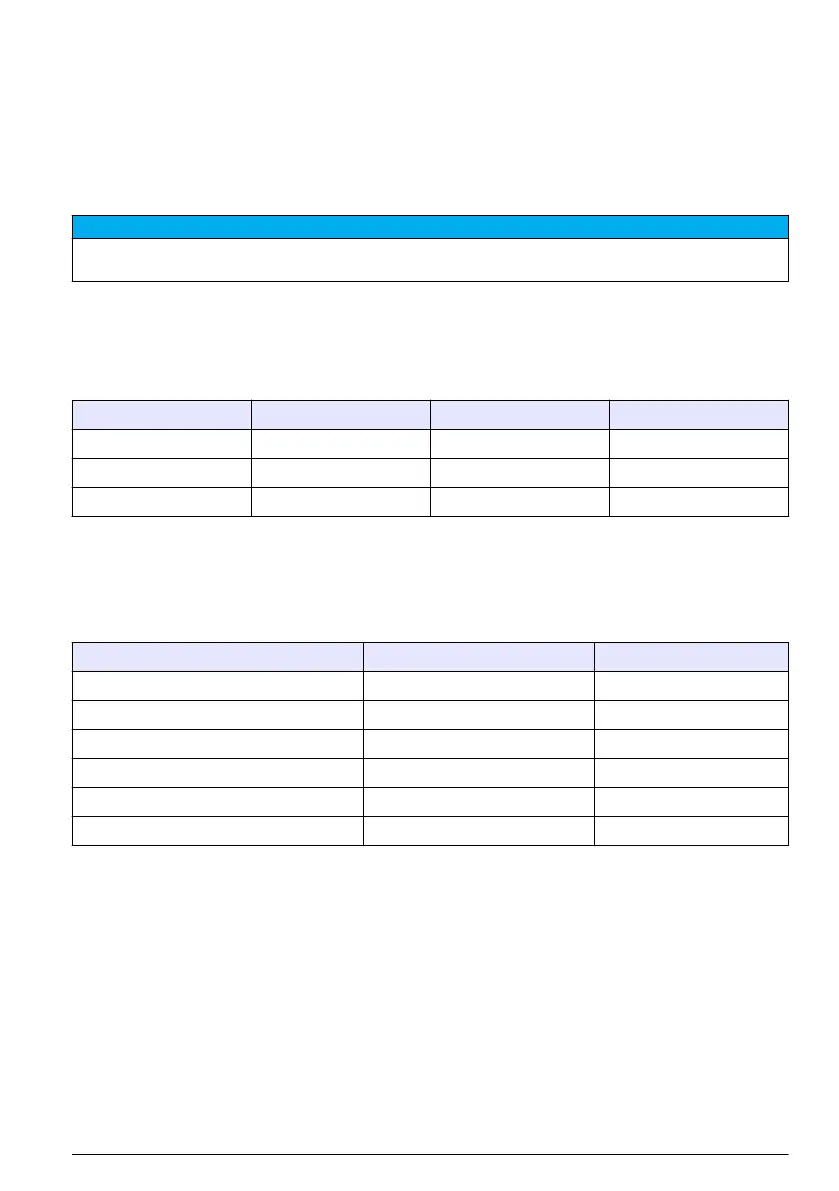
Table 3 Battery LED color indications
LED state LED color Battery status Charge status
Flashing Orange Low power Not charging
Flashing Green Low power Charging
Solid Green Charged Charging
Diagnostics and Troubleshooting
The Diagnostics screen shows information that may be needed for troubleshooting. Table 4 shows
an example of a failure notification on the Diagnostics screen.
Table 4 System Diagnostics screen example - Clock battery failure
Signal Value Status
Calibration 0.00 VDC OFF
Flow 0.00 VDC OFF
Clock battery 0.00 VDC FAIL
Battery 1 (bottom) 16.42 VDC PASS
Battery 2 (top) 16.44 VDC PASS
Laser current N/A – –
For troubleshooting that involves technical support from the manufacturer, the user may need to fax
a system status printout to technical support.
1. On the Counter Navigation screen, push DIAGNOSTICS.
2. Go to the Counter tab to see information about the system, such as serial number, model and
calibration date.
3. Go to the Calibration tab to see current calibration information.
4. On the Diagnostics screen, push PRINT.
The printout will show the serial number, date and time and other data about the system.
English
17
 Loading...