Eclipse Installation, Commissioning & Operating Manual Approved Document Ref: UI-ECL-01 Issue 8.0
19
SETUP & PROGRAMMING
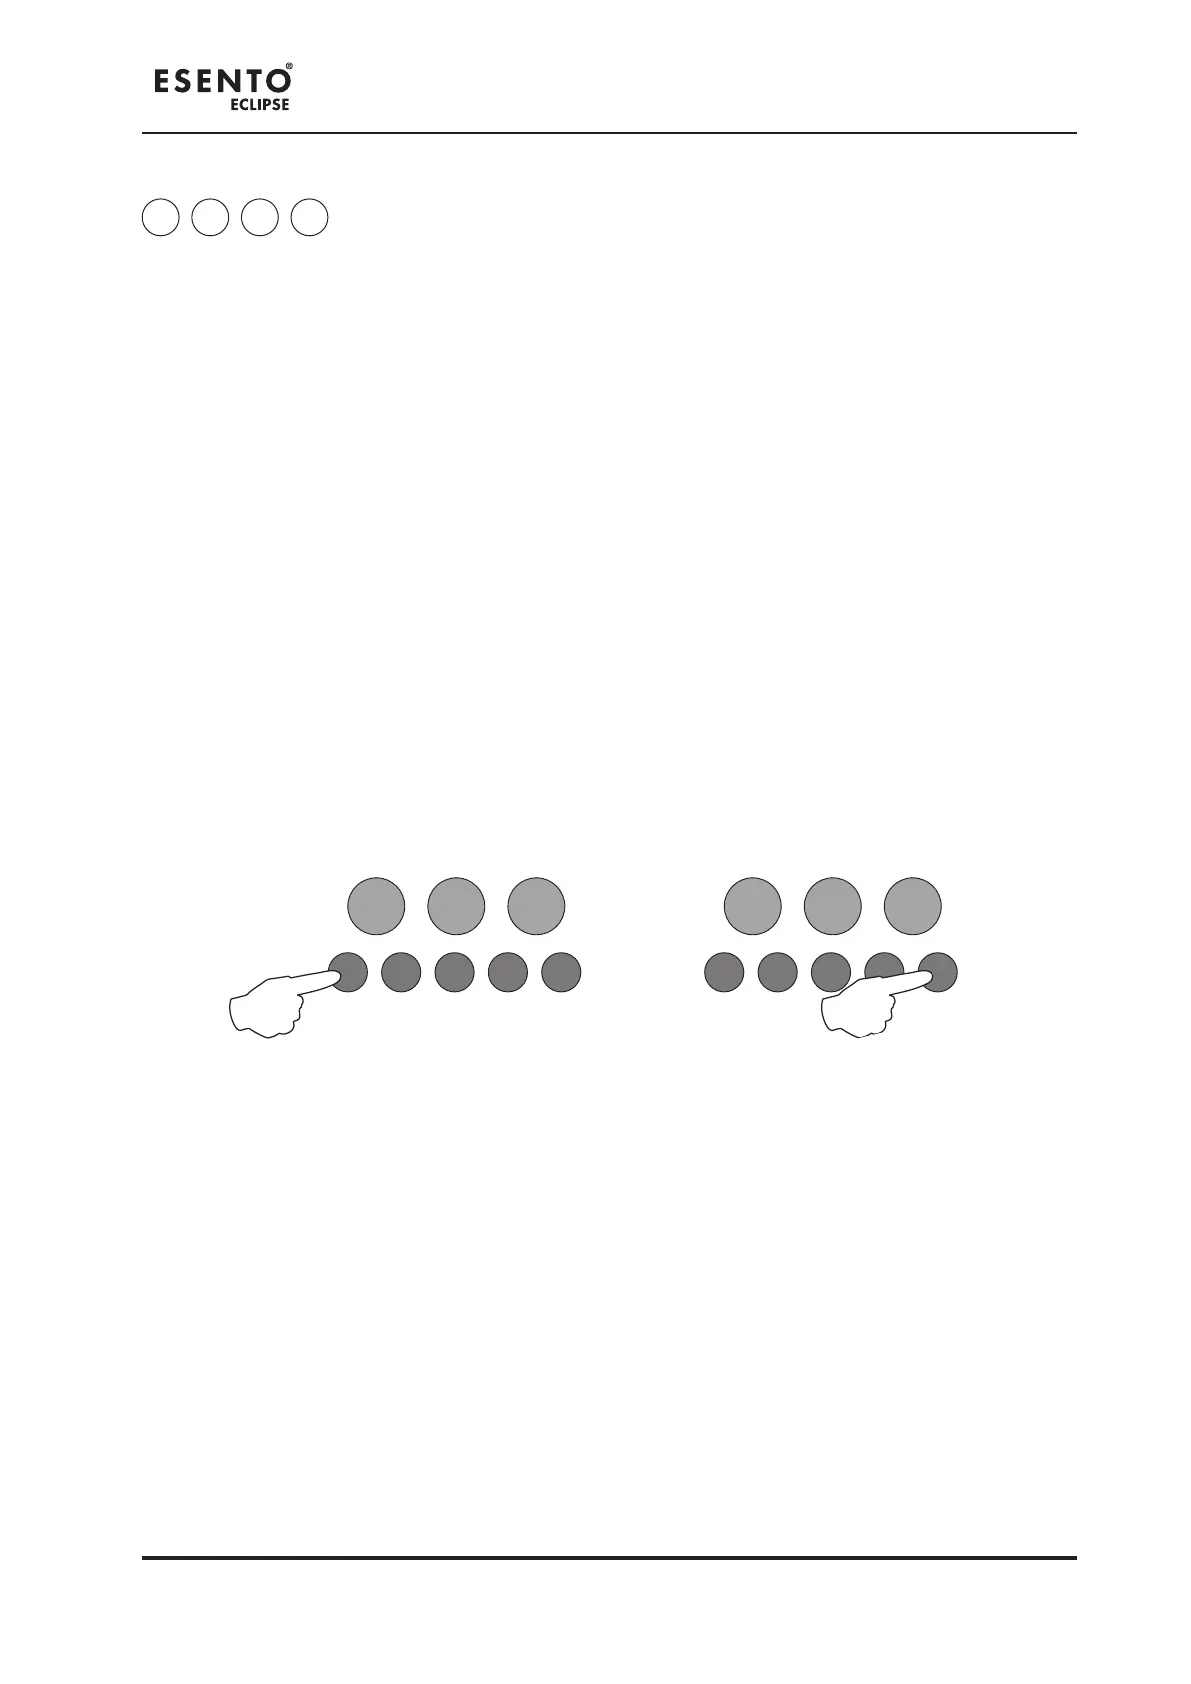
1 1 1 4
Select sounder resound options for zones.
By default, after an initial re condition and the (blue) Silence Alarms button has been activated, any new
re condition in a different zone will cause the alarms to resound.
It is possible to change this on a zonal basis so that any new alarm in a different zone will not resound the
alarms.
Enter the above code and press the ENTER button. The Sounder Status LED will pulse slowly. Zone Fault/
Disabled/Test LEDs will show their current status (see below) with Zone 1 pulsing to indicate it is under
selection.
Use Button 1 (Disable Mode) to move to the zone for programming (indicated by a pulsing LED) and press
the ENTER button to change the status. Pressing the ENTER button again will toggle the status, indicated
by a rapid or slow pulsing LED (see below). Then use Button 1 to move to the next zone. If the zone has
been set to not resound alarms, the LED will be off. If kept as default, new re condition will resound
alarms, then the LED will be on steady.
Rapid Pulse = Zone is under selection and is set to have alarms resound (default).
Slow Pulse = Zone is under selection and has been set to not resound alarms on new re condition.
LED Off = Zone has been set to not resound alarms on new re condition.
LED On = Zone is set to have alarms resound (default).
RESOUND SILENCE RESET
ENTER
1 2 3 4
Disable
Mode
Test
Mode
Mute
Buzzer
Test
Lamps
RESOUND SILENCE RESET
ENTER
1 2 3 4
Disable
Mode
Test
Mode
Mute
Buzzer
Test
Lamps
When nished, press and hold Button 1 (Disable Mode) for 3 seconds or alternatively wait approx 10
seconds and the panel will save the settings and revert back to Level 3 access mode.
Enter the next programming code or disable the controls and return DIL switch 3 to ‘OFF’.