Excel-EN Installation, Commissioning & Operating Manual Approved Document Ref: UI-XLEN-01 Issue 7.0
31
SETUP & PROGRAMMING
OPTION 10. Set Number of Network Slave Panels on System (Master Panel Only)
If using network slave control panels, the Master panel will need to be programmed with which slave panel
addresses are included in the system, for monitoring purposes. An incorrect quantity will cause a system
fault to be displayed on the panels.
With the zone 10 fi re LED lit the amber fault LEDs will display the current slave panel addresses set (0 - 7),
amber fault LED 1 = slave address 01 etc.
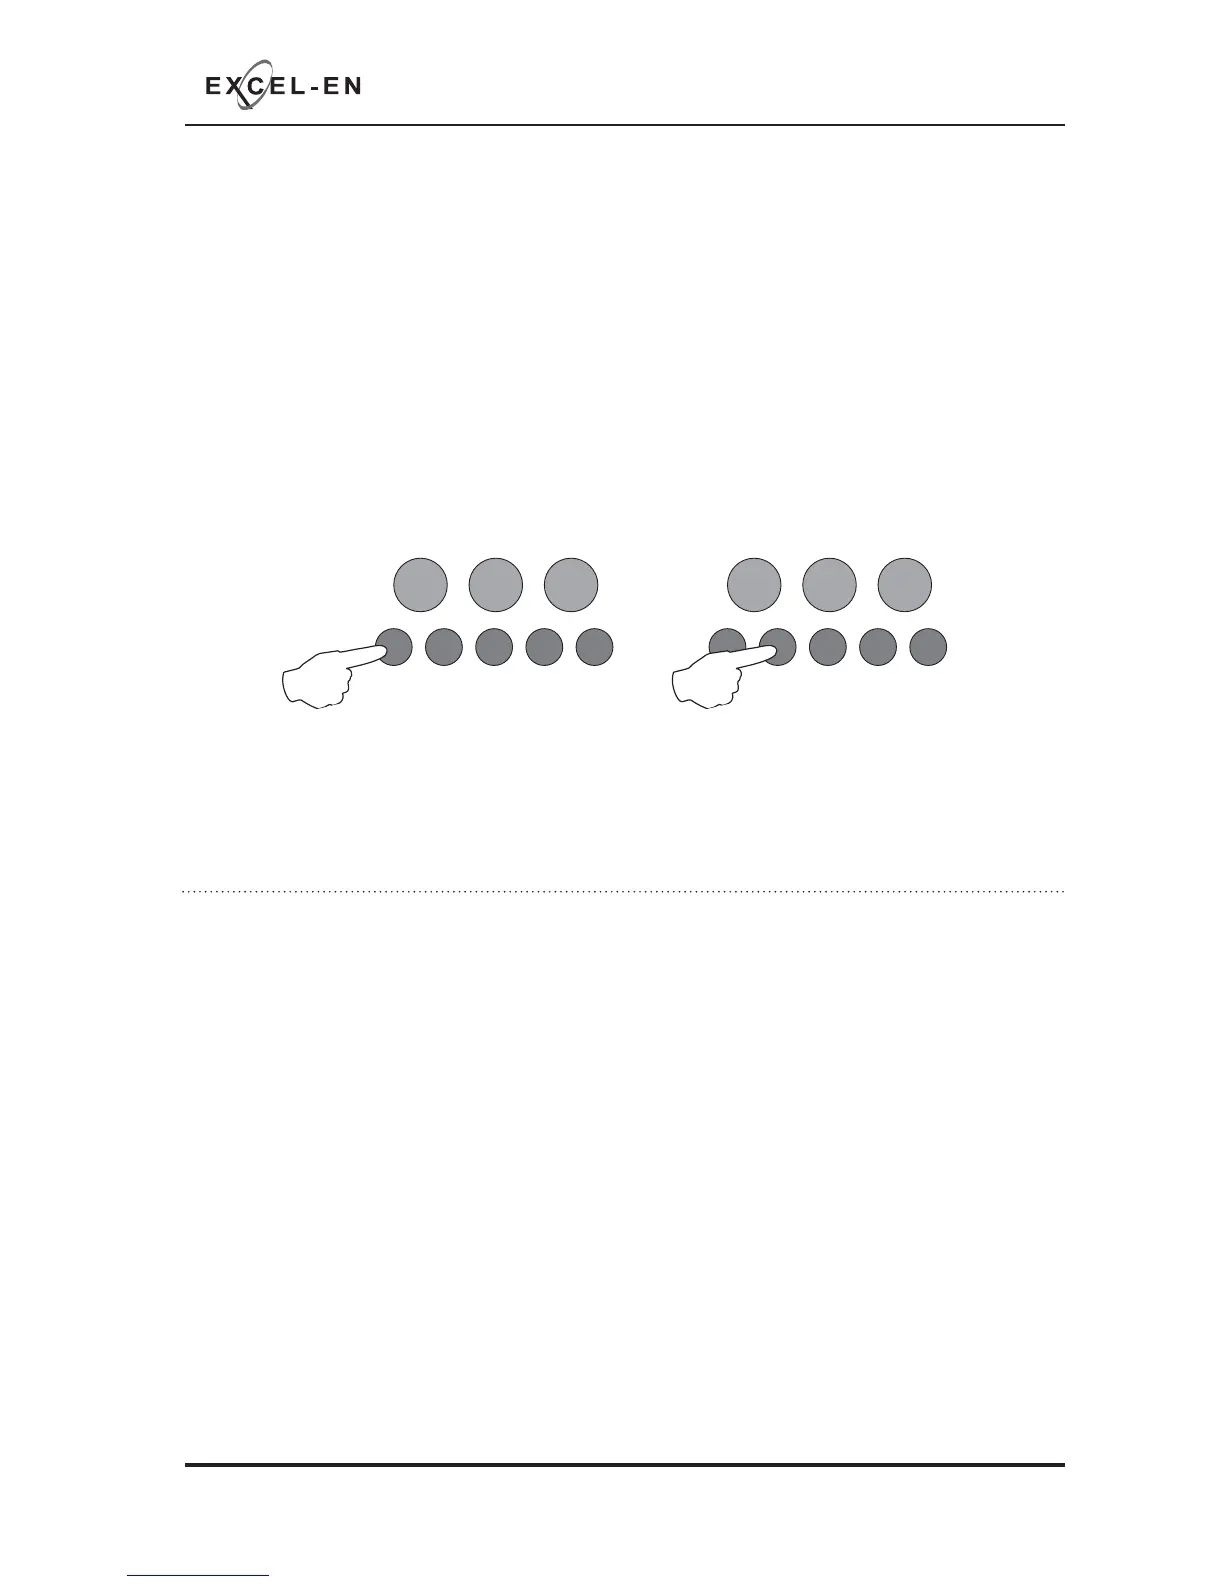
Press the ENTER button. The zone 1 fi re LED will pulse to indicate adding or removing slave adress 01.
Use buttons 1 & 3 (1=forward, 3=backward) to move the pulsing fi re LED to the required zone (addresses
1 - 7 indicated by zones 1 - 7 respectively).
Then use button 2 to add or remove the slave address, indicated by the amber fault LED ON (added) or
OFF (removed).
RESOUND SILENCE RESET
ENTER
1234
Disable
Mode
Test
Mode
Mute
Buzzer
Test
Lamps
RESOUND SILENCE RESET
ENTER
1234
Disable
Mode
Test
Mode
Mute
Buzzer
Test
Lamps
Tip - You can use button 4 as a shortcut to add or remove all 7 addresses in one go.
When fi nished press the ENTER button again and the zone 10 fi re LED will return to steady ‘view mode’.
Press button 1 to move to next option or hold button 1 for 3 seconds to exit programming mode 2-1-2-3.
OPTION 11. Inhibit Fire & Fault Buzzer on Network Slave Panel
When fi nished all panel wide programming, enter the next programming code or disable the controls and
return DIL switch 2 to ‘OFF’.
It is possible to inhibit the fi re and/or fault buzzers of the network slave panels. This is useful if the panels
are to be mounted together for a larger system. This option must be set on each individual slave panel.
With the zone 11 fi re LED lit press the ENTER button. The zone 1 fi re LED will pulse to indicate editing the
panels fault buzzer.
Editing of the fault buzzer is indicated by the zone 1 LEDs and editing the panels fi re buzzer is indicated
by the zone 2 LEDs.
Use buttons 1 & 3 (1=forward, 3=backward) to move the pulsing fi re LED to the required zone as per
above.
Then use button 2 to Disable or Activate the buzzer indicated by the amber fault LED.
Fault LED OFF = Buzzer Active ~ Fault LED ON = Buzzer Disabled
When fi nished press the ENTER button again and the zone 11 fi re LED will return to steady ‘view mode’.
Press button 1 to move to next option or hold button 1 for 3 seconds to exit programming mode 2-1-2-3.