Do you have a question about the Häfele miniLock II and is the answer not in the manual?
Details the three potential password levels: User, Service, and Master.
Explains the two operating modes: Single User and Multiple User.
Instructions on how to open the lock using a 4-digit user password.
Explains procedures for forgotten user passwords in Locker and Single User modes.
Details on activating, opening with, and changing the service password.
Details on opening with and changing the master password for programming access.
Steps to access the programming menu using the master password.
Explanation of programming numbers and their corresponding settings.
Detailed explanations for various programming options from 0 to 9.
Describes the meaning of LED lights and audio signals for lock status.
Instructions on how to replace the 3V lithium coin cell battery.
Provides cleaning instructions and important general warnings for lock usage.
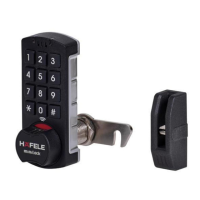
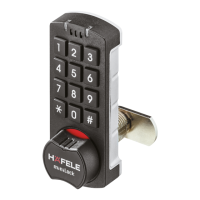
Details on cam placement and the external battery override feature.
Displays the default user and service passwords for the miniLock II.
Illustrates opening and closing the lock using the user password.
Illustrates opening and closing the lock using the master password.
Outlines the product's limited warranty and liability limitations.
Lists the technical specifications including weight, temperature, and battery life.
Relates cover thickness to the required screw size for installation.
Diagram showing lock components and their placement during installation.
Provides precise measurements for drilling holes for mounting the lock.
Instructions for mounting the lock on a right-hinged door.
Instructions for mounting the lock on a left-hinged door.
Provides installation dimensions for overlapping or external covers.
Steps to follow when replacing an existing lock with the miniLock II.
Steps for installing the miniLock II on a new door or cabinet.
Instructions for activating and testing the lock before final mounting.
Final checks for friction, adjustments, and screw tightening during mounting.
| Type | Electronic lock |
|---|---|
| Locking mechanism | Motorized bolt |
| Operation | Keypad |
| Master Code | Yes |
| Mounting | Surface mount |
| Material | Metal |
| Rotation | 90 degrees |
| Power Supply | Battery |
| Housing Material | Metal |
| Number of User Codes | 1 master code, 9 user codes |