11
3UHFDXWLRQVRQLQVWDOODWLRQ
NOTICE
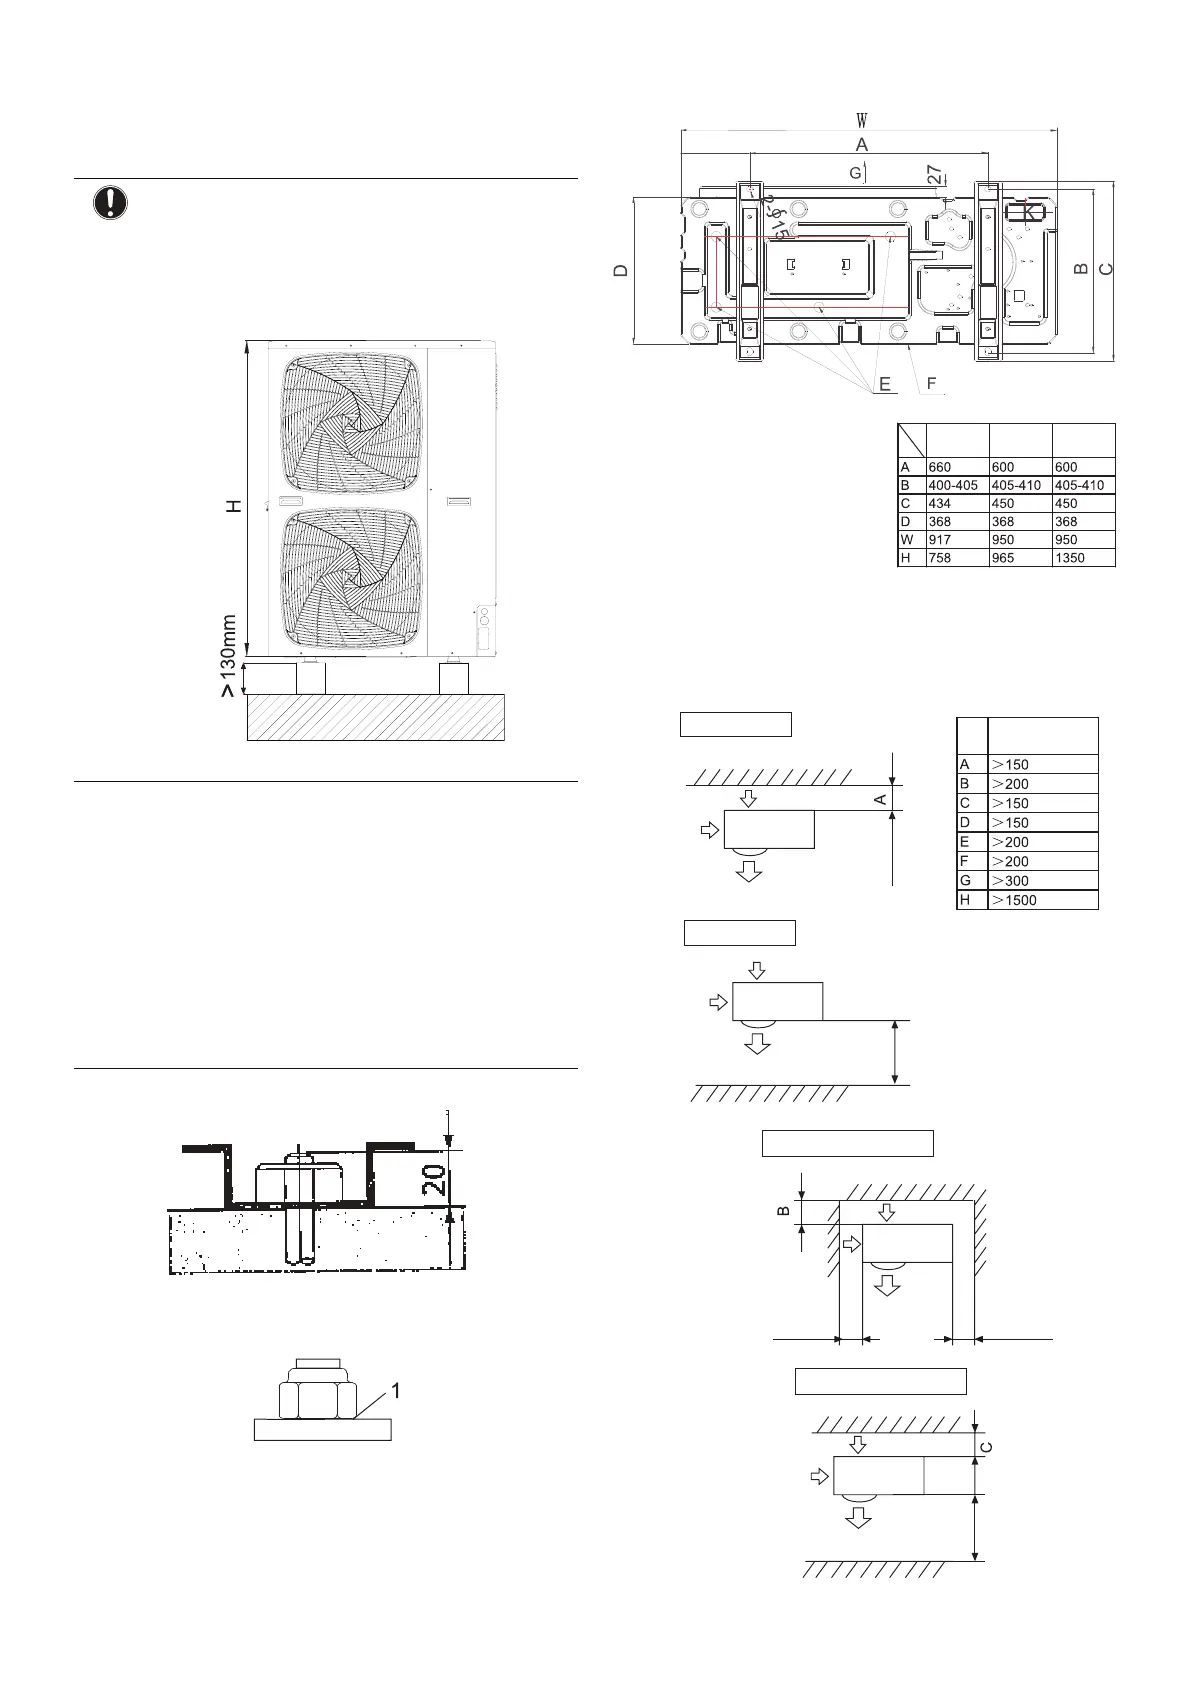
If drain holes of the outdoor unit are covered by
DPRXQWLQJEDVHRUE\ÀRRUVXUIDFHUDLVHWKH
unit in order to provide a free space of more
than 130mm under the outdoor unit.
)RXQGDWLRQZRUN
Check the strength and level of the installation
JURXQGVRWKDWWKHXQLWZLOOQRWFDXVHDQ\RSHUDWLQJ
vibration or noise after installation.
,QDFFRUGDQFHZLWKWKHIRXQGDWLRQGUDZLQJLQWKH
¿JXUH¿[WKHXQLWVHFXUHO\E\PHDQVRIWKHIRXQGDWLRQ
bolts. (Prepare four sets of M12 foundation bolts, nuts
DQGZDVKHUVHDFKZKLFKDUHDYDLODEOHRQWKHPDUNHW
,WLVEHVWWRVFUHZLQWKHIRXQGDWLRQEROWVXQWLOWKHLU
length are 20mm from the foundation surface.
Fix the outdoor unit to the foundation bolts using nuts
ZLWKUHVLQZDVKHUVDVVKRZQLQWKH¿JXUH
If the coating on the fastening area is stripped off, the
nuts rust easily.
'LPHQVLRQVERWWRPYLHZXQLWRIPHDVXUHPHQWPP
A leg pitch1
B leg pitch2
&)URQWJULOODLURXWOHWVLGH
D Drain hole
E Bottom frame
..QRFNRXWKROH
IRUSLSLQJOLQH
6HOHFWLRQRILQVWDOODWLRQORFDWLRQRI
outdoor
6LQJOHXQLWLQVWDOODWLRQXQLWPP
Back
Front
Back and side
Front and back
Above 150
Above 150
Above 300
Height of
barriers is
EHORZWKDW
of outdoor
unit
Above 1000
Above 1000
88
88
8