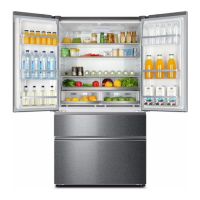
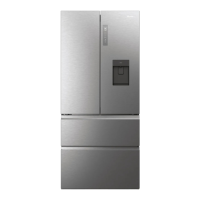
Do you have a question about the Haier GE ABE21D and is the answer not in the manual?
Covers general warnings, electrical hazards, and the importance of qualified service personnel.
Instructions for correctly reattaching grounding devices after service.
Guide to finding warranty information via the GE Appliances website.
Details on required safety gear including glasses, gloves, and steel-toed boots for repairs.
Mandatory 6-step process for safely disconnecting and isolating the appliance before disassembly.
Explanation of the alphanumeric coding used in appliance model numbers.
Guide to understanding the date of manufacture from the serial number.
Performance data under no load conditions, including temperature settings.
Specifications for the refrigeration system, including compressor and refrigerant charge.
Details on electrical ratings, voltage, amperage, and resistance measurements.
Recommendations for ideal refrigerator location and required clearances for operation.
Instructions for leveling the unit and connecting the optional water supply line.
Specifications for the required power supply and grounding.
Guide to refrigerator and freezer temperature settings using control knobs.
Procedure for adjusting the freezer compartment temperature setting.
Procedure for adjusting the fresh food compartment temperature setting.
Illustrates the path of cold and mixed air within the refrigerator compartments.
Details on removing and replacing refrigerator door handles and bins.
Procedure for removing and installing the fresh food compartment gasket.
Diagram showing the bottom hinge components and closure mechanism.
Details on removing and replacing freezer door handles and gaskets.
Procedure for removing and installing the freezer compartment gasket.
Diagram showing the bottom hinge components and closure mechanism.
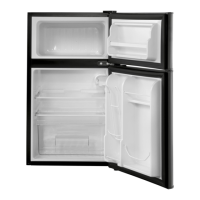
Diagram identifying key components within the fresh food compartment.
Steps for removing the adjustable shelves from the refrigerator.
Procedure for removing the climate controlled crisper drawers.
Instructions for removing and troubleshooting the fresh food door switch.
Steps for diagnosing issues and removing the fresh food LED lighting board.
Procedure for testing and replacing the fresh food thermistor.
Steps to remove the control housing assembly for access to internal components.
Explanation of the FF temperature board's role in regulating refrigerator temperature.
Diagnostic checks for the FF temperature board's voltage outputs.
Diagnostic checks for the back light LEDs in the control housing.
Procedure for removing the air tower assembly.
Diagram identifying key components within the freezer compartment.
Steps for troubleshooting and removing the optional icemaker.
Procedure for removing the wire shelf from the freezer compartment.
Procedure for removing the freezer basket.
Steps for troubleshooting and removing the freezer light switch.
Instructions for diagnosing and removing the freezer compartment LED boards.
Procedure for removing the cover protecting the evaporator fan.
Steps to remove the evaporator cover to access fan and components.
Diagnostic checks for the evaporator fan's operation and voltage.
Procedure for removing the evaporator fan motor and blade.
Procedure for removing the icemaker fill tube and associated parts.
Tests to diagnose the defrost thermostat for proper operation.
Procedure for replacing the defrost thermostat.
Tests to diagnose the defrost heater for continuity and resistance.
Procedure for removing the defrost heater from the evaporator coil.
Procedure for testing the evaporator thermistor's resistance at various temperatures.
Steps for replacing the evaporator thermistor.
Procedure for removing the evaporator coil assembly.
Explanation of the adaptive defrost system and its operational monitoring.
Details on the Pre-Chill, Heater Operation, Dwell, Post Dwell, and Abnormal Defrost cycles.
Diagnostic checks for the main board's voltage outputs and signals.
Procedure for safely removing the main control board.
Procedure for removing the rear machine compartment cover.
Diagnostic checks for the condenser fan's voltage and operation.
Procedure for removing the condenser fan motor and shroud.
Procedure for removing the condenser coil assembly.
Procedure for removing the compressor's overload, relay, and capacitor.
Checks for main board voltage and overload/relay functionality.
Procedure for diagnosing compressor windings and its physical removal.
Procedure for removing and replacing the system drier.
Diagram illustrating the layout of major cooling system components.
Steps for evacuating, pressurizing, and charging refrigerant in the sealed system.
| Category | Refrigerator |
|---|---|
| Ice Maker | No |
| Water Dispenser | No |
| Door Lock | No |
| Voltage | 220-240V |
| Frequency | 50Hz |
| Model | ABE21D |
| Climate Class | T |