42
System Configration
Parts and Functions
Outdoor Unit
4
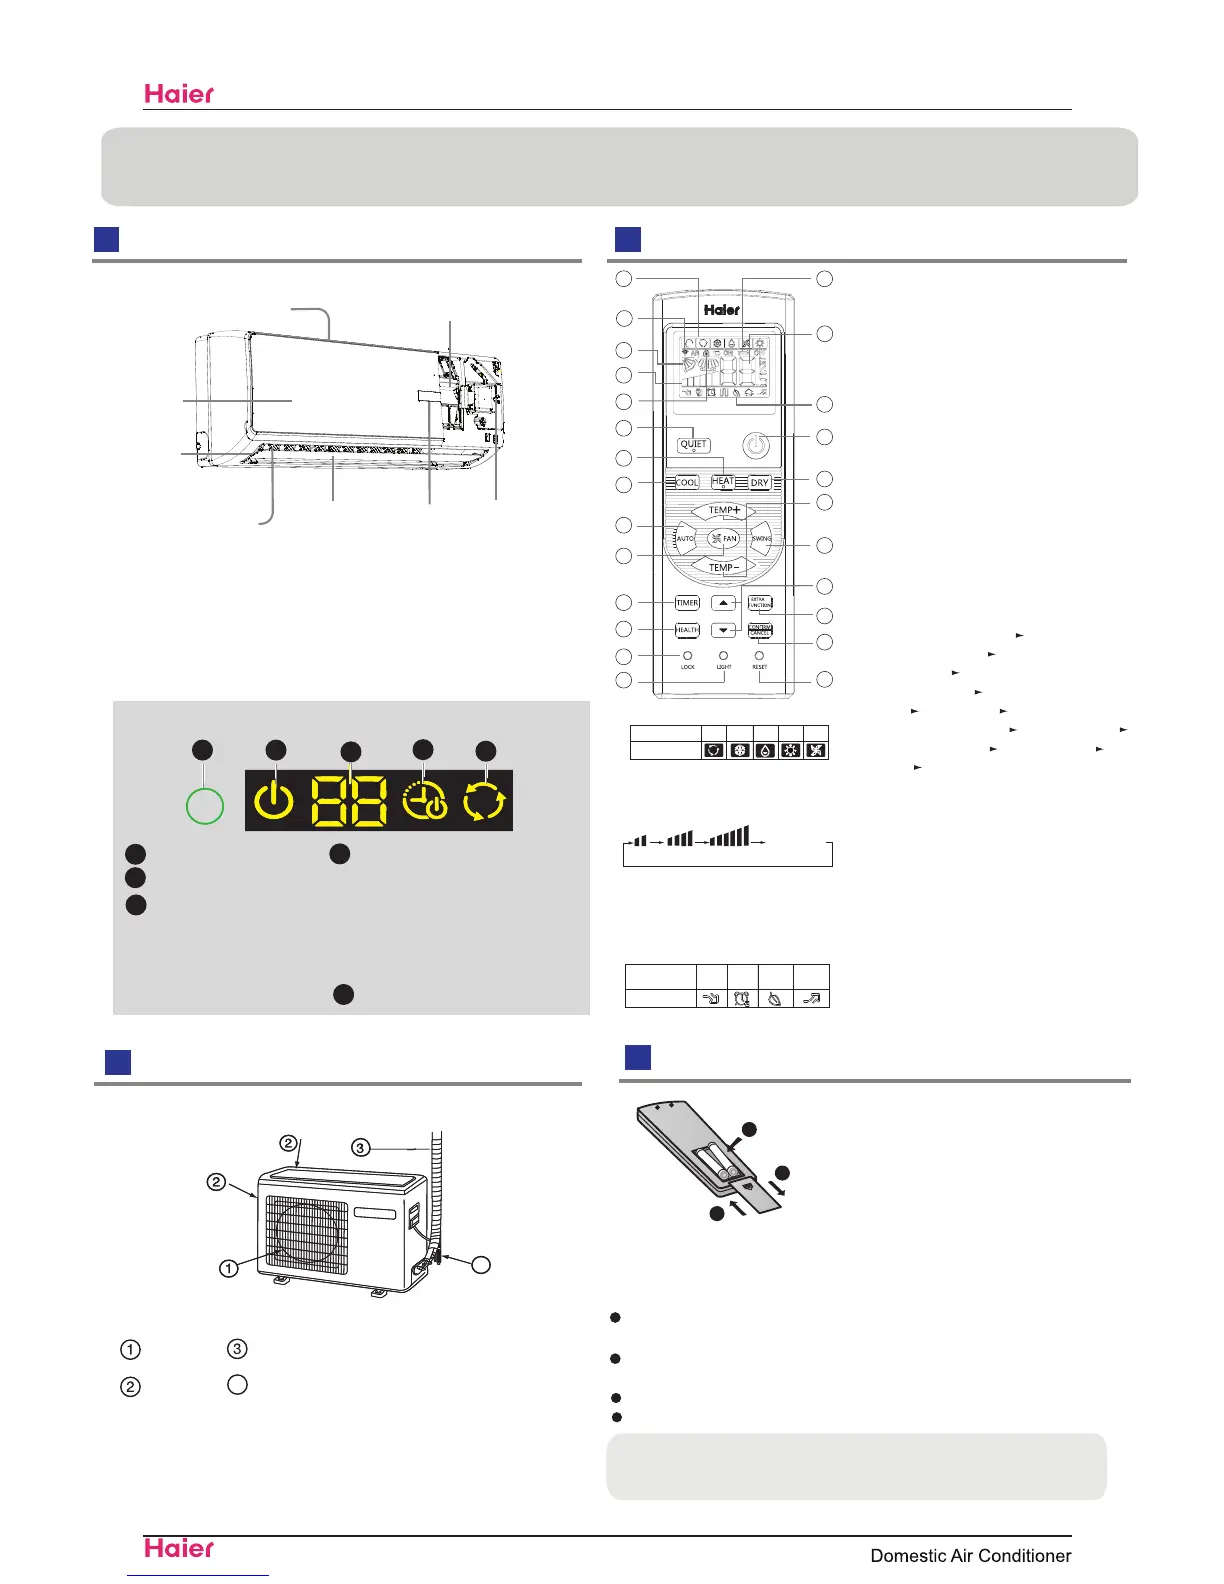
Loading of the battery
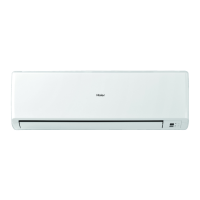
Indoor Unit
OUTLET
INLET
CONNECTING PIPING AND ELECTRICAL WIRING
DRAIN HOSE
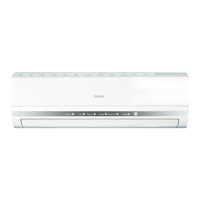
Remote controller
The unit pictured above is for reference only.
Your product may appear different.
4
Hint:
Remove the batteries if the unit won't be in use for a long period. If
there is any display after taking-out the batteries, just press reset key.
The unit pictured above is for reference only.
Your product may appear different.
Display
board
(adjust left and
Vertical blade
right air flow)
Air Purifying Filter
Inlet
(inside)
Emergency
Switch
Horizontal flap
Outlet
frant cover
Display board
1
4
2
3
5
Signal receiver hole
ON/OFF display
4
2
3
1
5
TIMER ON display
SLEEP display
Ambient temp.display
When receiving the remote
control signal, display the set
displayed and this room
display. The room temperature is
temperature mill be shown in the
temperature is only for reference.
Note to the Auto restart function:
press the sleep button ten times in five seconds
and enter the function after hearing four sounds.
And press the sleep button ten times within five
seconds and leave this function after hearing
TIMER OFF display
COOL\HEAT\DRY\AUTO display
two sounds.
1. Mode display
2. Signal sending display
4.FAN SPEED display
5. LOCK display
6.TIMER OFF display
TIMER ON display
LO MED HI
7.TEMP display
16. LOCK button
Used to lock buttons and LCD display.
25. RESET button
If the remote appears abnormal,
use a pen point or similar object to
depress the button to reset the remote
22. HOUR button
Operation mode
AUTO FANCOOL DRY
Remote controller
HEAT
1
2
3
4
5
9
10
11
12
13
14
15
16
17
22
23
24
25
19
20
21
8
18
7
6
Control the lightening and extinguishing
of the indoor LED display board.
3. SWING display
8
.
9. QUIET button
10. HEAT button
11. COOL button
12. AUTO button
13. FAN button
14. TIMER button
15. HEALTH button
17. LIGHT button
18. POWER ON/OFF button
19. DRY button
20. TEMP button
21. SWING button
23. EXTRA FUNCTION button
24.CANCEL/CONFIRM button
AUTO
Function: Setting and cancel to the
timer and other additional functions.
Display
circulated
Operation mode
Remote controller
QUITE
POWER
SLEEP
HEALTH
Additional functions display
Healthy function is not available for some units.
(adjust up and
down air flow
Don’t adjust it
manually)
1
2
3
4
Remove the battery cover;
Load the batteries as illustrated.
2 AAA batteries.
" + "/"-";
Load the battery,then put on the cover again.
Note:
1
2
3
Be sure battery polarity is
correct
The distance from the remote to the receiver should be less than
23 feet (7 meters) with no obstructions.
Fluorescent lights or cordless telephones will reduce the range
of the remote.
If the display is dim the remote batteries may need to be replaced.
Remote malfunctions can sometimes be corrected by removing
the batteries for a few minutes and then replacing them.
Function:Fan Mode— Healthy
airflow upwarder — Healthy airflow
downwarder— Reset the healthy
airflow position — Right & left airflow
setting— A-B yard— 10℃ low
temperature heating— Sleep Mode—
Electrical Heating— Refresh Air—
Power — Fahrenheit/Celsius mode
shift on unit and remote
Remark:A-B yard, Right & left airflow
setting, 10℃ low temperature heating,
Electrical Heating, Refresh Air functions
are not available for this mini split series.

 Loading...