Domestic air conditioner
Remarks
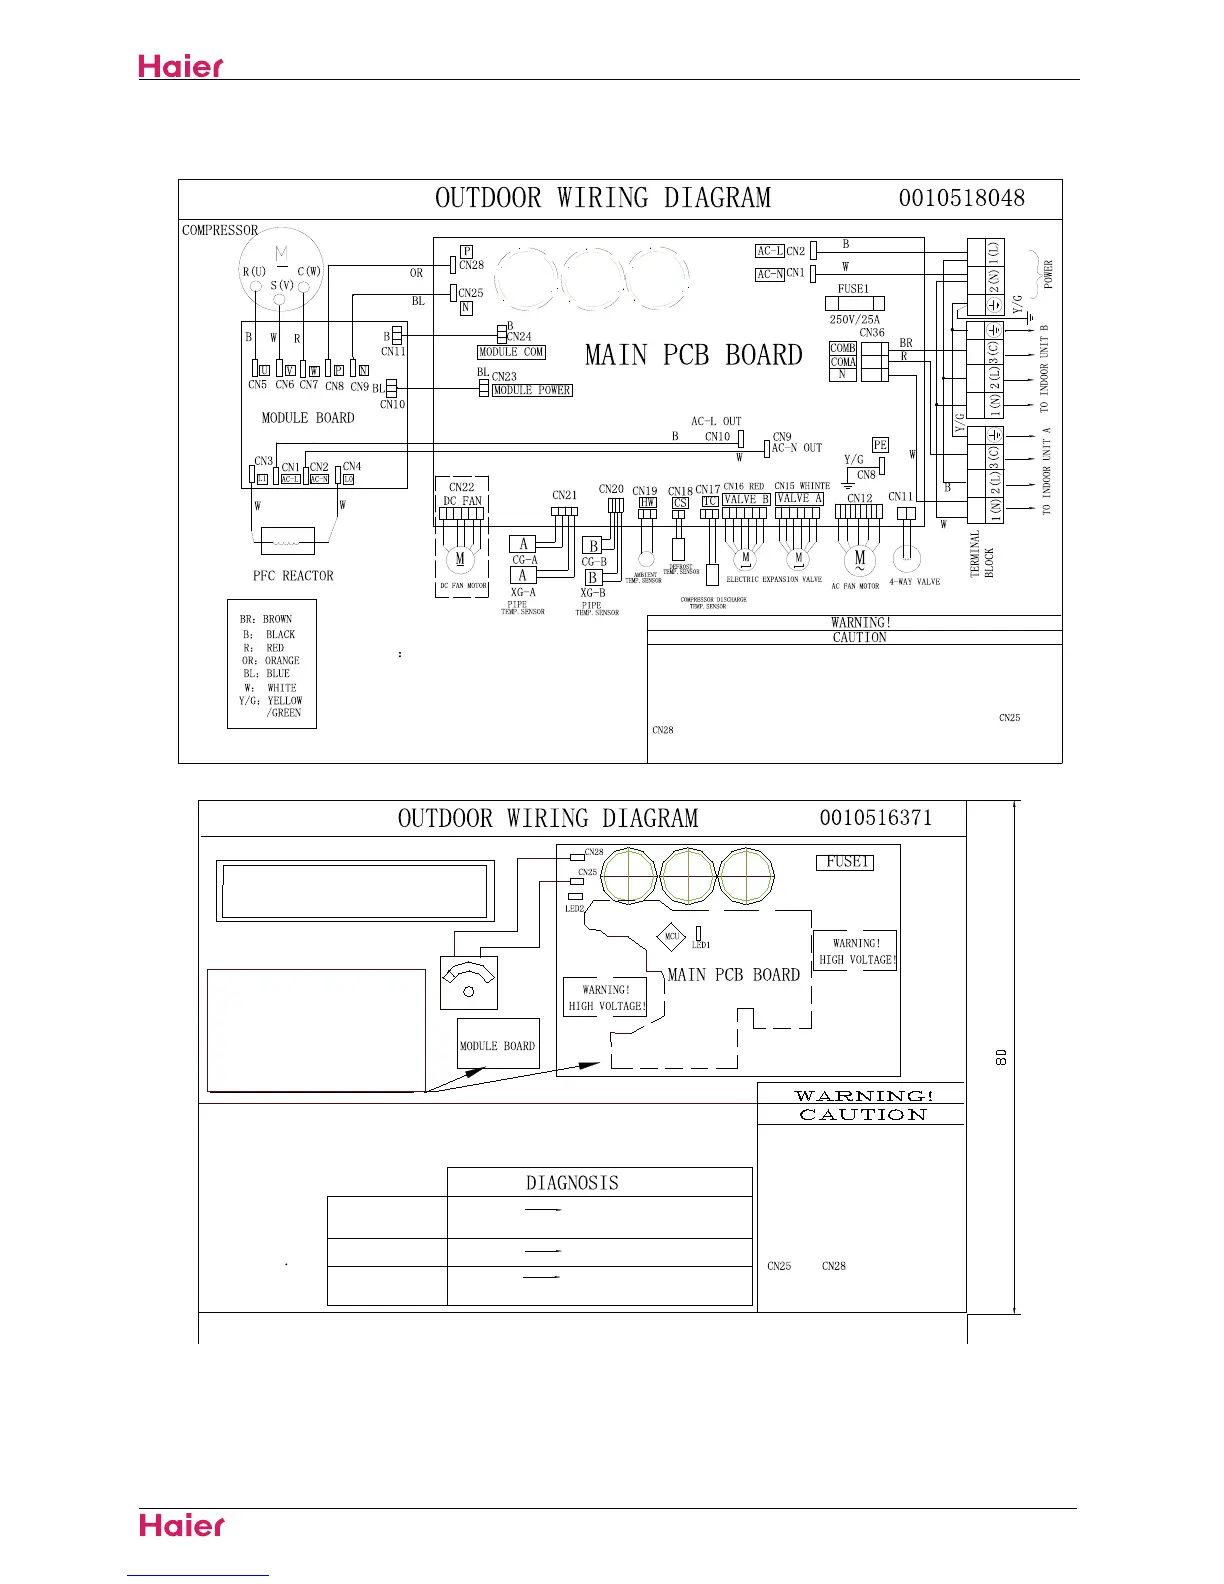
1.the dotted parts are optional for
different unit.
2.The components of main pcb board is
fixed facing to the compressor .
DON'T TOUCH CAPACITOR, EVEN AFTER PLUG-OFF ( DANGER
OF ELECTRIC SHOCK)
THE CAPACITOR RETAINS HIGH VOLTA GE EVEN AFTER THE PLUG-OFF.FOR
YOUR SAFETY,BE SURE TO WAIT AT L EAST 5 MINUTES.AFTER PLUG OFF AN D
USE A TESTER TO CONFIRM THE VOLT AGE BETWEEN CONNECTOR
AND
(ON MAIN PCB BOARD) IS LESS THAN DC 10V BEFORE START SERVICING
OR LED2 EXTINGUISHED.
WARNING!
DANGER ELECTRIC SHOCK!
1.DON'T TOUCH PCB,EVEN
AFTER PLUG-OFF ( DANGER OF
ELECTRIC SHOCK )
2.THE POINTED PARTS ARE
HIGH VOLTAGE. DON'T TOUCH
THE POINTED PARTS UNTIL THE
VOLTAGE IS LESS THAN DC 10V.
THE CAPACITOR RETAINS HIGH
VOLTAGE EVEN AFTER THE
PLUG-OFF.FOR YOUR SAFETY,BE
SURE TO WAIT AT LEAST 5
MINUTES.AFTER PLUG OFF AND
USE A TESTER TO CONFIRM THE
VOLTAGE BETWEEN CONNECTOR
AND (ON MAIN PCB
BOARD) IS LESS THAN DC 10V
BEFORE START SERVICING OR
LED2 EXTINGUISHED.
DON'T TOUCH CAPACITOR,
EVEN AFTER PLUG-OFF ( DANGER
OF ELECTRIC SHOCK)
Remarks:
1.Fault diagnosis by LED1 on
outdoor unit PCB.
2.Count times of LED1 flashing
to judge the malfunction.
3.The
details
refer to the
technology
notebook
power supply fault or check
the main PCB board
abnormal
LED1 OFF
LED1 ON
LED1 FLASHING
abnormal
according to times of LED1
flashing to check
check the indoor unit
normal
Wring diagram
95
 Loading...