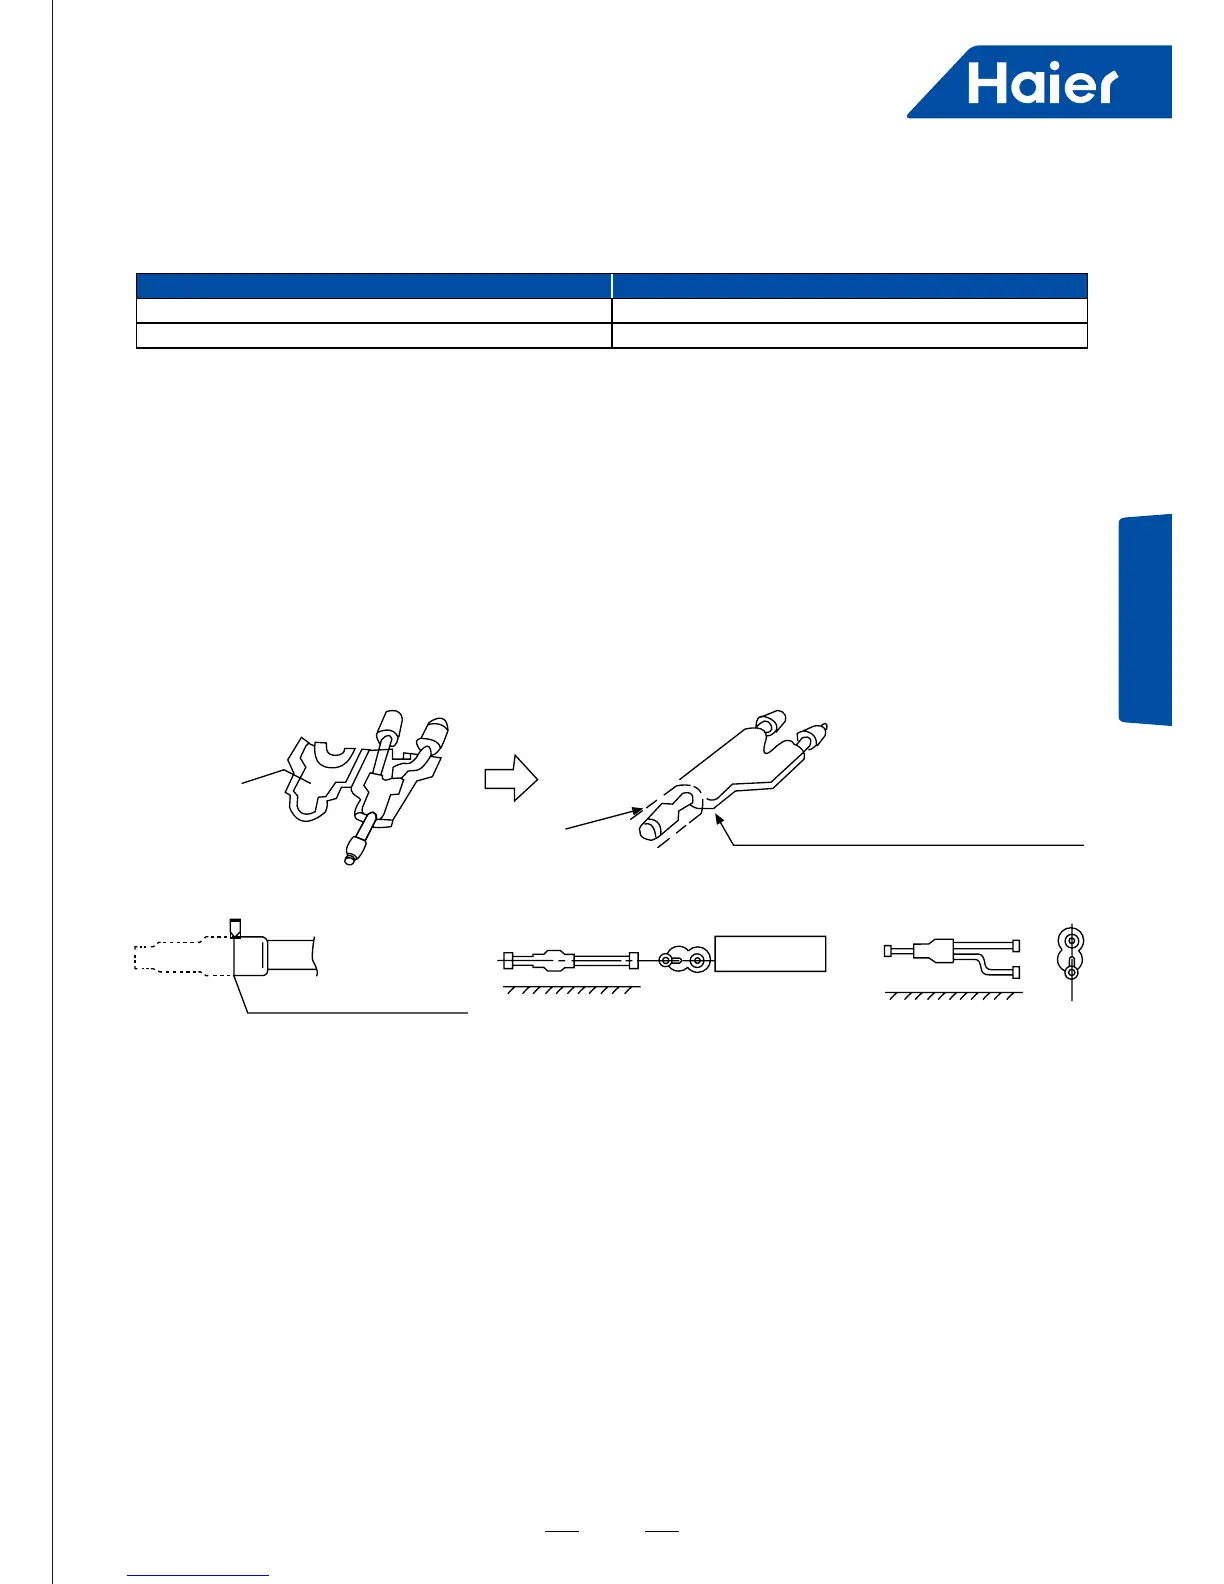
Branch pipe
Branch pipe selection:
Total indoor capacity (100W) Model (optional)
Less than 335 FQG-B335A
More than 335, less than 506 FQG-B506A
Outdoor unit type
The master unit will choose the closest one to the 1st branch pipe.
Note:
• When connecting the outdoor branch pipe and the outdoor, please pay attention to the outdoor pipe dimension.
• When adjusting the diameter among outdoor branch pipe and among the units, please must execute at the
branch pipe side.
• Please install the outdoor branch pipe (gas/liquid side) in horizontal or vertical direction.
• When welding with hard solder, please must blow nitrogen. If not, a number of oxide will be produced and cause
heavy damage. Besides, to prevent water and dust into the pipe, please make the brim as outer roll.
Pipe installation
When doing the piping connection, please do the following:
■ Please don't let the pipe and the parts in the unit collide each other.
■ When connecting the pipes, close the valves fully.
■ Protect the pipe end against the water, impurity into the pipes (welding after being at, or being sealed with
adhesive tape).
■ Bend the pipe as large semi-diameter as possible (over 4 times of the pipe diameter).
■ The connection between outdoor liquid pipe and the distributing pipe is ared type. Please expand the pipe with
the special tool for R410A after installing the expanding nut. But if the projecting pipe length has been adjusted
with the copper pipe gauge, you can use the original tool to expand the pipe.
■ Since the unit is with R410A, the expanding oil is ester oil, not the mineral oil.
■ When doing the are connection, please do the following: When connecting the expanding pipe, fasten the pipes
vwith double-spanner. The torque refers to the former info.
Adhesive side
Prepare on eld
Seal the connection and wrap the
heat insulator with adhesive tape
Cut off pipe with the cutter
Cut off at the middle
Right
Wrong
Floor
Floor
Horizontal
 Loading...