Do you have a question about the Haier WQP12-AFM and is the answer not in the manual?
Shows physical layout, connections, and dimensions for dishwasher setup.
Lists brand, model, and product code for reference.
Essential rules for safe appliance use and maintenance.
Identifies control panel and interior parts of the dishwasher.
Lists key appliance dimensions, capacity, and power requirements.
Instructions for loading salt and setting usage based on water hardness.
How to fill and adjust dispensers for optimal cleaning and drying.
Tips for improving drying by adjusting rinse aid levels.
Guidance for efficient placement of dishes in upper and lower racks.
Steps to start, modify, or cancel a wash cycle.
Explanation of buttons for 1/2 load and rapid wash functions.
Advice for efficient operation and reduced energy consumption.
Steps after washing, general maintenance, and holiday readiness.
Details on available cycles, their descriptions, and settings.
Instructions for cleaning filters/arms and fixing common operational issues.
Guidance on connecting water supply, drain, and power.
Explanation of the safety feature and its connection requirements.
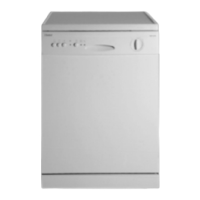
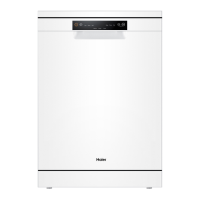
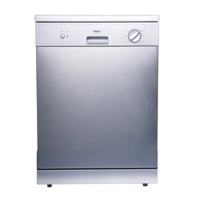
This document provides comprehensive instructions for the installation, operation, and maintenance of a Haier Domestic Dishwasher, model WQP12-AFM. It emphasizes safety precautions, proper loading techniques, and effective cleaning procedures to ensure optimal performance and longevity of the appliance.
The Haier WQP12-AFM is a domestic dishwasher designed for washing household dishes and cooking utensils. It features a specialized softener that uses salt to eliminate lime and minerals from hard water, preventing deposits on dishes. The appliance offers various wash cycles tailored to different levels of dirtiness and types of dishware, including options for normal wash, light wash, glassware, and a rapid cycle. It also incorporates a rinse aid dispenser to enhance drying and prevent spotting, and a detergent dispenser for efficient cleaning. The dishwasher is equipped with an anti-flooding protection system to prevent water damage in case of leaks or supply hose issues.
Installation: The dishwasher should be positioned in its desired location, with the back against a wall and sides against adjacent cabinets or walls. It is equipped with adjustable feet for leveling, ensuring proper performance. The water supply hose can be connected to either a cold or hot water line (not exceeding 60°C), with specific instructions to flush new or unused pipes to prevent impurities from blocking the inlet. The drain hose must be inserted into a drain pipe with a minimum diameter of 4cm or run into a sink, ensuring it is not bent or crimped and is securely fastened at a height between 40 and 100 cm. Electrical connection requires a properly earthed socket that matches the appliance's voltage and frequency, and adapters should be avoided.
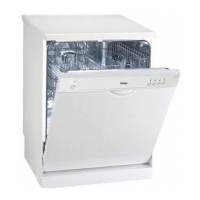
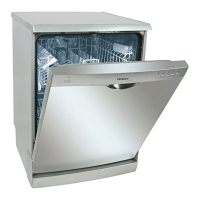
Loading the Dishwasher: Before loading, large food particles should be removed from dishes to prevent filter clogging. For baked-on food, pre-soaking is recommended. The lower rack is ideal for difficult-to-clean items like pots, lids, serving dishes, and bowls, placed top-down and slanted for water drainage. The silverware basket can be used as a single section for light loads or doubled, with handles at the bottom. The upper rack is designed for delicate and lighter dishware such as glasses, cups, saucers, and small bowls. Dishes should be positioned to avoid movement during the wash cycle and to prevent blocking the spray arms. The upper rack's height can be adjusted using side knobs.
Starting a Wash Cycle: Ensure the plug is inserted, water supply is on, and the dishwasher is loaded with detergent and salt. Turn the knob on the control panel to select the desired cycle, aligning it with the reference mark. Press the ON-OFF button to start the cycle. If dishes are forgotten, the cycle can be interrupted by pressing the ON-OFF button, additional dishes loaded, and the appliance restarted. At the end of the cycle, when the knob aligns with the STOP mark, turn off the appliance, water supply, and open the door. It is advisable to wait a few minutes before unloading to prevent breakage and allow better drying.
Cancelling or Modifying a Wash Cycle: A cycle can be modified if it has been running for a short time. If detergent has already been used, it must be refilled. Press the ON-OFF button, rotate the knob to the new cycle setting, and restart the appliance.
Control Panel Buttons:
Detergent and Rinse Aid: Only dishwasher-specific detergent should be used. To load, press the "B" button to open the "A" cover, pour detergent into the "C" compartment, and close the cover until it clicks. The rinse aid dispenser, located on the inside panel of the door, should be refilled every 80 wash cycles or when the indicator light comes on. To load, turn the "C" cap anti-clockwise, pour in rinse aid without overfilling, and adjust the dosage (1-6 settings, normal is 3) using a screwdriver if needed. Proper dosage improves drying; adjust higher for water drops/spotting, lower for white streaks.
Salt Loading and Adjustment: The salt container, located beneath the lower rack, should be filled with dishwasher-specific salt when the "low salt" indicator light illuminates. Remove the lower rack, unscrew the cap, fill with water (first time only), add about 2 kg of salt using the funnel, and screw the cap back on. Salt consumption can be adjusted based on water hardness by rotating a ring on the container from "-" to "+" settings, following the provided water hardness scheme.
Cleaning and Special Maintenance:
Troubleshooting: The manual provides a checklist for common issues:
Keeping Your Dishwasher in Shape:
Energy Saving Tips:
| Energy Efficiency Class | A+ |
|---|---|
| Noise Level | 49 dB |
| Weight | 47 kg |
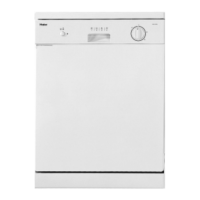
| Colour | White |
| Built-in Display | Yes |
| Washing Class | A |
| Drying Class | A |
| Delayed Start Timer | Yes |
| Number of Place Settings | 12 place settings |
| Dimensions (HxWxD) | 820x598x550 mm |