Do you have a question about the Haier HDW100SST and is the answer not in the manual?
Carefully read instructions for safe installation, use, and maintenance of the appliance.
General steps for self-diagnosing and fixing common dishwasher issues.
Troubleshooting steps for when the dishwasher fails to power on.
Explanation of different beep patterns and their corresponding troubleshooting solutions.
Solutions for problems related to the detergent lid and dispenser.
Fixes for water retention after cycles or unusual foam formation.
What to do if the appliance stops suddenly or makes unusual noises.
Addressing issues like food remnants, stains, discoloration, and poor drying.
Instructions for placing and ensuring the appliance is level for optimal performance.
Guidance on connecting the cold and hot water supply hoses.
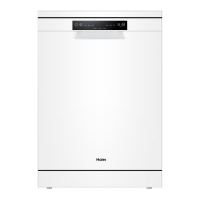
This document provides user instructions for Haier dishwashers, specifically models HDW100WHT and HDW100SST. It covers safety information, a close-up view of the control panel and interior, technical characteristics, detergent and rinse aid loading, dishwasher loading, operating instructions, energy-saving tips, maintenance, a wash cycle table, troubleshooting, and installation guidelines.
The Haier dishwasher is designed for washing household dishes and cooking utensils. It automates the cleaning process, offering various wash cycles to suit different levels of soiling and types of items. The appliance uses detergent and rinse aid to ensure effective cleaning and drying, aiming for sparkling, spot-free results.
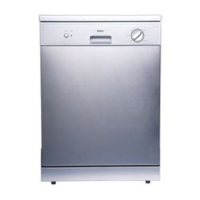
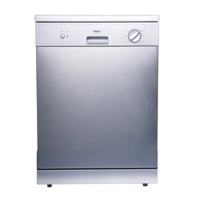
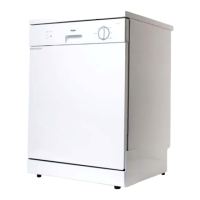
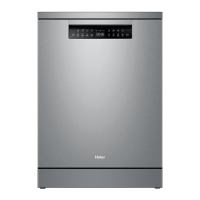
Control Panel and Operation: The dishwasher features a straightforward control panel. It includes a "POWER" button (A) to turn the appliance on and off, an "END" light (B) that illuminates when a cycle is complete, a handle (C) for opening the door, and a knob (D) for selecting the desired wash cycle.
Wash Cycles: The dishwasher offers several wash programmes:
Detergent and Rinse Aid Dispensing: Detergent is loaded into a dedicated dispenser on the inside panel of the door. The dispenser has compartments for both the main wash cycle (C) and a pre-wash cycle (D). To open, press button (B) on cover (A). After loading, the cover should be closed until it clicks. Rinse aid is also dispensed from a unit on the inside panel of the door. To load, turn cap (C) anti-clockwise and pour in the rinse aid. The dosage can be adjusted using adjuster (F) beneath the cap, with 6 settings available (normal is 3). Proper rinse aid dosage is crucial for effective drying and preventing spots or streaks.
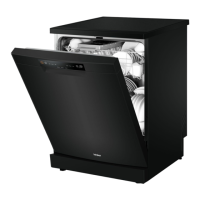
Loading the Dishwasher: The dishwasher features an upper rack (A) and a lower rack (D). The lower rack is designed for more difficult-to-clean items like pots, pans, lids, serving dishes, and bowls, which should be placed face down and tilted to allow water drainage. The upper rack is for delicate and lighter items such as glasses, cups, saucers, plates, and small bowls, positioned to prevent movement during the wash. The height of the upper rack can be adjusted by rotating caps on the rack guide rails, removing the rack, and refitting it using alternate wheels (fig.D) to accommodate larger items in the bottom basket. Before loading, larger food particles should be removed from dishes, and heavily baked-on food should be pre-soaked.
Starting and Modifying a Wash Cycle: To start, ensure the appliance is plugged in, water supply is on, dishes are loaded, and detergent is added. Press the "POWER" button, turn the cycle knob to align with the desired programme (or "RESET" if modifying an ongoing cycle), and the "END" light will turn on. After five seconds, the "END" light will turn off, and the cycle will begin. An ongoing cycle can be modified if it has been running for a short time. If detergent has already been used, it must be refilled. To modify, rotate the knob to "RESET" and then select the new programme.
End of Wash Cycle: At the end of a cycle, the buzzer will beep six times, and the "END" light will turn on. The appliance should be turned off using the "POWER" button, the water supply turned off, and the door opened slightly. It's recommended to wait a few minutes before unloading to allow dishes to cool and dry better, reducing the risk of breakage.
Filter Assembly: For optimal performance, the filter assembly must be kept clean. It removes food particles from the wash water. After each wash cycle, the semi-circular filter and cup ("A") should be rinsed under running water. The entire filter assembly (including the fine filter "B") should be cleaned at least once a month with a soft brush. To reassemble, insert the assembly into its seat and press downward. The dishwasher should not be used without filters, as improper replacement can reduce performance.
Cleaning the Spray Arms: Food particles can encrust and block the holes in the spray arms (C, E). Periodically check and clean the spray arms as needed.
After Every Wash: After each wash, turn off the water supply and leave the door slightly ajar to prevent moisture and odors from being trapped inside.
Removing the Plug: Always remove the plug from the socket before cleaning or performing maintenance.
Moving the Appliance: If the dishwasher needs to be moved, keep it in a vertical position. If absolutely necessary, it can be laid on its back, but never on its right-hand side.
Seals: Food trapped in the seals can cause odors. Periodic cleaning of the seals with a sponge will prevent this.
Cleaning Products: Do not use solvents or abrasive cleaning products on the exterior and rubber parts. Instead, use a cloth with warm soapy water. For interior spots or stains, use a cloth dampened with water and white vinegar, or a dishwasher-specific cleaning product.
When Going on Holiday: Before a holiday, it is recommended to run an empty wash cycle, then remove the plug, turn off the water supply, and leave the door slightly ajar. This helps preserve the seals and prevent odors.
Troubleshooting: The manual provides a comprehensive troubleshooting guide for common issues, including:
The manual advises contacting an authorized service center if problems persist after self-troubleshooting, providing details like the nature of the problem, model type number, and serial number.
Installation: The manual provides instructions for positioning and leveling the appliance, connecting to cold and hot water supplies (avoiding push-through hot water systems exceeding 60°C), and connecting the drain hose (ensuring it's between 40-100 cm high and secured). Electrical connection requires ensuring voltage and frequency match the rating plate and plugging into an earthed socket, explicitly stating not to use adaptors or extension leads.
| Type | Freestanding |
|---|---|
| Capacity | 10 place settings |
| Noise Level | 49 dB |
| Wash Programs | 6 |
| Dimensions (H x W x D) | 850 x 448 x 600 mm |
| Delay Start | Yes |