5
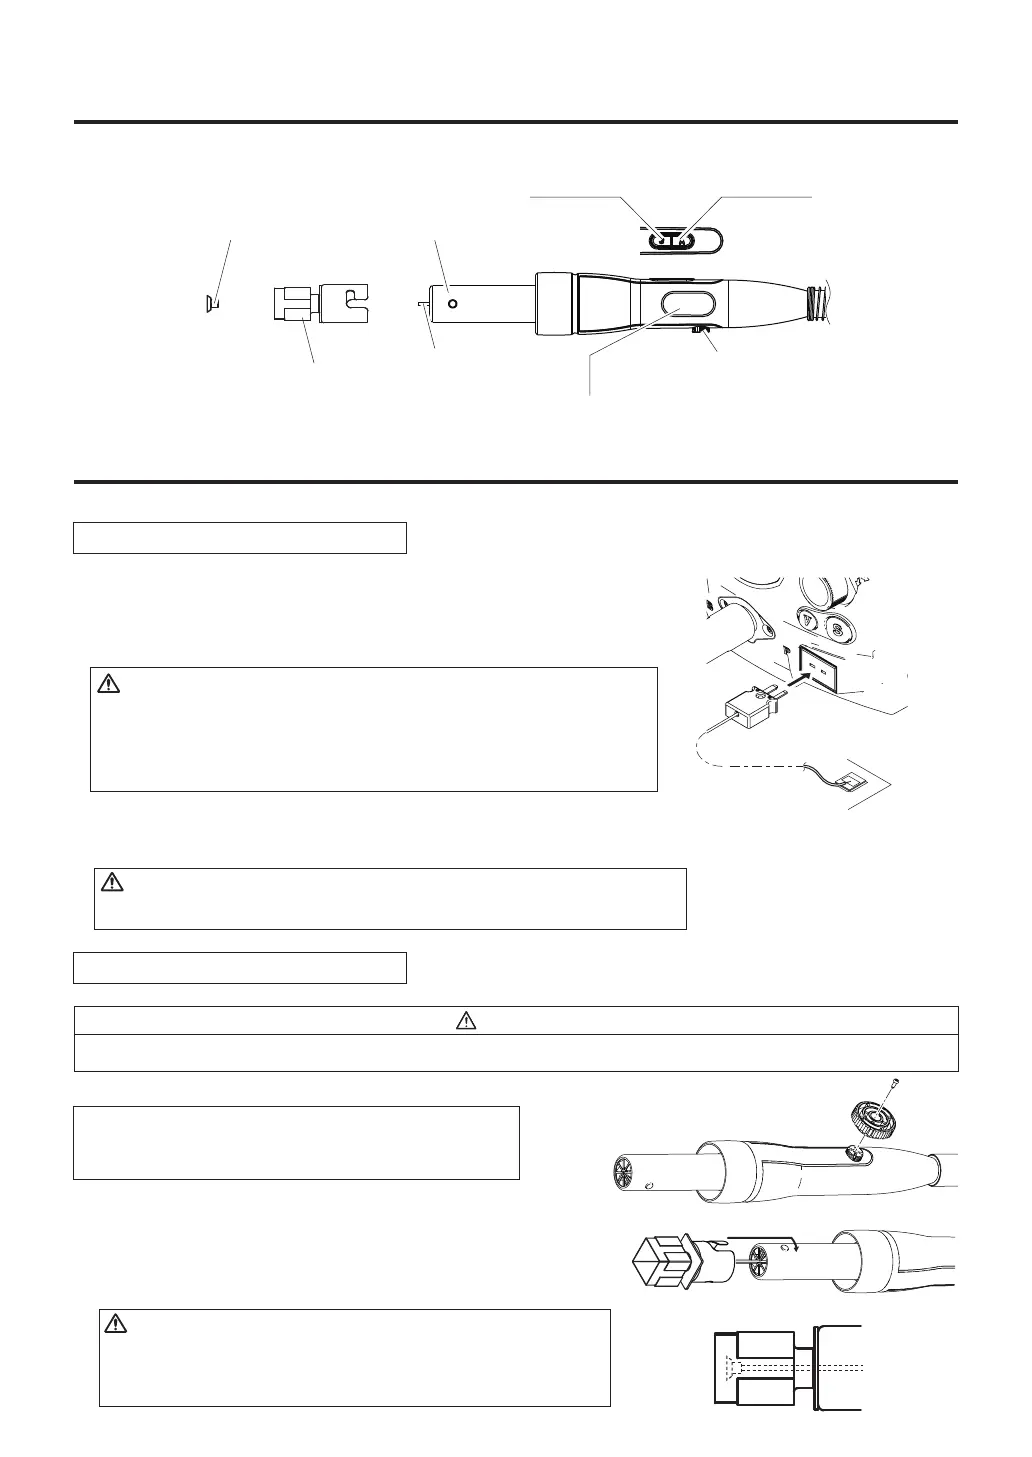
● Handpiece
5. INITIAL SETUP
A. Station
● Connections
1. Connect the power cord to the power receptacle on the rear of the station.
2. Connect the thermocouple to the T/C connector.
(When using in T/C mode)
CAUTION
・Ifconnectionisnotperformedproperly,anerrorwillbedisplayed.
・ThereareT/Cconnectorsforthehandpieceside
(Labeled with "P")
andthebottomheaterside
(Labeled with "B").Besuretoconnect
thethermocoupletotheproperT/Cconnector.
Circuitboardside
Thermocouple
CAUTION
This product is ESD-protected. Be sure to use a grounded wall socket.
3. Plug the power cord into a wall socket.
Check that the power switch is set to OFF and then plug in the power cord.
①
Pad
The pad absorbs parts.
Nozzle
(not included)
③Sensor (internal)
This sensor detects the
temperature of the hot air.
②Vacuum pipe
The pad is mounted on the
tip of the vacuum pipe.
④Vacuum pipe control knob
This knob controls the length
of the vacuum pipe.
⑤Pick-up indicator
The movement of the vacuum pipe can be checked here.
S (START/STOP)
button
V (VACUUM)
button
B. Handpiece
NOTE:
The handpiece can be used with the provided vacuum
pipe control knob (L).
CAUTION
The nozzle and pad will be heated at high temperature. Cool them before replacement.
● Using vacuum function operative nozzle
1. Attach the nozzle.
a. Extend the vacuum pipe using the vacuum pipe control knob.
b. Pass the vacuum pipe through the nozzle hole and attach the nozzle.
CAUTION
● Vacuum pipe
Do not use excessive force. When not using a nozzle,
retract the vacuum pipe to the shortest length.