5
Thank you for choosing a Hama product.
Take your time and read the following instructions and
information completely. Please keep these instructions in a
safe place for future reference. If you sell the device, please
pass these operating instructions on to the new owner.
1. Explanation of Warning Symbols and Notes
Risk of electric shock
This symbol indicates product parts energized with a
dangerous voltage of sucient magnitude to constitute
a risk of electric shock.
Warning
This symbol is used to indicate safety instructions or to
draw your attention to specic hazards and risks.
Note
This symbol is used to indicate additional information or
important notes.
2. Package Contents
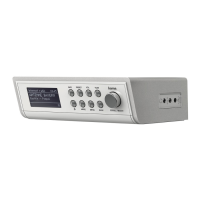
• Internet Radio IR230
• Power supply
• Mounting plate
• 8 screws
• Quick guide
• Spotify Connect brochure"
3. Safety Notes
• The product is intended for private, non-commercial use
only.
• Protect the product from dirt, moisture and overheating
and us it in dry rooms only.
• As with all electrical devices, this device should be kept
out of the reach of children.
• Do not drop the product and do not expose it to any
major shocks.
• Do not operate the product outside the power limits
given in the specications.
• Keep the packaging material out of the reach of children
due to the risk of suffocation.
• Dispose of packaging material immediately according to
locally applicable regulations.
• Do not modify the device in any way. Doing so voids the
warranty.
Risk of electric shock
• Do not open the device or continue to operate it if it
becomes damaged.
• Do not use the product if the AC adapter, adapter
cable or power cable is damaged.
• Do not attempt to service or repair the product
yourself. Leave any and all service work to qualied
experts.
4. Installation
• Attach the included mounting plate to the bottom of
your wall cupboards using all 4 wood screws. (B)
• Choose a suitable position for this purpose because the
radio must not be exposed to heat sources or moisture
(not above or near a stove/ dishwasher/ sink).
• Screw the four M6 X 13 screws into the appropriate
holes on the top of the radio (C).
• The screws must protrude about 3.5 mm and may not be
screwed in all the way.
• Mount the radio on the mounting plate so that the 4
screws click rmly into place in all 4 mounting rails (D
and E)

 Loading...