leaving
them
loose
until
remaining
screws
are replaced.)
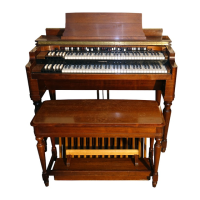
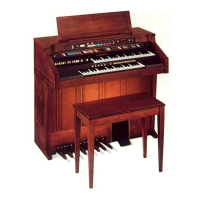
3-12.
SWELL ASSEMBLY.
-
To
remove
swell
assembly,
perform
steps a.
through
d.
If
replacement
of
assembly is
required,
perform
step e.
a.
Remove
tv^o leads
with
white
coded ends
from preamplifier
and main amplifier.
b.
Remove four wood
screws securing swell
housing
cover
to case
and lift out
cover.
c.
Remove four
screws
securing swell
pedal
assembly to case
work. Swell
assembly
is now loose
and can
be picked up and
removed from
back.
d.
Swell potentiometer
can
be removed
at
this
time
if
necessary and
will
require
an
Allen
1/16"
wrench.
e.
Replacement
for more dependable swell
operation
can be
made by
ordering Part
Number
123-000021
from
the
factory,
and
proceeding
as
follows.
1.
Remove Expression Control housing.
2.
Unplug long
shielded lead
from
Per-
cussion
Amp.
Chassis and short
shielded lead
from Power Amp.
Chassis.
3. Remove
four
screws
securing
Expres-
sion
Control
Chassis
to
floor
of
cabinet.
4.
Remove
Expression Control
as
one
unit.
5. Place new Expression
Control in
posi-
tion and secure
with
original
screws.
6.
Plug
long shielded
lead
into
Percus-
sion Amp. jack and short lead into
Power
Amp.
Jack.
7.
Using accompanying Terminal Strip,
splice two Brown wires from Expres-
sion Control into
Blue
&
Gray
6.3V
filament
leads originating
in
6
pin
rectangular
plug
on
Power
Amp.
Chassis.
Secure
Terminal
Strip to
cabinet
floor with
small
wood
screw.
8.
Replace
Expression
Control
Housing.
NOTE
If
swell
assembly
is
replaced
as
directed,
circuitry
will conform to
Figures
5—3
and
5—4.
3-13.
TO
REPLACE
A
BROKEN TAB.
-
Proceed
according
to
the
following.
a.
Remove
four
screws
which
secure metal*
cover
on
control
panel
assembly.
b.
Remove
two
Phillips screws
from front
of
control
panel
which hold bank of
switches
associated with tab to
be
replaced.
c.
Remove
lock washer
from
either
end
of
switch assembly, and pull
rod out
so
it
just clears
broken
tab.
It
may
be neces-
sary
to tilt
assembly so
that
free end of
rod
will
clear
adjacent
switch assembly.
d.
Remove
remains of
broken
tab
and
insert
new piece.
NOTE
A small
bronze spring
washer
will be
found
between tab
and
one side
of
switch
assembly.
Be
sure this
is
re-
inserted with
new tab.
3-14.
PILOT LIGHT
OR
POWER
SWITCH.
-
Dis-
connect organ from power
source,
then
proceed according to the following.
a.
Remove
four screws which secure
metal
cover
on
control
panel assembly.
b.
Replace bulb with No. 12
GE
6.3 V .15A
miniature
2 pin.
c.
To
replace
power
switch, unsolder two
black leads
from generator power
panel.
d.
Compress
springs on sides
of
switch and
push through
front of
control panel.
3-15.
PERCUSSION
CIRCUITRY,
L-100A.
-
With
the
exception
of
power
supply
and
terminal
strip
assembly,
Figure 5
—
13,
the percussion
circuitry is
mounted on the
lower
left end
block.
If
access to
end
block circuitry is
required,
remove control knobs
before
re-
moving end block
from
organ.
3-16.
SIX-VOICE
PERCUSSION
CIRCUITRY.L-1
00-1
The power
supply, 1
27-000007
and
pedal
control
board
assembly,
063-042051,
are
mounted
on
the
left (rear
view)
wall of
the
console.
The rhythm voice
board, 1
24—0001
14,
is
located
on
the
bottom left (rear
view)
of
the
console.
 Loading...