10
ADVANCED OPERATION
Velocity Curve
A
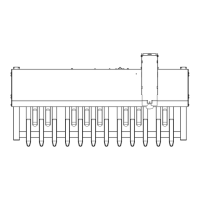
LED
1
2
3
4
5
Velocity Curve
nonvelocity
6
is allows you to determine how the notes will respond to
key velocity. You can select “1 ~ 6”. e default setting is “5”
(standard organ touch - the notes sound at the same volume
regardless of a light or heavy note pressure), “1” is the most
exaggerated velocity curve while “4” is a gentler curve. “2”
and “3” are curves in between.
To select a Velocity Curve, do the following:
① Press and Hold the “A
” pedal key and the pedal corre-
sponding to the Velocity-Curve you want (see the dia-
gram on the le ).
② Continue to hold the pedal keys and turn the power to
the unit “ON.”
e LED on the top panel will blink according to the val-
ue you select, indicating that the Velocity-Curve has been
changed.
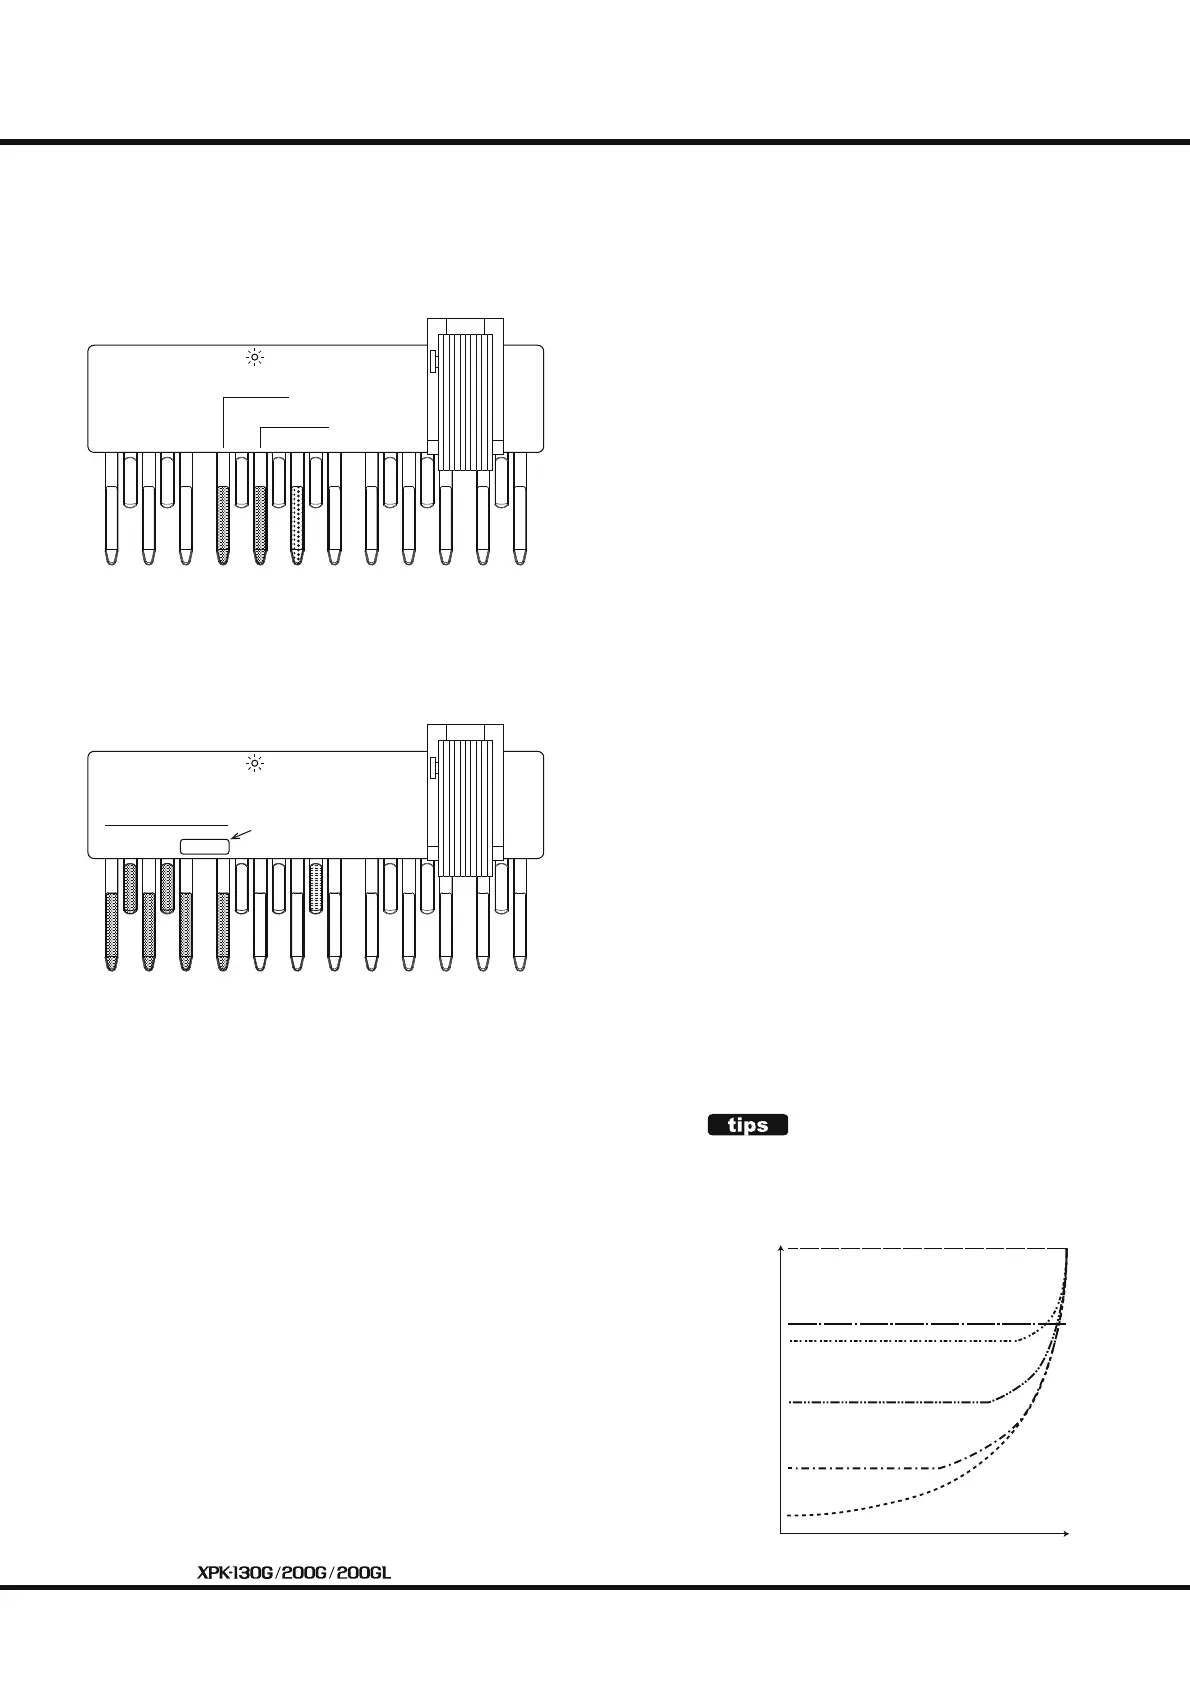
0
127
VelocityValue
ActualPlayingVelocity
Curve6(non-velocity)
Curve1
Curve2
Curve3
Curve4
VELOCITY CURVE
A graphic of each Velocity Curve is shown below. Curve
1 is the most faithful to the actual pressing velocity,
while at Curve 5 or 6, you can play with xed velocity.
Curve5(non-velocity)
You can customize the operation of this unit with these
Advanced Features.
NOTE: These settings will be remembered even if the power to
the unit is turned “OFF.”
Auto Power OFF
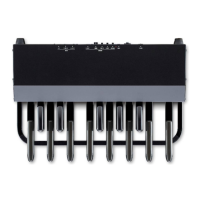
A
LED
30 min.
DISABLE
is allows you to select whether the unit will automatically
turn “OFF” a er 30 minutes, or stay “ON” continuously.
e default setting is “30 min.”
To set this feature, do the following:
① Press and HOLD the “A” pedal key and the pedal corre-
sponding to the setting value (see the diagram on the
le ). “30 min.” and “DISABLE” are available.
30 min. The unit will turn "OFF" automatically if not played or
operated for 30 minutes.
DISABLE The unit will stay "ON" continually.
② Continue to hold the pedal keys and turn the power to
the unit “ON.”
e LED on the top panel will blink 5 times, indicating that
Auto Power OFF function setting has been changed.
 Loading...