6
SETTING MIDI CHANNELS
To use this unit as a MIDI pedalboard, do the following:
① Determine to which MIDI Channel the Bass is as-
signed on the MIDI instrument.
② Set the MIDI Channel of the unit to the same chan-
nel as the Bass channel on the MIDI instrument (see
the diagram below).
ere are several ways to use this unit. Below are several examples.
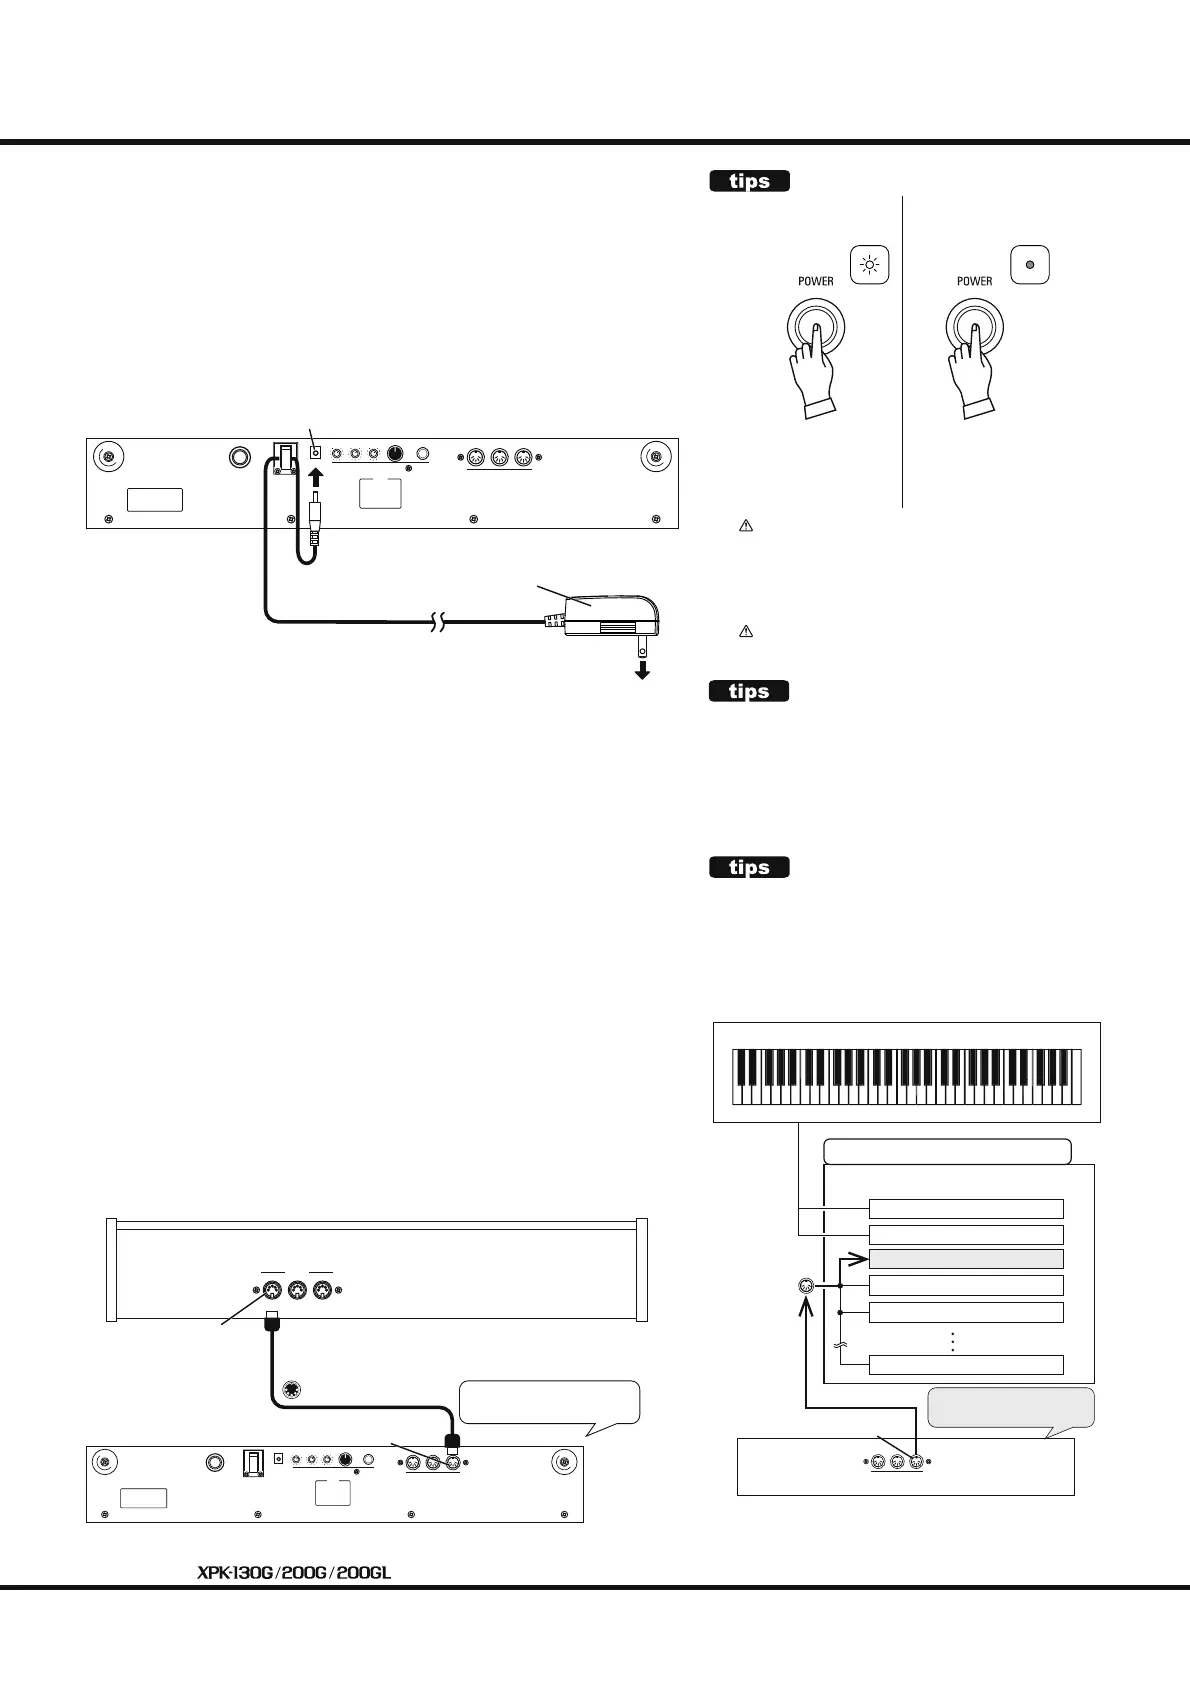
Hook-up example 1: MIDI pedalboard
To use this unit as a MIDI pedalboard, do the following:
① Connect the MIDI OUT from the unit to the MIDI IN of the MIDI
instrument you wish to use as shown.
② Make sure the unit and the connected instrument are set to the same
MIDI Channel (factory setting is MIDI Channel 3).
NOTE: You can change the MIDI channel of this unit. See P.9.
③ Turn the power to the unit “ON.”
④ In order for the connected instrument to function correctly, set the
MIDI function properly. Consult the manual for your connected
instrument if needed.
010 010 010
MIDI
IN
MAKING THE CONNECTIONS
010 010 010
MIDIcable
ACadaptor
AD2-1210/AD3-1210
ToACoutlet
Preparing unit for use
①Connect the AC adaptor AD2-1210/AD3-1210 into the DC IN jack
on the unit.
② Hook the AC adaptor cord on the cord hook.
③Connect the AC plug into an AC outlet.
MIDIInstrument
(e.g.electronicorgan,arrangerkeyboard)
MIDIINjack
MIDIOUTjack
DCINjack
SettheTxMIDI
channel(P.9)
MIDIInstrument
soundmoduleintheinstrument
RxMIDIchannel:assignedpart
1:Upper
2:Lower
3:Bass(orPedal)
4:Guitar
5:Synthesizer
16:Vibraphone
MIDIIN
XPK
MIDIOUT
SettheTxMIDI
channelat“3”(P.9)
NOTE: The above example represents one possibil-
ity. The MIDI Channel assigned to Bass part
may vary among di erent instruments.
HOW TO TURN THE POWER ON/OFF
LED LED
PowerON PowerOFF
PressthePOWERSwitch.
Thepowerturnsonandthe
LEDwilllightonbrightlyfor
about1second.
PressandHOLDthePOWER
Switchfor1second.
Thepowerturnsoffandthe
LEDwilllightoff.
Before switching the power to this unit "ON" or
"OFF," be sure to set the VOLUME of both this
unit and the connected ampli er etc at "0." Also,
be sure the power to the connected ampli er is
"OFF."
Do not connect or disconnect the audio cables
while the power to both units is "ON."
AUTO POWER OFF
This unit has an Auto Power OFF feature which will au-
tomatically turn the power to the unit "OFF" if no notes
are played or features accessed for 30 minutes (default
setting).
If you wish to disable this feature please consult "Auto
Power OFF" under the "ADVANCED OPERATION" section
on P.10.
 Loading...