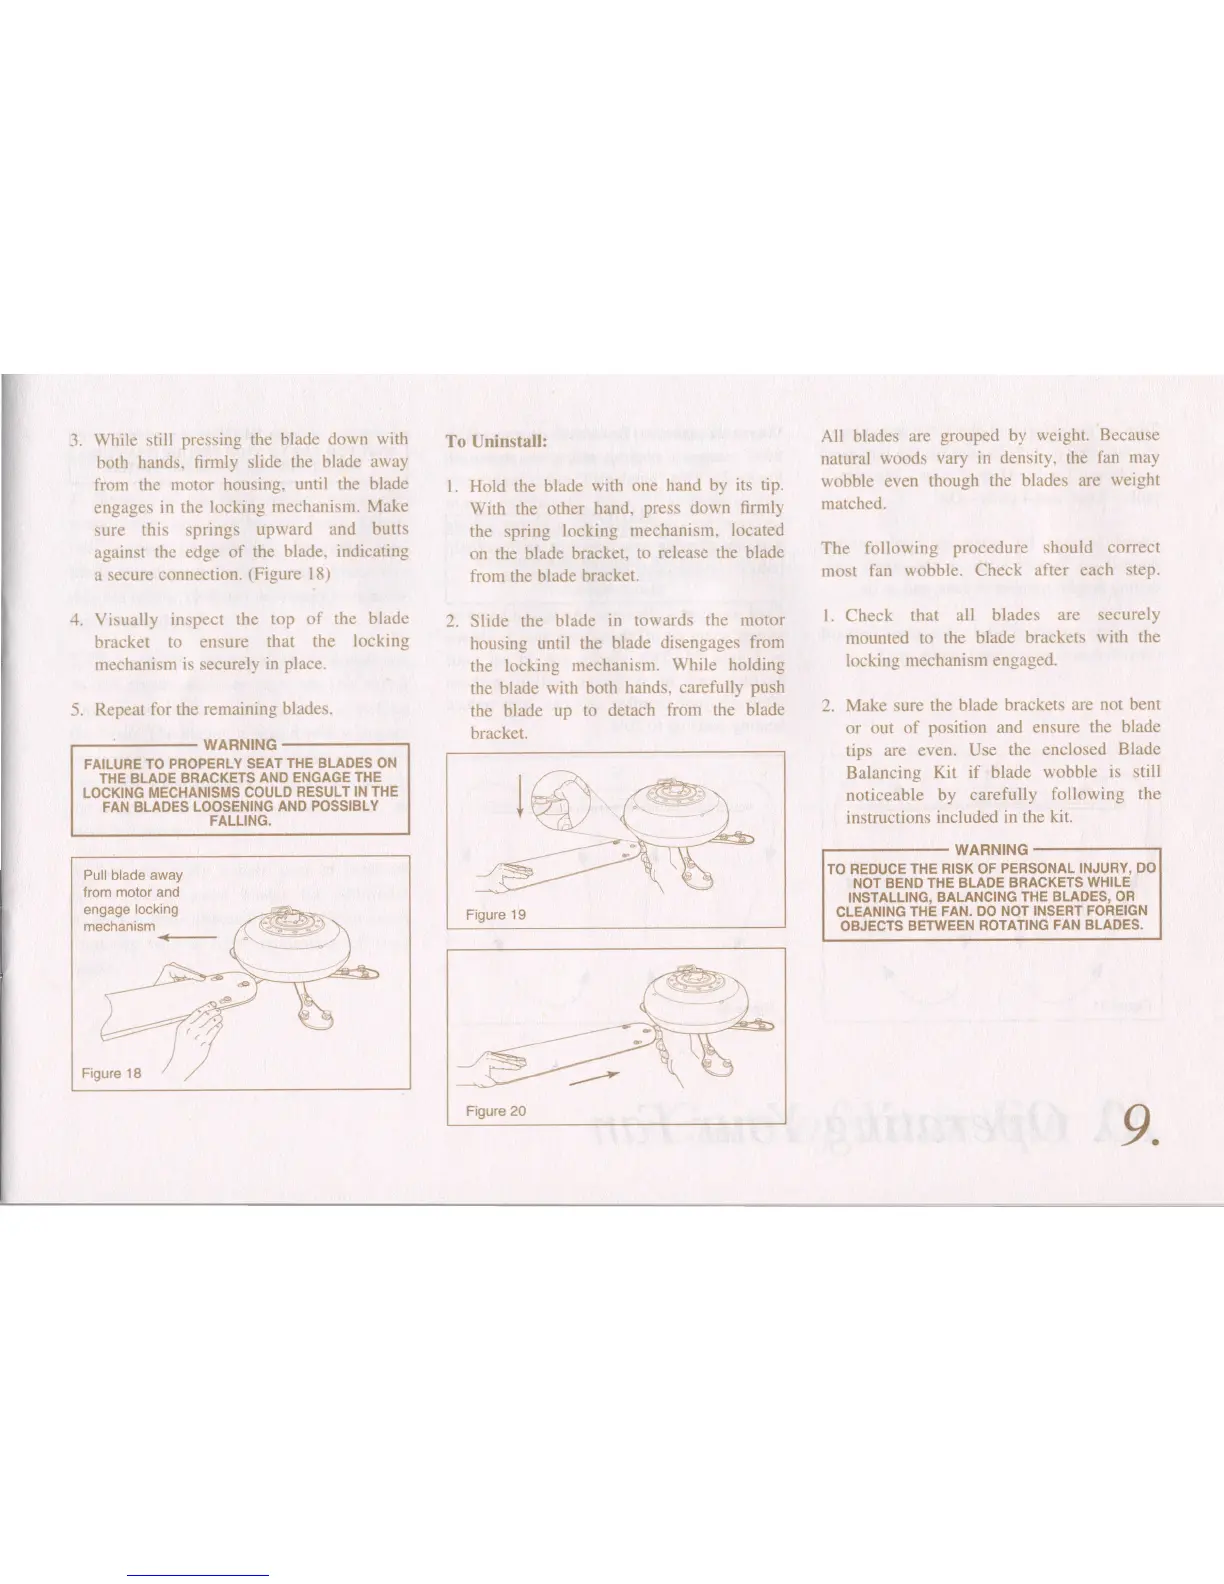
3. While still pressing the blade down with
both hands, firmly slide the blade away
from the motor housing, until the blade
engages in the locking mechanism. Make
sure this springs upward and butts
against the edge of the blade, indicating
a secure connection. (Figure 18)
4. Visually inspect the top of the blade
bracket to ensure that the locking
mechanism is securely in place.
5. Repeat for the remaining blades.
,...----''----- WARNING ------,
FAILURE TO PROPERLY SEAT THE BLADES ON
THE BLADE BRACKETS AND ENGAGE THE
LOCKING MECHANISMS COULD RESULT IN THE
FAN BLADES LOOSENING AND POSSIBLY
FALLING.
Pull blade away
from motor and
engage locking
mechanism
-
Figure 18
To Uninstall:
L. Hold the blade with one hand by its tip.
With the other hand, press down firmly
the spring locking mechanism, located
on the blade bracket, to release the blade
from the blade bracket.
2. Slide the blade in towards the motor
housing until the blade disengages from
the locking mechanism. While holding
the blade with both hands, carefully push
the blade up to detach from the blade
bracket.
All blades are grouped by weight. Because
natural woods vary in density, the fan may
wobble even though the blades are weight
matched.
The following procedure should correct
most fan wobble. Check after each step.
I. Check that all blades are securely
mounted to the blade brackets with the
locking mechanism engaged.
2. Make sure the blade brackets are not bent
or out of position and ensure the blade
tips are even. Use the enclosed Blade
Balancing Kit if blade wobble is still
noticeable by carefully following the
instructions included in the kit.
Figure 19
.------- WARNING -----.....,
TO REDUCE THE RISK OF PERSONAL INJURY, 00
NOT BEND THE BLADE BRACKETS WHILE
INSTALLING, BALANCING THE BLADES, OR
CLEANING THE FAN. 00 NOT INSERT FOREIGN
OBJECTS BETWEEN ROTATING FAN BLADES.
9.
Figure 20