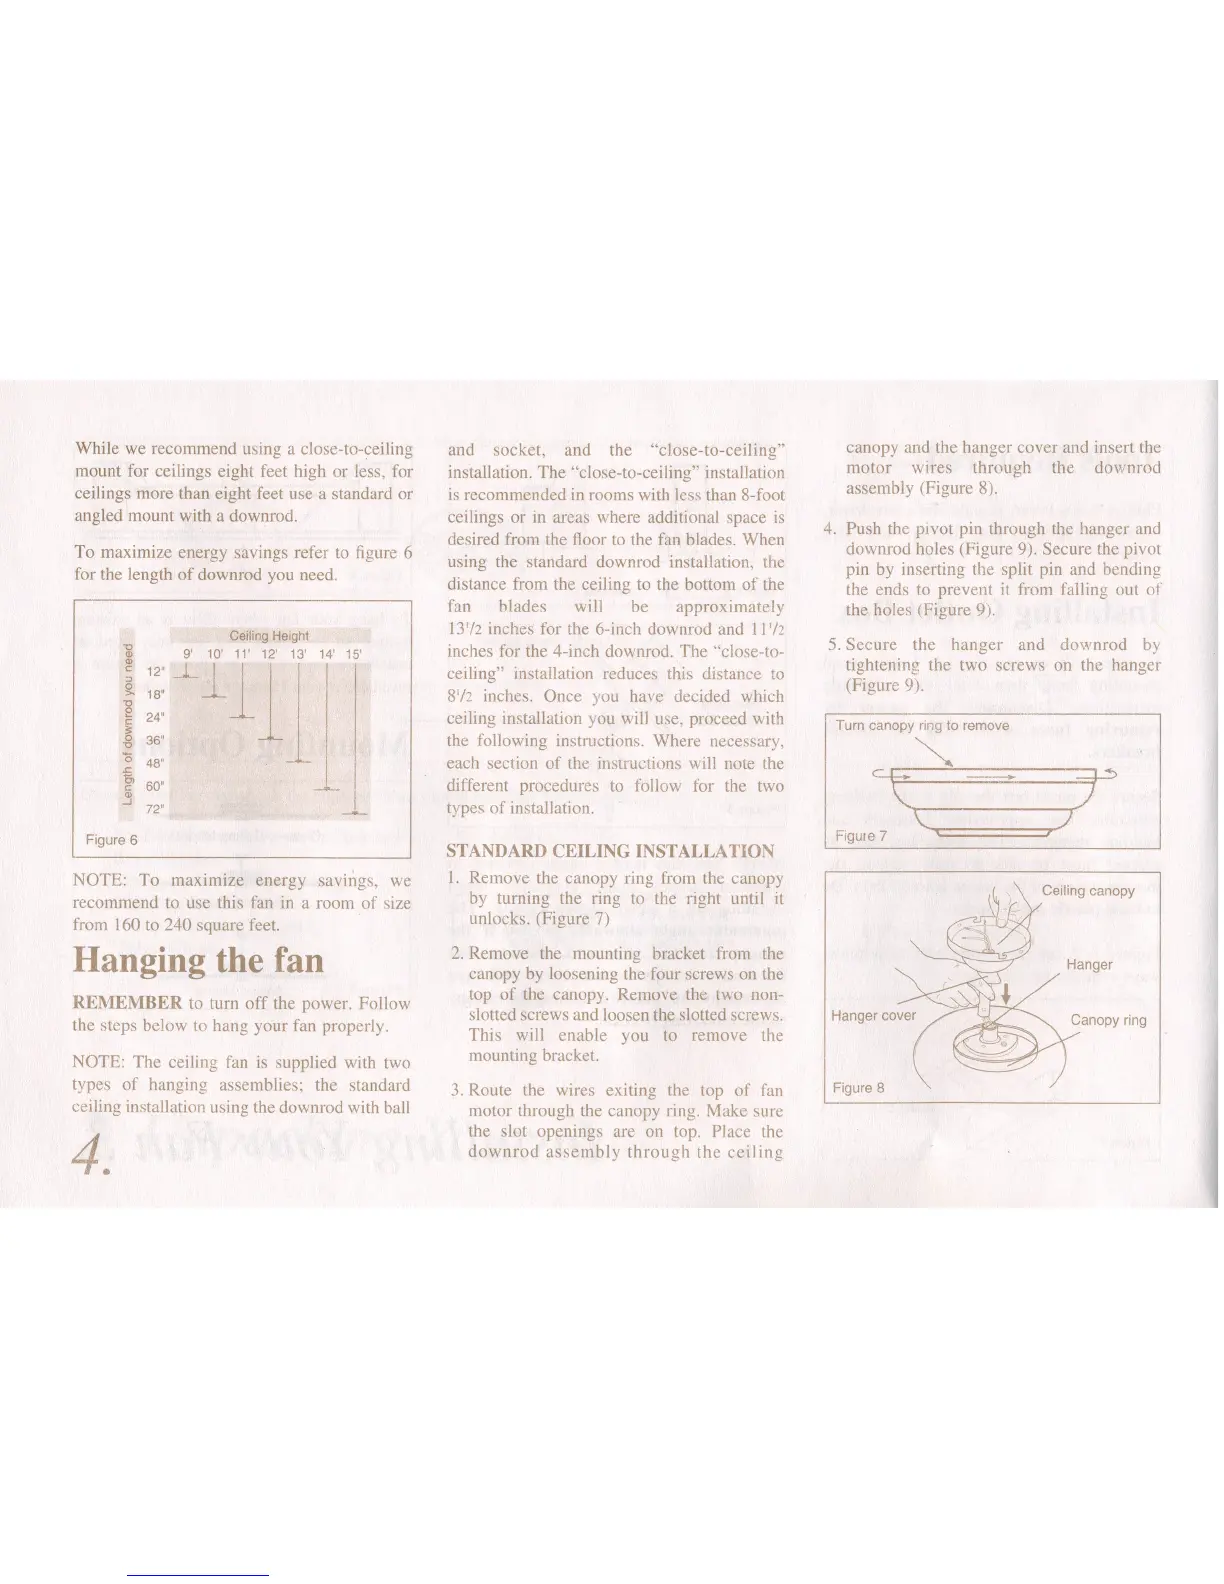
While we recommend using a close-to-ceiling
mount for ceilings eight feet high or less, for
ceilings more than eight feet use a standard or
angled mount with a downrod.
To maximize energy savings refer to figure 6
for the length of downrod you need.
Ceiling Height
"*
9' 10' 11' 12' 13' 14' 15'
i~:::
-L
111:
1
~ 24"
~ 36"
~ 48"
1
g>
60"
I
~ I
72"
Figure 6
NOTE: To maximize energy savings, we
recommend to use this fan in a room of size
from 160 to 240 square feet.
Hanging the fan
REMEMBER to turn off the power. Follow
the steps below to hang your fan properly.
NOTE: The ceiling fan is supplied with two
types of hanging assemblies; the standard
ceiling installation using the downrod with ball
4.
and socket, and the "close-to-ceiling"
installation. The "close-to-ceiling" installation
is recommended in rooms with less than 8-foot
ceilings or in areas where additional space is
desired from the floor to the fan blades. When
using the standard downrod installation, the
distance from the ceiling to the bottom of the
fan blades will be approximately
13'/2 inches for the 6-inch downrod and 11'/2
inches for the 4-inch downrod. The "close-to-
ceiling" installation reduces this distance to
8'/2 inches. Once you have decided which
ceiling installation you will use, proceed with
the following instructions. Where necessary,
each section of the instructions will note the
different procedures to follow for the two
types of installation.
STANDARD CEILING INSTALLATION
I. Remove the canopy ring from the canopy
by turning the ring to the right until it
unlocks. (Figure 7)
2. Remove the mounting bracket from the
canopy by loosening the four screws on the
top of the canopy. Remove the two non-
slotted screws and loosen the slotted screws.
This will enable you to remove the
mounting bracket.
3. Route the wires exiting the top of fan
motor through the canopy ring. Make sure
the slot openings are on top. Place the
downrod assembly through the ceiling
canopy and the hanger cover and insert the
motor wires through the downrod
assembly (Figure 8).
4. Push the Pivot pin through the hanger and
downrod holes (Figure 9). Secure the pivot
pin by inserting the split pin and bending
the ends to prevent it from falling out of
the holes (Figure 9).
5. Secure the hanger and downrod by
tightening the two screws on the hanger
(Figure 9).
Turn canopy ring to remove
-,
q:+ -;
\:::'---)-r"
Figure 7 '
Ceiling canopy
Hanger
Figure 8