EasyManua.ls Logo

HAMPTON BAY MIDILI 91100 - User Manual

HAMPTON BAY MIDILI 91100
20 pages
Print Icon
To Next Page IconTo Next Page
Loading...
USE AND CARE GUIDE
MIDILI 44 IN. CEILING FAN
Questions, problems, missing parts? Before returning to the store call
Hampton Bay Customer Service
8 a.m. - 7 p.m., EST, Monday-Friday, 9 a.m. - 6 p.m., EST, Saturday
1-855-HD-HAMPTON
HAMPTONBAY.COM
THANK YOU
We appreciate the trust and condence you have placed in Hampton Bay through the purchase of this ceiling fan. We strive to continually create
quality products designed to enhance your home. Visit us online to see our full line of products available for your home improvement needs.
Thank you for choosing Hampton Bay!
To view an instructional video on how to install this product:
1. Go to www.homedepot.com and enter either the Item or Model number, found in the top
right corner of the cover of this instruction manual, in the search eld.
2. Click on your product from the list of search results and click on the video link in the
“Product Overview” section.
Item #1002 711 156, 1002 711 135
Model #91100, 91044
UL Model #44-MDL

Questions and Answers

  • D
    djonesAug 4, 2025
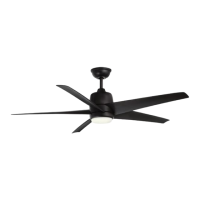
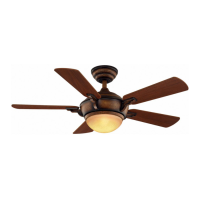
    Why won't my HAMPTON BAY MIDILI 91100 Fan start?
    • L
      Laurie TylerAug 5, 2025
      If your HAMPTON BAY Fan won't start, there are several things to check: First, check the main and branch circuit fuses or breakers. Ensure the light kit plug is connected to the motor plug. Verify the line wire connections to the fan and switch wire connections in the switch housing. Check the battery in the remote control, making sure the protective wrap has been removed and it is oriented properly. Make sure you are within the normal range of 10-20 ft. Ensure the dip switch settings are the same on the remote control and receiver. Remember to turn off the power supply before checking the dip switches settings.
  • T
    Tony TateAug 14, 2025
    What to do if HAMPTON BAY MIDILI 91100 is noisy?
    • B
      Brooke MitchellAug 14, 2025
      If your HAMPTON BAY Fan is noisy, try the following: Make sure all motor housing screws are snug. Check that the screws attaching the fan blade bracket to the motor hub are tight. Ensure the wire nut connections are not rattling against each other or the interior wall of the switch housing. Allow a 24-hour “breaking in” period, as most noises disappear during this time. If you're using a light kit, ensure the screws securing the glassware are tight and the light bulbs are secure. Confirm the canopy is a short distance from the ceiling and not touching it. Finally, ensure your outlet box is secure and rubber isolator pads were used between the mounting plate and outlet box.
  • M
    Mary SmithAug 25, 2025
    How to fix a wobbling HAMPTON BAY Fan?
    • S
      sstoneAug 26, 2025
      To address a wobbling HAMPTON BAY Fan, first check that all blade bracket screws are secure and that all the blades are fully latched into place. Unequal blade levels often cause wobble. To check this, select a point on the ceiling above the tip of one blade and measure the distance from the center of each blade to that point on the ceiling. Rotate the fan to measure each blade, ensuring any deviation is within 1/8 inch. Run the fan for ten minutes.

Summary

Safety Information

Warranty

Pre-Installation

TOOLS REQUIRED

Lists the necessary tools for installing the ceiling fan, including screwdrivers and wrenches.

HARDWARE INCLUDED

Details the specific hardware components provided with the fan for assembly and installation.

PACKAGE CONTENTS

Identifies all parts included in the fan's packaging, with descriptions and quantities.

Installation

MOUNTING OPTIONS

Explains different methods for securely mounting the ceiling fan's electrical box.

Assembly - Standard Ceiling Mount

Preparing for mounting

Describes steps for preparing the ceiling mount, including canopy ring and bracket removal.

Routing the wires

Guides on how to properly route electrical wires through the fan's downrod and canopy.

Assembling the fan

Provides instructions on assembling the fan, including downrod, hanger pin, and locking pin.

Assembly - Hanging the Fan

Attaching the mounting bracket to the outlet box

Details how to securely attach the fan's mounting bracket to the ceiling outlet box.

Hanging the fan

Explains the process of lifting and seating the fan motor assembly onto the mounting bracket.

Setting the code on the remote control and receiver

Instructs on setting matching dip switch codes for remote and receiver synchronization.

Installing the receiver

Guides on positioning and seating the fan's receiver unit within the mounting bracket.

Wiring the receiver to the household wiring

Details connecting the receiver's wires to the home's electrical supply wiring.

Wiring the fan to the receiver

Explains how to connect the fan motor wires to the receiver unit.

Wrapping the extra wire

Provides instructions on how to neatly manage and secure excess wiring under the receiver.

Mounting the fan-motor assembly

Describes how to securely mount the fan motor assembly to the ceiling bracket.

Assembly - Attaching the Fan Blades

Attaching the blades to the blade brackets

Guides on attaching fan blades to their respective blade brackets using screws.

Fastening the blades assemblies to the motor

Explains how to secure the assembled blades and brackets to the fan motor.

Assembly - Attaching the Lights

Attaching the light kit fitter assembly

Details how to attach the light kit fitter assembly to the fan motor housing.

Installing the bulbs and attaching the glass bowl

Provides instructions for installing light bulbs and securing the glass bowl to the light kit.

Operation

OPERATING YOUR FAN

Explains how to use the fan's remote control for speed, direction, and light functions.

USING THE REMOTE CONTROL

Details the buttons and functions of the remote control for operating the fan.

Care and Cleaning

Troubleshooting

HAMPTON BAY MIDILI 91100 Specifications

General IconGeneral
TypeCeiling Fan
Motor TypeAC
Control TypeRemote Control
FinishBrushed Nickel
Light TypeLED
Mounting TypeDownrod Mount
Light Kit IncludedYes
WarrantyLimited Lifetime
Blade Span52 inches
Light KitIncluded
Motor Speed3
StyleModern

Related product manuals