28
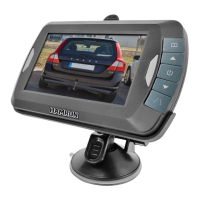
POWER SWITCH BUTTON
Press the power switch to switch on the
power to the monitor. The image is shown
automatically when the reverse gear is
engaged (if the camera and monitor are paired
in accordance with the instructions).
When the monitor receives an image signal
the blue status light goes on. If the power
supply to the monitor is switched on but there
is no image signal the blue status light will
ash. When the power supply to the monitor is
switched o the blue status light goes o and
no image is shown.
Menu button
Press the menu button to go to the menu,
which shows: image settings, image
orientation, pairing (PAIR) and product
information (i).
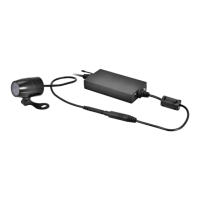
DIGITAL REVERSING CAMERA
Go to the required menu with the arrow
buttons and conrm the choice with the
power switch button.
FIG. 12
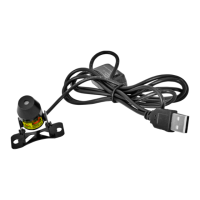
Pairing (PAIR)
Go to the pairing icon (PAIR) with the arrow
buttons and press the power switch. Afterwards
press the rubber button underneath the
camera and keep it pressed until the signal
is received and the message OK is shown on
the monitor. The pairing is now ready and
the camera and monitor handle the pairing
automatically when used again. Press the
menu button to exit the menu. The menu will
switch o automatically after 30 seconds if no
button is pressed.
– Do not mount in direct sunlight and
protect the suction cup from direct
sunlight for the rst 24 hours after
mounting.
NOTE:
In very bright conditions it can take a few
seconds for the image on the monitor to
stabilise. Wait until the image has stabilised
before reversing.
TESTING THE INSTALLATION
1. Reconnect the negative lead to the
battery, if this has not already been done.
2. Turn the ignition key to garage mode.
Do not start the engine.
3. Apply the parking brake and engage
reverse gear.
4. After testing and routing the cable should
be installed permanently.
5. Route all cables behind the interior panels
or under the oor mats. Wind together
surplus length of cable and x with the
supplied cable ties.
USE
Before using for the rst time the monitor and
camera must be paired, see “Pairing” section
below.
The monitor is controlled with 5 buttons:
1. Menu button
2. Arrow button
3. Power switch
4. Arrow button
5. Help line button
FIG. 11