1.2 | Table of Contents www.HandiQuilter.com
Table of Contents
1. Table of Conents ..................................................................................1.2
2. Important Safety Instrucons .............................................................2.1
3. Installaon Instrucons ......................................................................3.1
Congratulaons on your HQ Pro-Stcher® purchase .................................................................. 3.1
Grounding ............................................................................................................................... 3.2
Parts List .................................................................................................................................. 3.2
Installaon (HQ Fusion and HQ Avanté)
...................................................................................... 3.5
Installaon of the X-Rack and Y-Rack .......................................................................................... 3.5
To install the X-Rack
............................................................................................................ 3.5
To install the Y-Rack
............................................................................................................ 3.7
Y-encoder circuit board replacement
.......................................................................................... 3.8
To replace the Y-encoder
.................................................................................................... 3.9
To set up the HQ Pro-Stcher carriage
............................................................................. 3.10
To aach the tablet computer .......................................................................................... 3.13
Installaon (HQ Sixteen and HQ
18
Avanté with 4-wheel carriage)............................................. 3.16
Set frame height ........................................................................................................................ 3.16
If you have a Portable Professional Frame ....................................................................... 3.16
If you have an HQ Studio Frame
....................................................................................... 3.17
Installaon of the X-Rack and Y-Rack ........................................................................................ 3.17
To install the X-Rack
.......................................................................................................... 3.17
To install the Y-Rack .......................................................................................................... 3.19
Y-Encoder Assembly Installaon (HQ Sixteen only) ................................................................... 3.20
Install the power cord retaining clamp (HQ Sixteen only)
......................................................... 3.21
C-Pod Replacement (HQ Sixteen only) ...................................................................................... 3.22
Set Up the New Carriage
........................................................................................................... 3.23
To turn on and shut down HQ Pro-Stcher ............................................................................... 3.29
To turn on HQ Pro-Stcher ............................................................................................... 3.29
To shut down HQ Pro-Stcher
.......................................................................................... 3.29
Geng started with HQ Pro-Stcher ........................................................................................ 3.30
To move the quilng machine aer the soware has been loaded
................................. 3.30
To use the USB ash drive ................................................................................................ 3.30
To use an external keyboard ............................................................................................ 3.31
4. HQ Pro-Stcher® Overview ..................................................................4.1
Handlebar control ....................................................................................................................... 4.1
Enable or disable the carriage motors
.................................................................................... 4.2
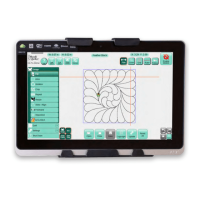
Overview of the HQ Pro-Stcher screen
..................................................................................... 4.2
Menu opons
.......................................................................................................................... 4.2
Panel buons .......................................................................................................................... 4.3
Work Area.................................................................................................................................... 4.3
Selected vs. non-selected buons .......................................................................................... 4.4
Gray buons
........................................................................................................................... 4.4
Top toolbar buons
..................................................................................................................... 4.4
To get on-screen help ......................................................................................................... 4.5
 Loading...