40
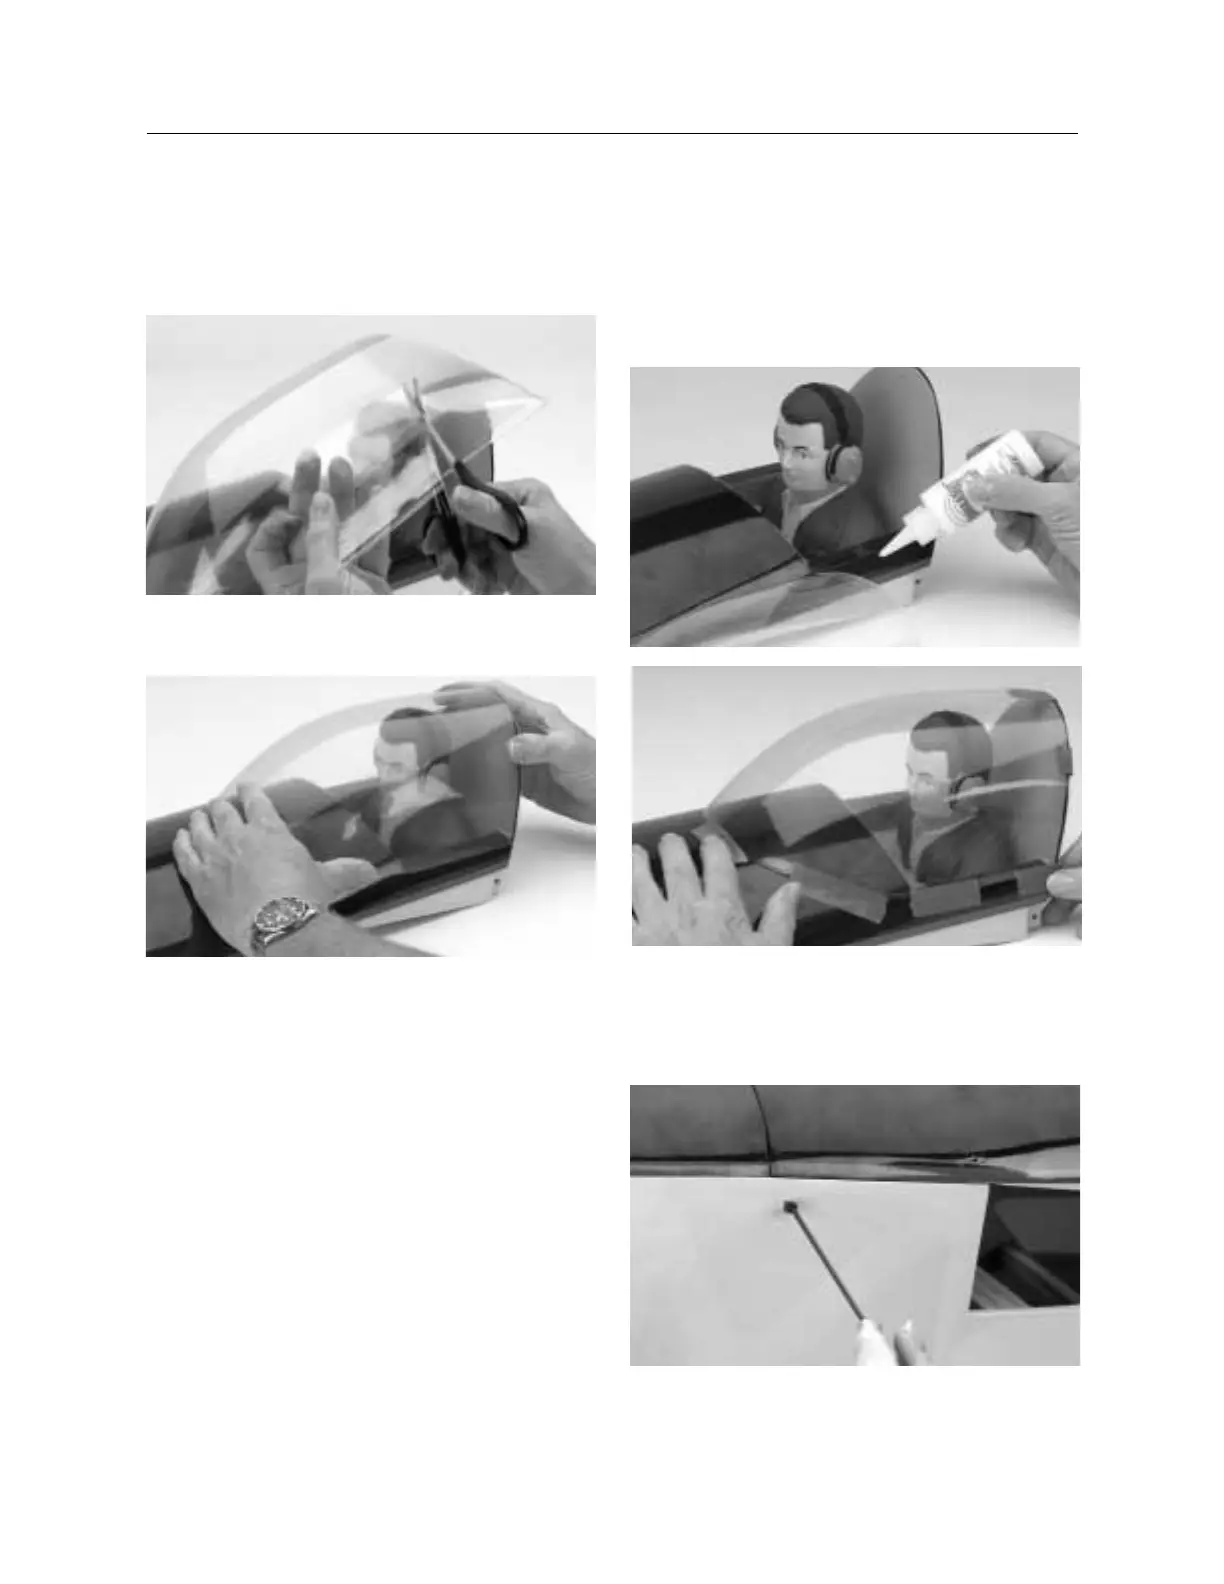
Step 5. Locate the canopy and note the trim lines. Carefully
trim out the canopy using Lexan
®
scissors or regular scissors.
Use care in cutting out the canopy.
Step 6. After cutting out the canopy, trial fit it to the hatch. Trim
as necessary to make a proper fit.
Step 7. After confirming the fit of the canopy to the hatch, attach
it to the hatch using canopy glue such as Pacer 560. Masking
tape can be used to hold the canopy in place while the glue dries.
Allow the canopy glue to dry at least 24 hours. Trim tape for the
canopy can be applied now. (Blue trim strips are provided.)
Step 8. With the instrument panel, pilot (optional), and canopy
mounted to the hatch, slide the hatch into the fuselage. Carefully
screw in the four 4-40 cap screws and washers until the hatch is
snug. Do not overtighten; the fuselage covering will be marred.
Section 17. Mounting the Hatch (with/canopy)
CONTINUED
 Loading...