Setup/Installation
18
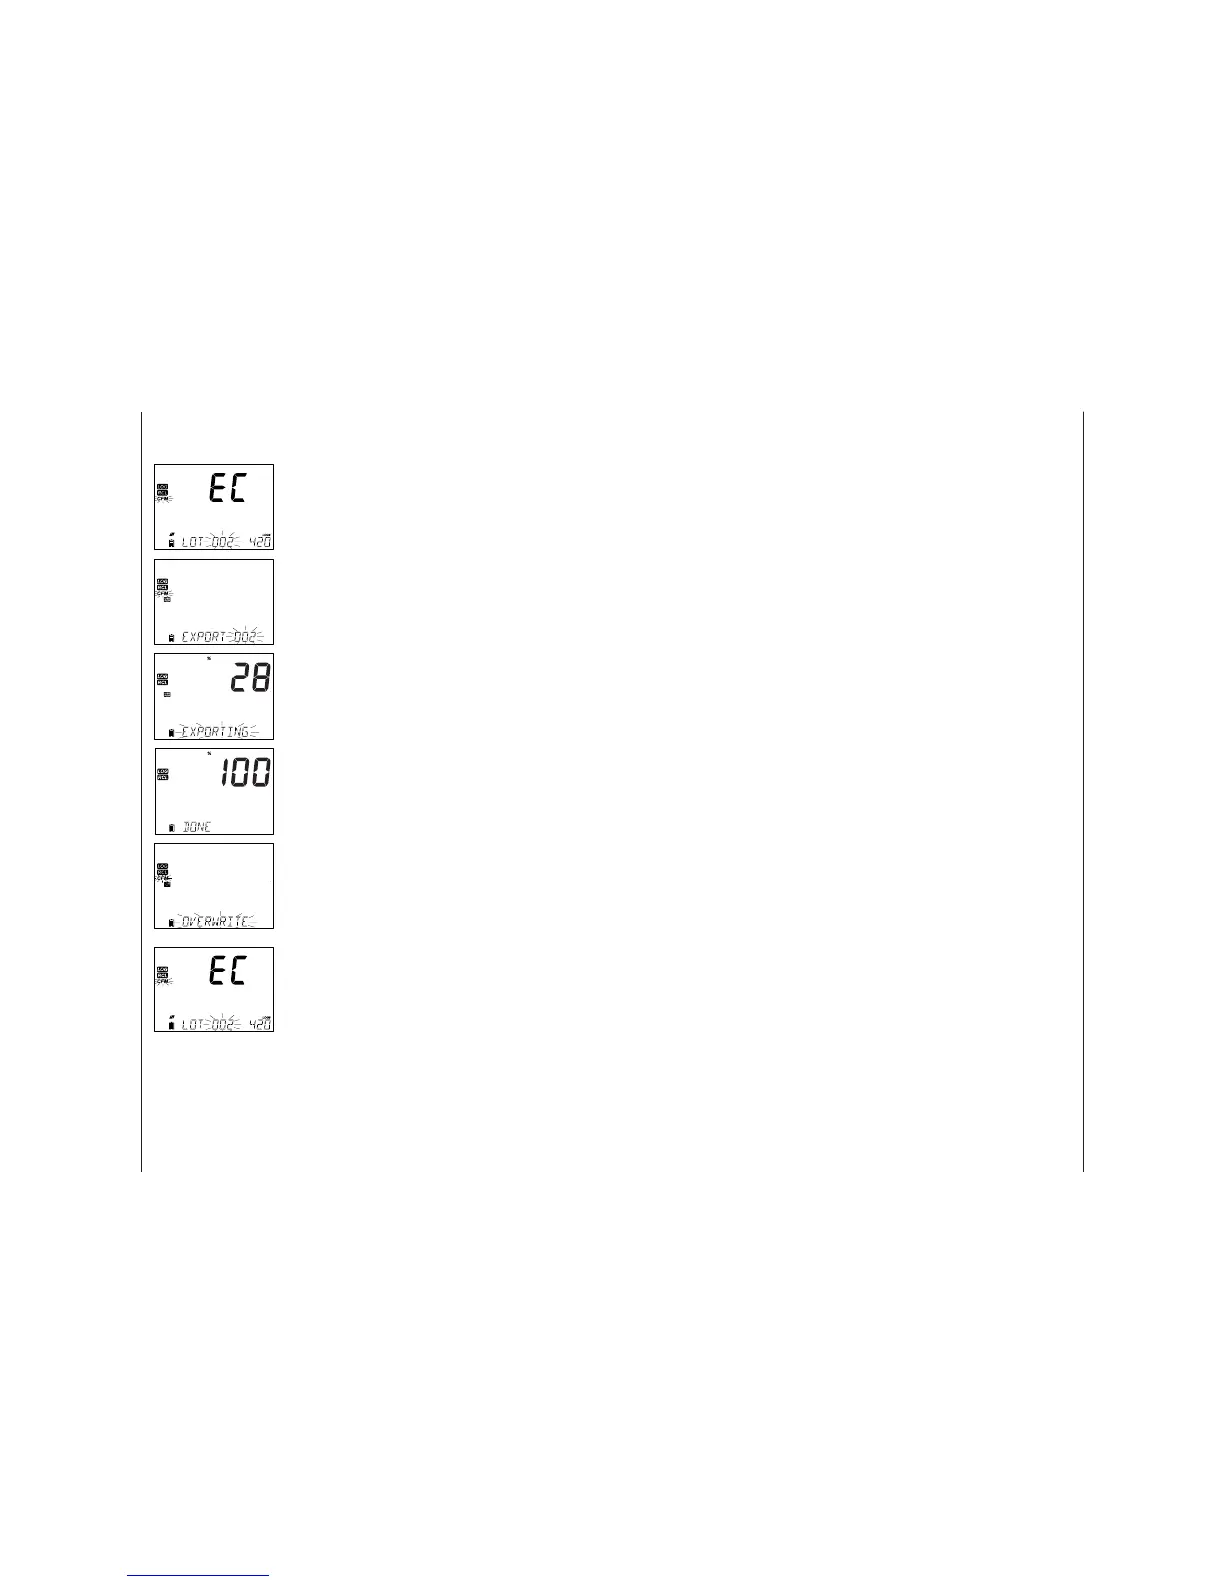
Logged data on edge
EC
® can be transferred from the meter to a USB ash drive
by using the log recall function. The minimum requirement for the drive is USB
2.0. Select the EC record you wish to export and follow the simple steps below.
Connect USB ash drive to the USB port, located on
the top of the meter. Press the RCL key. Press the CFM
key. Select Manual, Stability, or interval lots by using
the pq keys. Press the LOG key (not CFM). The “USB
HOST” tag should come on.
“PLEASE WAIT” message appears followed by
“EXPORT”. Press CFM to export the selected record or
lot. If CFM is not pressed within 10 seconds, the USB
host will become inactive.
The meter will display the percentage of export.
The export percentage should go to 100%. Remove
USB ash drive.
If the selected le is already saved on the ash drive,
edge
EC
® will ask for con rmation of overwriting the
existing le. The message “OVERWRITE’ and “CFM”
tag will blink. Press CFM for overwriting the existing
le or CAL to exit without exporting.
After exporting the display will return to the
selected le. Press the RCL key twice to return to
measurements.
Note: Do not remove USB ash drive during an active export transfer.
PC & Storage
Interface
Operational Guide 23
6. Press CFM. The message “MANUAL CALIBRATION CLEARS PREVIOUS
CALIBRATIONS” will be displayed on the third line LCD. “CAL” and “CFM” tags
will blink. Press CFM to con rm the manual calibration.
Note: GLP will display “Manual” for a standard. Using this calibration technique
will erase any previous calibrations done in CAL. Log les will indicate “MANUAL”
as standard.
User Selectable EC/TDS Range (Not Available In Basic Mode)
The EC and TDS measurements may be con gured in SETUP as AUTO (meaning
auto ranging, the measurement automatically nds the correct conductivity
or TDS unit and resolution), or it may be con gured with a user-selected
measurement range and resolution (if you know ahead of time where your
samples will fall). If AUTO is selected, the meter will select the scale with
the highest possible resolution, but may change in the middle of a series of
measurements changing units and displayed resolution.
Note: The selected range is only active during measurements. Auto ranging is
used during calibration. If a xed range is selected and during measurement
goes beyond the range limits, the full scale value of that range will ash on the
display. All log data in the CSV les will be displayed in uS/cm.
General Guidelines
Calibrate the instrument frequently, especially if high accuracy is required.
The instrument should be recalibrated:
• Whenever the EC probe is replaced.
• At least once a week.
• After testing aggressive chemicals.
• If “CAL DUE” is displayed on the third LCD line.
Every time you calibrate the instrument use fresh standard and perform
electrode maintenance as required. It is recommended to choose a calibration
standard that is close to the sample.
Preparation
Pour small quantities of the standard solutions into a beaker. If possible, use a
plastic beaker to minimize any EMC interferences. For accurate calibration and to
minimize cross-contamination, use two beakers for the standard solution; one
for rinsing the probe and one for calibration.
Procedure
Select standard to be used for calibration. 0.00 μS (probe in air) may be used for
an o set calibration. This should be done rst. Hanna Conductivity standards
are available at 84 μS/cm, 1413 μS/cm, 5.00 mS/cm, 12.88 mS/cm, 80.0 mS/cm,
111.8 mS/cm and are used for the cell factor calibration.
Rinse the probe with calibration solution or deionized water. Shake o excess
solution. Submerse the probe in the calibration solution. The sleeve holes must
be completely submersed. If possible, center the probe in the beaker away from
the bottom or beaker walls.
Raise and lower the probe to re ll the center cavity and tap the probe repeatedly
to remove any air bubbles that may be trapped inside the sleeve.
EC Meter
Con guration
EC/TDS
Calibration
 Loading...