The oven
Page GB-19
Special preparation
information for yeast dough
1. Pre-heat the oven to 50°C.
2. Switch the oven off when the temperature
has been reached.
3. Place the baking dish with the yeast
dough in the cooking compartment. If the
baking dish does not fit into the cooking
compartment, you can remove the tel-
escopic rails and place the baking dish
directly on the bottom of the cooking com-
partment.
4. Close the oven door and leave the yeast
dough in the oven for the desired time
without further heating.
NOTICE
Pent-up heat can damage the oven’s
enamel.
■ If you wish to place dishes directly
on the bottom of the cooking com-
partment, the oven temperature
must not exceed 50°C.
■ Be careful when handling cook-
ware – the enamel can be easily
scratched.
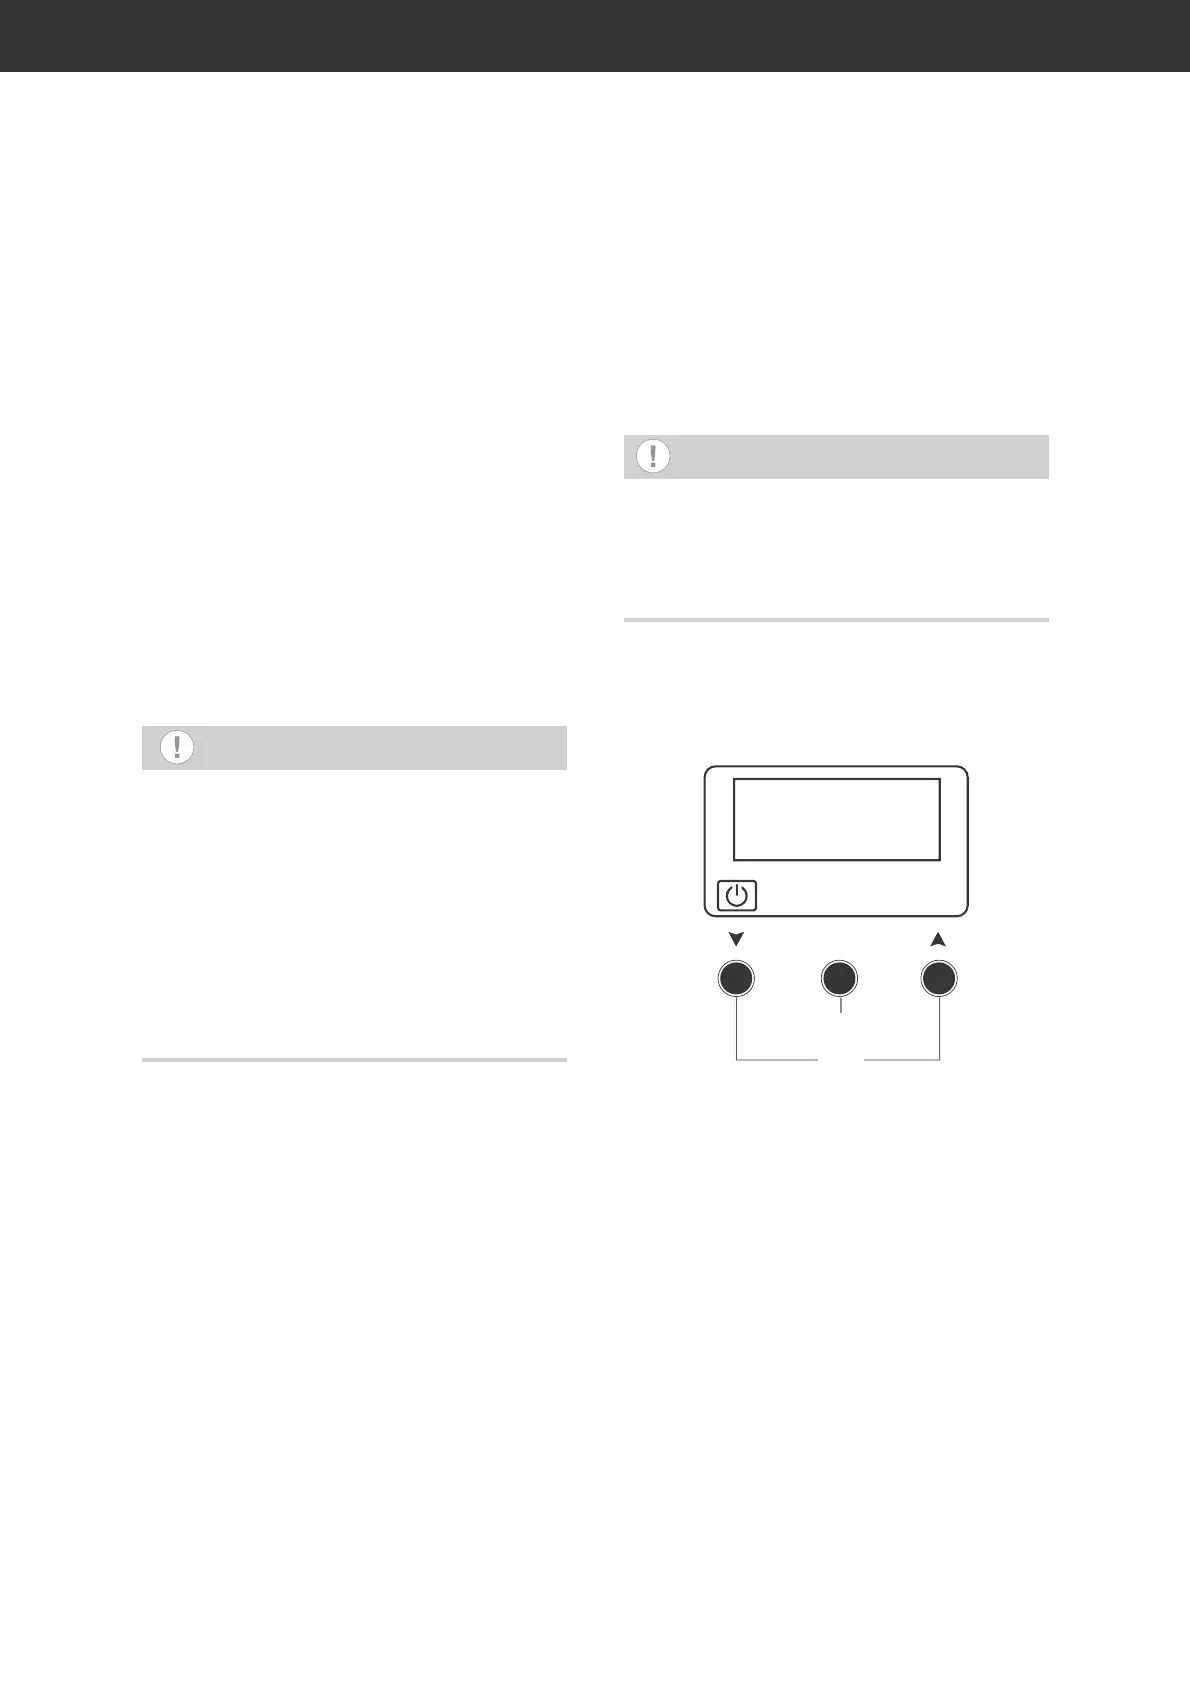
Clock
Your oven is equipped with an electronic clock
that can also be used as a timer to switch the
oven on and off.
NOTICE
Quickly set the clock. If you do not touch a
button for five seconds, the operation shall
be cancelled. If this happens, press the two
arrow buttons (18) at the same time to start
over again.
Setting the time
The oven’s timer functions can only be used
if the time is set correctly.
12:00
(17)
(18)
The oven’s clock will flash during initial set-up
or after a power failure. In this case, you can
immediately set the clock.
If you want to change the time already set,
for example, changing from daylight savings
time to standard time, press the two arrow
buttons (18) at the same time.
The oven’s clock will then flash.
1. Use the arrow buttons (18) to set the hour
for the current time. To go up/down quick-
ly, press the appropriate arrow button.
2. Press the OK button (17) to confirm the
setting.
The minute display will flash.
3. Use the arrow buttons (18) to set the
minutes for the current time. To go up/
down quickly, press the appropriate arrow
button.