Page EN-32 Installation, connection and initial commissioning
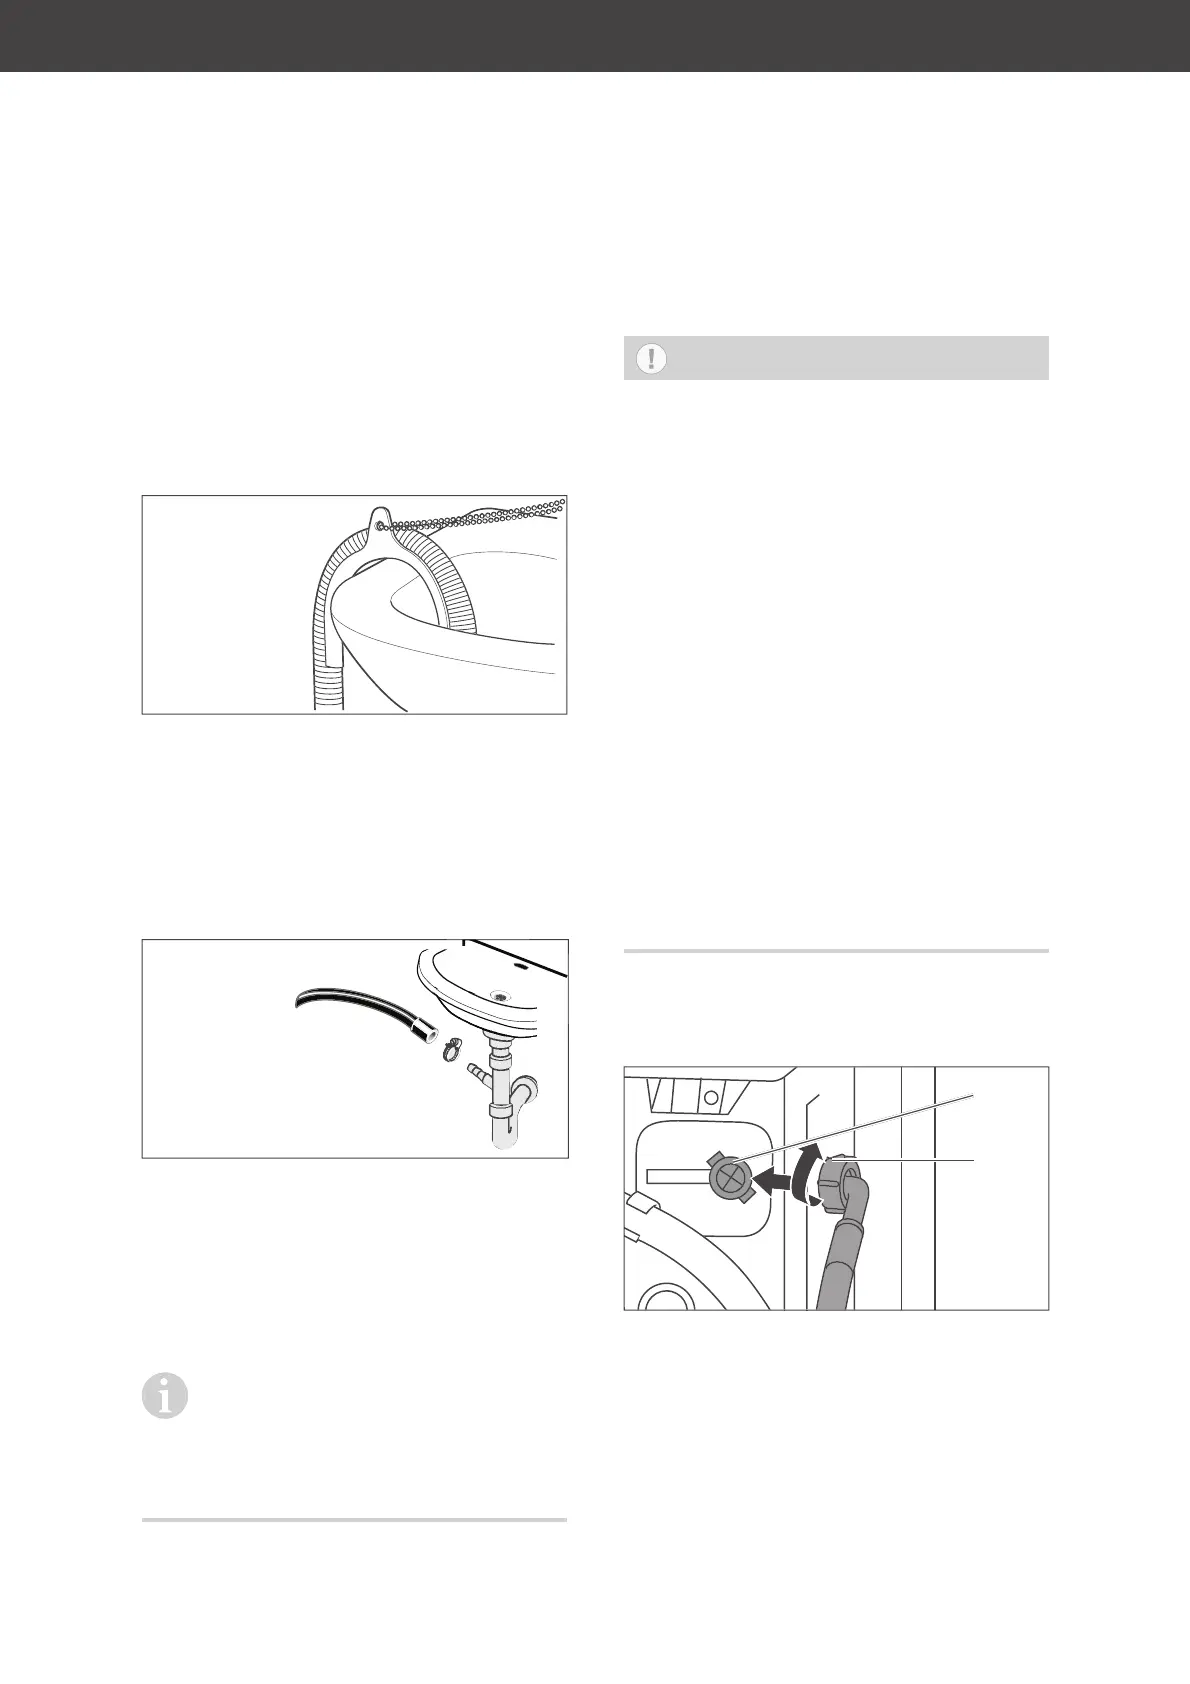
You can fit the outlet hose in two ways:
– Attaching with hose holder over the edge
of a bathtub or washbasin
– Attaching the discharge manifold to a
washbasin.
Attaching with a hose holder
• Put the end of the water outlet hose (20) over
a hose holder and hang it over the edge of
a bath or a washbasin. You can find a hose
holder in a specialist shop or DIY store.
Attaching the discharge manifold to a
washbasin
• The water outlet hose (20) is mounted
onto a special device, which can be found
on the outlet manifold of a washbasin. In
doing so the lock on the siphon must be
removed.
Have this fixed by a specialist!
There is a washer in an unused connec-
tion manifold to ensure that no water
can run out. This washer must be replaced by
a seal ring before connecting the water outlet
hose.
Establish the water supply
NOTICE
Risk of damage to property!
Improper handling of the appliance
may result in damage.
■ Only use the hose set delivered with
the appliance to connect to the water
supply. Do not use old hoses.
ATTENTION: Do not connect to the
hot water supply.
Only connect the appliance to a wa-
ter supply with an inlet water pressure
between 0.1 MPa and 1.0 MPa (1.0
to 10.0 bar). For higher water pres-
sure, a pressure regulator needs to
be arranged. Enquire about the water
pressure with the water authority.
Do not use a pipe wrench to screw
down the union nuts on the valve.
This can damage the union nuts.
For the water supply, you will need a valve
with a ¾ inch screw connection.
(19)
(32)
1. Screw the enclosed water inlet hose onto
the connection (19) by hand. To do so,
turn the union nut (32) clockwise.