Preparing the Camera
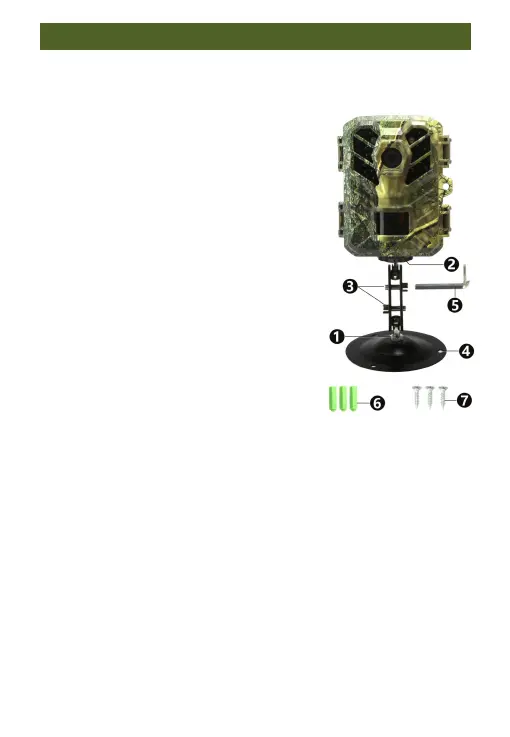
2.3. Using the wall mount/bracket
The camera can also be securely attached
to walls or ceilings by using the included
wall mount. Installing the wall mount
ensures that all existing bolts are
securely tightened.
1. 1/4“Screw
2.Counter screw/Lock nut
3.Pivot bolt
4.Drilled holes
5.Hexagonal screw
6.Plastic expansion tube/Wall plugs
7.Long screw of metal bracket
Required tools
■ Drill
■ 6 mm masonry/concrete drill bit
■ Phillips head screwdriver
Notice:
■ Ensure that there are no electric lines, water, or heating pipes