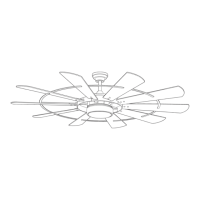
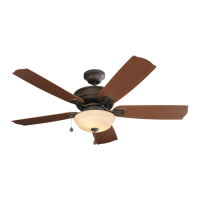
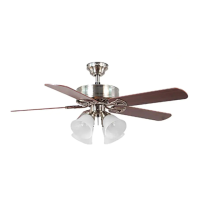
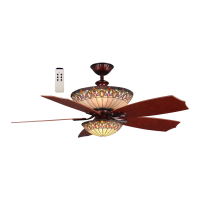
This document is a user manual for the Henderson LED Ceiling Fan, models EUK60MBK10LR and EUK60GV10LR, manufactured by Harbor Breeze.
Function Description
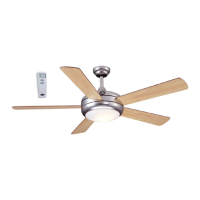
The Henderson LED Ceiling Fan is designed to provide air circulation and illumination in residential settings. It features a DC motor for quiet operation and includes an integrated LED light kit. The fan is controlled via a remote control transmitter, allowing users to adjust fan speed, light settings, and access special modes like "Breeze" and "Vacation." It supports both standard and angle mounting, but not close-mount installation.
Important Technical Specifications
- Model Numbers: EUK60MBK10LR, EUK60GV10LR
- Net Weight: 29 lbs.
- Minimum Clearance (Blades to Floor): 7 ft.
- Minimum Clearance (Blades to Obstruction): 30 in. from the end of the blades
- Ceiling Angle for Angle Mount: Not steeper than 19°
- Outlet Box Support: Must be marked "ACCEPTABLE FOR FAN SUPPORT OF 35 LBS. OR LESS" and securely attached to the building structure. A METAL octagonal outlet box is required; plastic outlet boxes are not suitable.
- Electrical Rating: 120V / 60 Hz
- Motor Amps (MAX): 1.25 MAX
- Total Wattage (LEDs): 18 watts (LEDs are not replaceable by the user)
- Dimmability: Dimmable to 10%
- Remote Control Batteries: 2 x AAA batteries (non-rechargeable)
- Safety Cable: MUST be installed with the fan.
- Wire Connectors: Designed to accept one 12-gauge house wire and two lead wires from the fan. Consult an electrician if house wire is larger than 12-gauge or if there is more than one house wire to connect.
Usage Features
The fan offers a range of features for user convenience and comfort:
- Remote Control Operation: The fan is operated using a remote control transmitter.
- Fan Speed Control: Six fan speeds (1 lowest, 6 highest) are available.
- Reverse Function: Allows changing blade direction (fan must be on low speed before reversing).
- Timer Mode: Set the fan to run for 1 hour, 4 hours, or 8 hours.
- Dimmer Mode: Press and hold to dim the integrated LED light.
- Color Mode: Change/select light color from options including soft white, warm white, cool white, daylight, and cool daylight.
- Breeze Mode: Fan automatically cycles through all 6 different speeds.
- Vacation Mode: Light kit switches on for 5 minutes every 2 hours.
- DC Motor: Ensures quiet operation. The DC motor will not operate until the blades are installed.
- Mounting Options: Supports standard mount and angle mount (for ceilings not steeper than 19°). A longer downrod (not included) may be necessary for taller or angled ceilings to ensure proper blade clearance.
- Safety Cable: An integrated safety cable is provided and must be secured to a wood ceiling joist for added safety.
Important Usage Notes:
- Do NOT use power tools to assemble any part of the fan, especially the blades, as overtightening can cause them to crack or break.
- Do NOT use a full range dimmer switch to control fan speed, as this will cause a loud humming noise and poses a risk of fire or electrical shock.
- The remote control transmitter can be programmed to multiple receivers or fans. To avoid this, turn off the wall switch to other programmable receivers or fans during synchronization.
- Synchronizing the remote control with the fan motor requires pressing and holding the ON/OFF button on the remote for 5 seconds within 30 seconds of powering on the fan.
- Ensure correct battery polarity when installing AAA batteries in the remote control.
- Keep small parts and batteries away from children due to choking/ingestion hazards.
- Do NOT mix old and new batteries, or different types of batteries (alkaline, standard, rechargeable).
- Remove batteries with low or no charge and dispose of them properly.
- Do NOT dispose of batteries in fire; they may explode or leak. Consult local recycling/hazardous waste coordinators for proper disposal.
Maintenance Features
Regular maintenance is recommended to ensure optimal performance and longevity of the fan:
- Semi-Annual Check: At least twice a year, lower the canopy to check the downrod assembly and tighten all screws on the fan.
- Cleaning Motor Assembly: Clean the motor assembly with only a soft brush or lint-free cloth to avoid scratching the finish.
- Cleaning Blades: Clean the blades with a lint-free cloth. A light coat of furniture polish can be applied to wood blades for added protection.
- Power Disconnection: ALWAYS shut off the main power supply before beginning any maintenance.
- Cleaning Restrictions: Do NOT use water or a damp cloth to clean the ceiling fan.
- LEDs: The integrated LEDs are not user-replaceable. Do NOT attempt to replace them.
- LED Component Tampering: Do NOT tamper with or attempt to repair the LED component. If servicing is required, contact customer service.
Troubleshooting
The manual provides a troubleshooting guide for common issues:
- Fan does not move:
- Check power supply (fuse/breaker).
- Verify wire connections.
- Resynchronize remote control (learning code process).
- Ensure blades are installed.
- Noisy operation:
- Tighten blade screws.
- Replace cracked blades.
- Replace full range dimmer switch with an approved speed control device.
- Allow for a "break-in" period for new fans, especially at medium/high speeds.
- Excessive wobbling:
- Tighten blade screws/washers.
- Switch blades from opposite sides to balance.
- Verify mounting bracket is secure by loosening canopy.
- Use a longer downrod or move the fan if too close to a vaulted ceiling.
- Tighten set screws on motor assembly yoke.
- Tighten set screw on hanging ball.
- Fan operates but light fails:
- Check wires in canopy and re-wire if necessary.
- Ensure wall switch to fan is on.
Note: A small amount of "wobble" is considered normal and not a defect.
The manufacturer provides a Limited Lifetime Warranty:
- Fan Motor: Warranted against defects in workmanship and material for the life of the product.
- All Other Ceiling Fan Parts (excluding motor and parts with glass): Warranted against defects in workmanship and material for one year from the date of purchase by the original purchaser.
- Glass Parts and Finishes: Not warranted.
- Purchaser Responsibility: Costs of removing and reinstalling the product are the purchaser's responsibility.
- Exclusions: Damage from ordinary wear and tear, accident, misuse, improper installation, or service by a non-licensed electrician voids the warranty.
- Manufacturer's Sole Responsibility: To repair or replace the defective motor, parts, or product.
- Limitations: Manufacturer is not liable for incidental or consequential damages. Some states may not allow this limitation.
- Voided Warranty: If the original purchaser ceases to own the fan, the warranty is voided.
- Replacement: Manufacturer agrees to replace defective parts without charge, or at its option, replace the ceiling fan with a comparable or superior model.
- Disclaimer: All other express and implied warranties, including fitness for a particular purpose and merchantability, are disclaimed (unless prohibited by state law).
Customer Support
For questions, problems, or missing parts, contact customer service at 888-251-1003 (8 a.m. - 8 p.m., EST, Monday - Sunday) or email ascs@lowes.com.