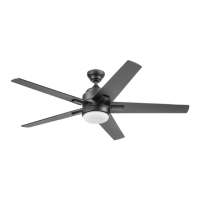
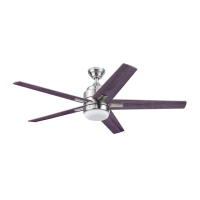
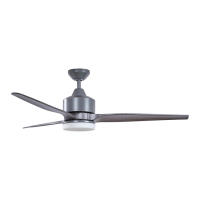
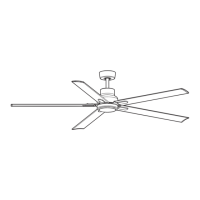
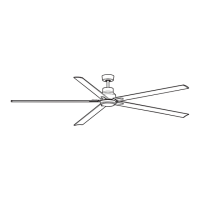
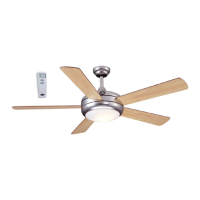
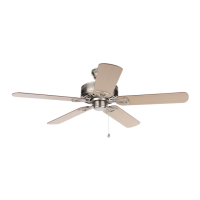
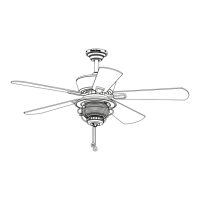
This document describes the Flanagan Ceiling Fan, Model #42461, an indoor ceiling fan designed for residential use. The fan is manufactured by Harbor Breeze.
Function Description
The Flanagan Ceiling Fan is designed to provide air circulation and illumination in a room. It features a motor assembly, five blades, and a light kit with a glass bowl. The fan's operation, including speed control and light functions, is managed via a remote control. It offers multiple fan speeds (high, medium, low), a variable breeze mode that simulates natural airflow, and a Home Shield™ mode that simulates occupancy by randomly turning the light on and off. The light kit provides illumination and can be dimmed (for dimmable bulbs only) using the remote control. A "Light Delay" feature keeps the light on for 60 seconds after activation, allowing for safe exit from a room. The fan also includes a reverse switch, enabling it to function in both warmer weather (downward airflow for a wind chill effect) and cooler weather (upward airflow to help move hot air off the ceiling).
Usage Features
The fan can be installed using either a standard mounting method, suitable for ceilings 8 ft. or higher, or an angle mounting method for angled or vaulted ceilings (up to 16°). A longer downrod may be required for taller or angled ceilings to ensure proper blade clearance. The fan blades must maintain a minimum clearance of 7 ft. from the floor and 30 in. from any obstructions.
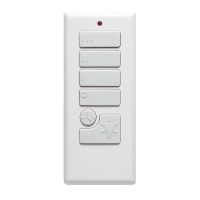
The remote control is the primary interface for operating the fan and light. It includes buttons for:
- Fan Off: Turns the fan power off.
- Light On/Off: Turns the light on and off, and can be pressed and held to dim or brighten the lights (if dimmable bulbs are used).
- High Speed: Activates the fan at high speed.
- Light Delay: Keeps the light on for 60 seconds after activation.
- Medium Speed: Activates the fan at medium speed.
- Variable Breeze: Simulates a natural breeze.
- Low Speed: Activates the fan at low speed.
- Home Shield™: Simulates occupancy by randomly turning the light on and off.
The remote control also features an LED indicator that illuminates when any button is pressed. A "LEARN" button, located in the battery compartment, is used to sync the remote with the fan's receiver.
The fan's reverse switch allows for seasonal adjustments:
- Warmer Weather (Sun Icon): Pushing the switch to the left creates downward airflow, producing a wind chill effect.
- Cooler Weather (Snowflake Icon): Pushing the switch to the right creates upward airflow, helping to move hot air off the ceiling.
It is important to ensure the fan is stopped before moving the reverse switch and that the switch is fully engaged in either the left or right position for correct operation.
Maintenance Features
Regular maintenance is recommended to ensure the fan's longevity and performance:
- Semi-Annual Check: At least twice a year, the canopy should be lowered to check the downrod assembly, and all screws on the fan should be tightened.
- Cleaning: The motor housing should be cleaned with a soft brush or lint-free cloth to prevent scratching the finish. The blades should also be cleaned with a lint-free cloth. It is crucial to avoid using water or a damp cloth to clean the ceiling fan.
- Battery Replacement: The remote control uses CR2032 lithium batteries. Exhausted batteries must be removed, and non-rechargeable batteries should not be recharged. Batteries should not be disposed of in fire due to explosion or leakage risks. If the LED indicator on the remote does not illuminate when a button is pressed, the batteries should be replaced.
- Power Disconnection: Before performing any maintenance tasks, the main power supply to the fan must be shut off by removing fuses or turning off circuit breakers.
Several safety precautions are highlighted in the manual:
- Power Disconnection: Always disconnect power before installation or maintenance to prevent serious injury or death.
- Electrical Connections: All electrical connections must comply with local codes, ordinances, the National Electrical Code, and ANSI/NFPA 70-199. A qualified electrician should be consulted if unfamiliar with electrical wiring.
- Outlet Box: The fan must be mounted to an outlet box marked "ACCEPTABLE FOR FAN SUPPORT" and securely attached to the building structure, capable of supporting at least 35 lbs. Most outlet boxes for lighting fixtures are not suitable for fan support.
- Wire Connectors: The provided wire connectors are designed for one 12-gauge house wire and two fan lead wires. If house wiring is larger or more numerous, consult an electrician for appropriate wire connectors.
- Grounding: The outlet box must be properly grounded, or a ground (green or bare) wire must be present.
- Screw Security: All screws, bolts, and nuts on the fan motor assembly must be carefully checked and secured.
- Blade Safety: Do not bend blade arms during installation, balancing, or cleaning. Do not insert objects between rotating fan blades.
- Dimmer Switches: Do not use a full-range dimmer switch to control fan speed, as this can cause humming and poses a risk of fire or electric shock.
- Part Usage: Only use parts provided with the fan; using other parts will void the warranty.
- Glass Bowl Installation: When attaching the glass bowl, twist it tightly in a clockwise direction until secure. Avoid cross-threading, as improper installation can make removal difficult or cause the bowl to fall, leading to injury.
- FCC Compliance: The device complies with FCC rules, but users should be aware of potential interference and measures to mitigate it.
Troubleshooting
The manual provides a troubleshooting guide for common issues such as the fan not moving, being noisy, wobbling excessively, lights not working, or the remote control not functioning. Solutions include checking power, wire connections, reverse switch engagement, tightening screws, replacing blades, and re-syncing the remote.
Warranty
The fan comes with a limited lifetime warranty for defects in workmanship and materials from the factory for the original purchaser. Other fan parts (excluding glass or plastic blades) are warranted for one year. The manufacturer will correct defects or replace the fan. The warranty does not cover damage from accident, misuse, improper installation, or accessories. It also excludes changes in brass finish due to climate conditions.