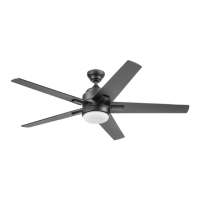
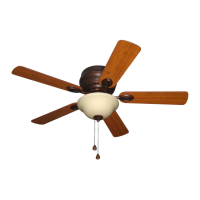
This document is a user manual for the Harbor Breeze ELMS CEILING FAN, model #HTD21011. It provides comprehensive instructions for assembly, installation, operation, maintenance, and troubleshooting.
Function Description
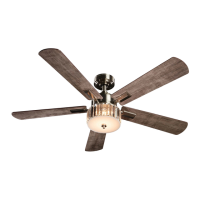
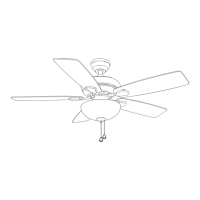
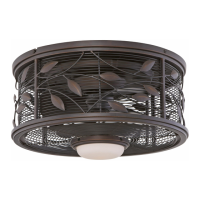
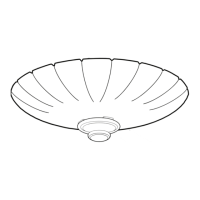
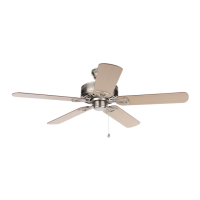
The Harbor Breeze ELMS CEILING FAN is designed to provide air circulation and illumination in residential settings. It features a multi-speed fan for cooling in warmer weather and an upward airflow function for circulating warm air in cooler weather. The fan includes an integrated light kit with a shade and is controlled by a remote unit. The fan can be mounted in either a standard or angled configuration, accommodating various ceiling types and heights. The remote control allows for convenient adjustment of fan speed, light on/off, and light dimming. It also includes a color temperature switch for the LED light and timer functions for automatic fan and light shut-off.
Usage Features
Installation:
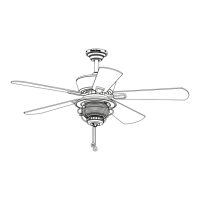
The manual outlines a detailed installation process, starting with safety information and preparation. Users are instructed to turn off electricity at the main fuse box before beginning installation. The fan can be installed using either a standard mounting method for ceilings 8 feet or higher, or an angle mounting method for angled or vaulted ceilings (up to 20°). Proper clearance from blades to the floor (minimum 7 ft) and to any obstruction (minimum 30 in.) is emphasized. The installation involves securely fastening the mounting bracket to an existing outlet box, assembling the downrod with the canopy and coupling cover, and then attaching the downrod assembly to the motor assembly. Wiring instructions are provided for connecting the fan to the house electrical system, including specific connections for the receiver, motor, and light. The wired receiver is placed between the mounting bracket and the downrod assembly. After wiring, the canopy and canopy cover are secured. The blades are then attached to the blade arms, and the blade arms are secured to the motor assembly. Finally, the light kit housing, light kit, shade, and finial are assembled and attached to the fan.
Operation:
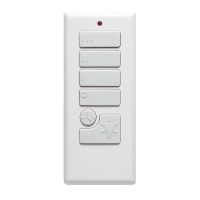
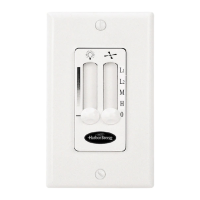
The fan is operated using a remote control unit.
- Fan Direction: The remote allows users to change the direction of the fan's rotation. In warmer weather, counterclockwise rotation creates a downward airflow for cooling (indicated by a SUN icon). In cooler weather, clockwise rotation creates an upward airflow to move hot air from the ceiling (indicated by a SNOWFLAKE icon). Users are warned to turn off the fan and wait for it to stop before flipping the reverse switch, which is located on the fan itself. A small screwdriver or ballpoint pen may be needed to move the reverse switch.
- Fan Speed: The remote has buttons to increase or decrease the fan speed.
- Fan ON/OFF: A dedicated button controls the fan's power.
- Light ON/OFF/Dimming: The light can be turned on or off. Pressing and holding the light button initiates circular dimming, with the transmitter beeping twice at the brightest and darkest points.
- Color Temperature: A button allows switching the color temperature of the LED light when it is on. This model requires a dedicated CCT LED light provided by the manufacturer.
- Timer Functions: The remote includes timer buttons (1h, 3h, 6h) to automatically turn off the fan after 1, 3, or 6 hours, respectively. There is also a button to turn off the light after 1 minute.
- Remote Control Setup: The remote requires a 3V CR2032 battery (included). If the remote is not used for long periods, the battery should be removed to prevent damage. Each remote has a unique ID code, which is factory-set and not user-changeable. However, an "ID code learning" process is required if multiple fans are installed nearby and controlled by the same remote, or if the remote is not responding (after checking the battery), or after replacing a faulty transmitter or receiver. This process involves restoring power to the fan, pressing and holding the "light" button on the transmitter for 5 seconds until it beeps five times, indicating successful code learning. This must be completed within 1 minute of restoring power to the fan.
Maintenance Features
General Maintenance:
- Power Disconnection: Before any maintenance, the main power supply to the fan must be shut off.
- Cleaning: The fan housing should be cleaned with a soft brush or lint-free cloth to avoid scratching the finish. The blades should also be cleaned with a lint-free cloth. Water or a damp cloth should not be used to clean the ceiling fan.
- Screw Tightening: At least twice a year, all screws, including those on the lower canopy and mounting plate, should be tightened to ensure secure connections.
- Blade Protection: A light coat of furniture polish can occasionally be applied to wood blades for added protection.
Troubleshooting:
The manual includes a troubleshooting section to address common issues:
- Noisy Fan: Solutions include tightening set screws, avoiding non-approved speed controls, allowing a "break-in" period, checking for rattling wire connectors, replacing cracked blades, ensuring the upper canopy is close to the ceiling, and securing the glass.
- Fan Wobble: Corrective actions involve tightening hanger bracket screws and/or the outlet box, tightening the set screw in the downrod assembly, ensuring the hanger ball is properly seated in canopy tabs, tightening set screws in the motor coupling, checking that blades are firmly screwed into blade holders, ensuring blade irons seat firmly and uniformly, interchanging adjacent blades to redistribute weight, lowering or moving the fan if too close to a vaulted ceiling, and ensuring the canopy and mounting bracket are securely tightened to the ceiling joist. Some wobble may disappear when the fan stabilizes at low speed.
- Fan Does Not Start: Solutions include turning power on, replacing fuses or resetting breakers, checking all wire connections according to the wiring instructions, checking the plug connection in the switch housing, and ensuring the motor reversing switch is fully engaged (not in the middle position).
- Light Does Not Work: Users are directed to refer to the wiring instructions to ensure all wire connections were done correctly.
Warranty:
The fan comes with a limited lifetime warranty covering defects in workmanship and material from the date of purchase for the original purchaser. The manufacturer will correct defects or replace the fan at no charge. The warranty does not cover damage from accident, misuse, improper installation, or unauthorized accessories. It also excludes changes in brass finish, rusting, pitting, tarnishing, corroding, or peeling due to varying climatic conditions. Replacement of defective parts within the first year is covered, with instructions to contact customer service for return authorization. The warranty supersedes all prior warranties and provides specific legal rights that may vary by state. A small amount of "wobble" is considered normal and not a defect.