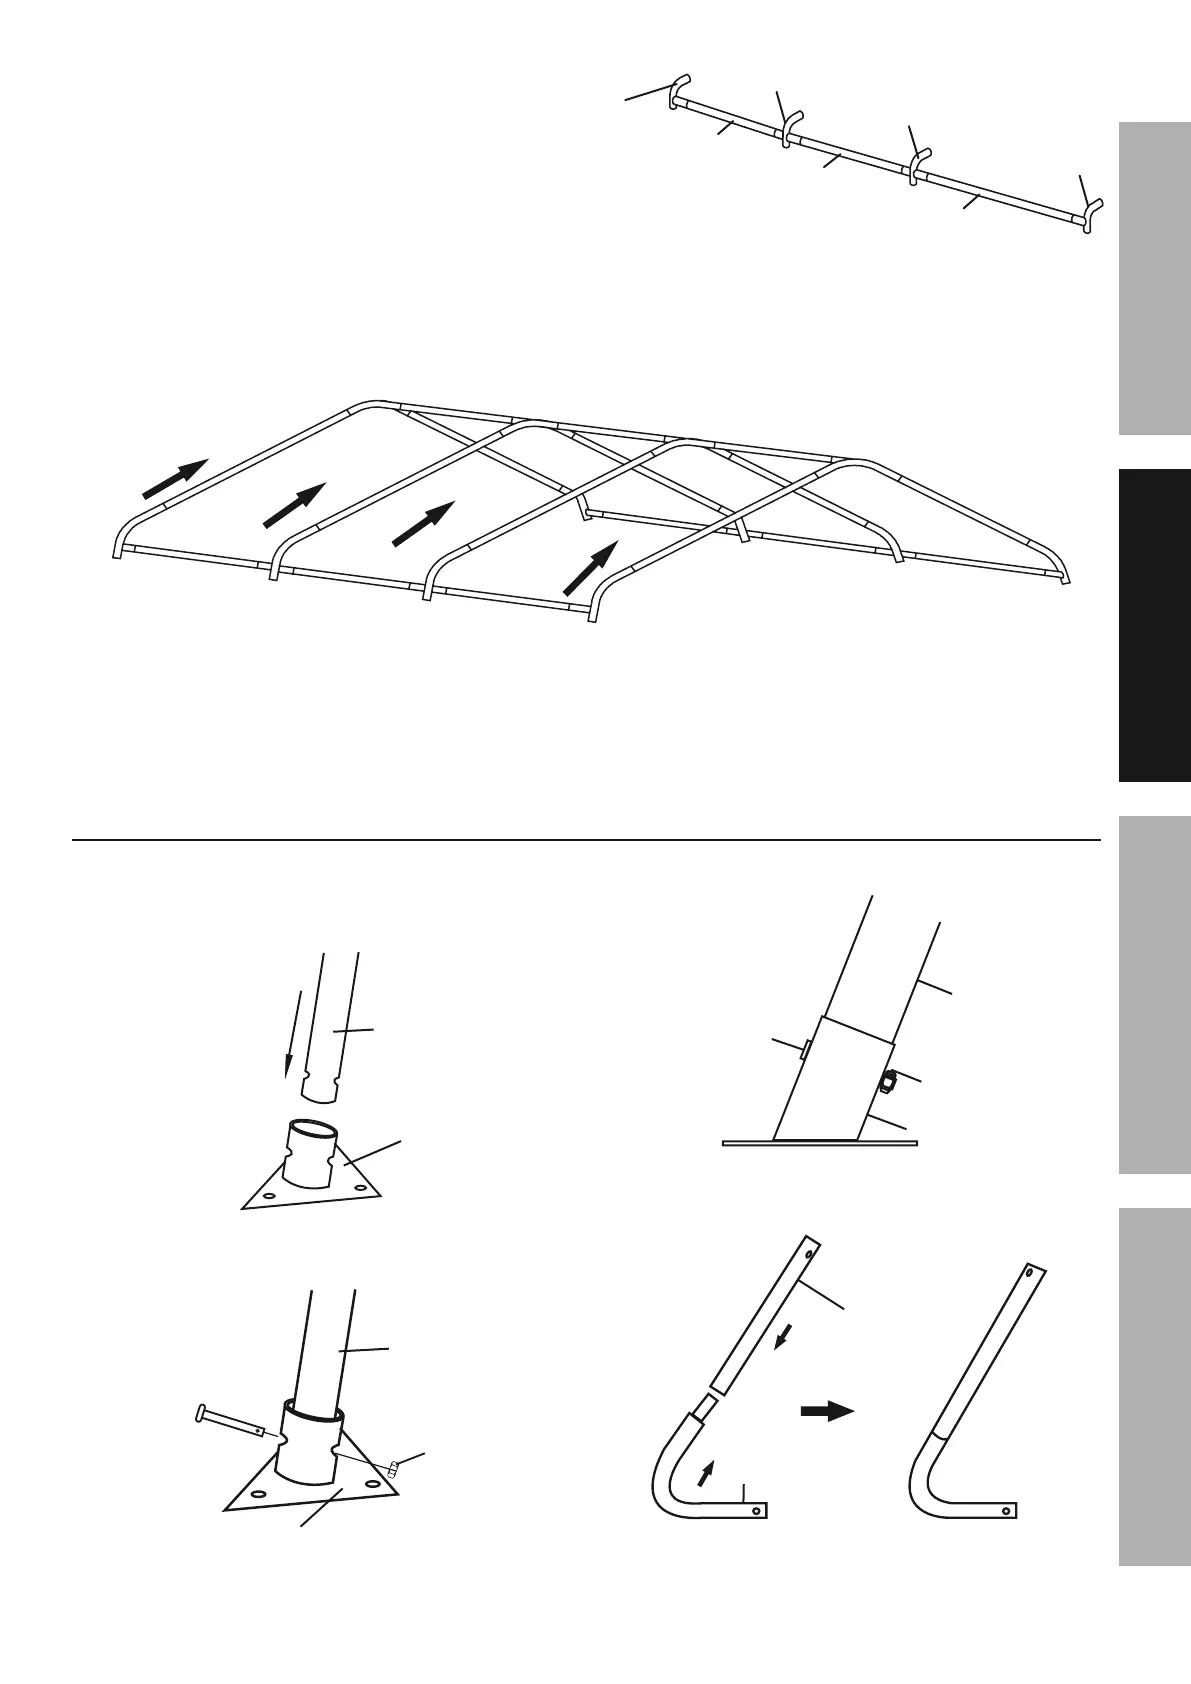
3. Assemble a roof side rail using a 3-Way
Side Connector B (A2), three Rails (4) with
4-Way Side Connectors (B1) between them,
and then a 3-Way Side Connector A (A1)
on the other end (see Figure D). The Rails
connect to the straight ends of the Connectors,
and the curved ends of all Connectors must
face up angled the same direction, as shown. If
that is not the case, incorrect connectors were
used, or they were assembled backwards.
<O
<a
c
IO
IO
c
c
L$7+/"'B3''=))6'D$,"'=2$&'<.."81&C
4. Assemble a second identical roof side rail
by repeating the instructions in step #3.
5. Connect the roof side rail assemblies to the
ends of the Rafters (3), as shown in Figure E.
<O
<a
c
IO
IO
c
c
b
b
b
b
<a
IO
IO
<O
c
L$7+/"'93''=))6'D$,"'=2$&'?(.*2&&2*$)(
6. Make sure all parts assembled up to this point are
firmly joined together. Tap parts together gently
with a rubber mallet (sold separately) if needed.
D*+,N'L))*N'2(,'K"7'<.."81&C
1. Assemble a Foot (7) to the bottom
of each Center Stud (1):
a. Place a Foot onto the bottom of the Center Stud.
T
O
b. Align the holes and insert a Hex
Head Bolt (12) through them.
Oa
U
O
Oc
c. Secure with a Nut (14).
O
Oa
Oc
T
2. Assemble a Corner Leg (6) to the bottom of
each Corner Stud (2) as shown in Figure F.
a
R
L$7+/"'L3''F)/("/'K"7'<.."81&C
Page 7L)/'*"%#($%2&'M+".*$)(.N'4&"2."'%2&&'OPQQQPQRRPSTUT-Item 62859
D<L9EGJV9=<E?J>H<?>E9><>F9 D9EWV