D*+,'?(.*2&&2*$)(
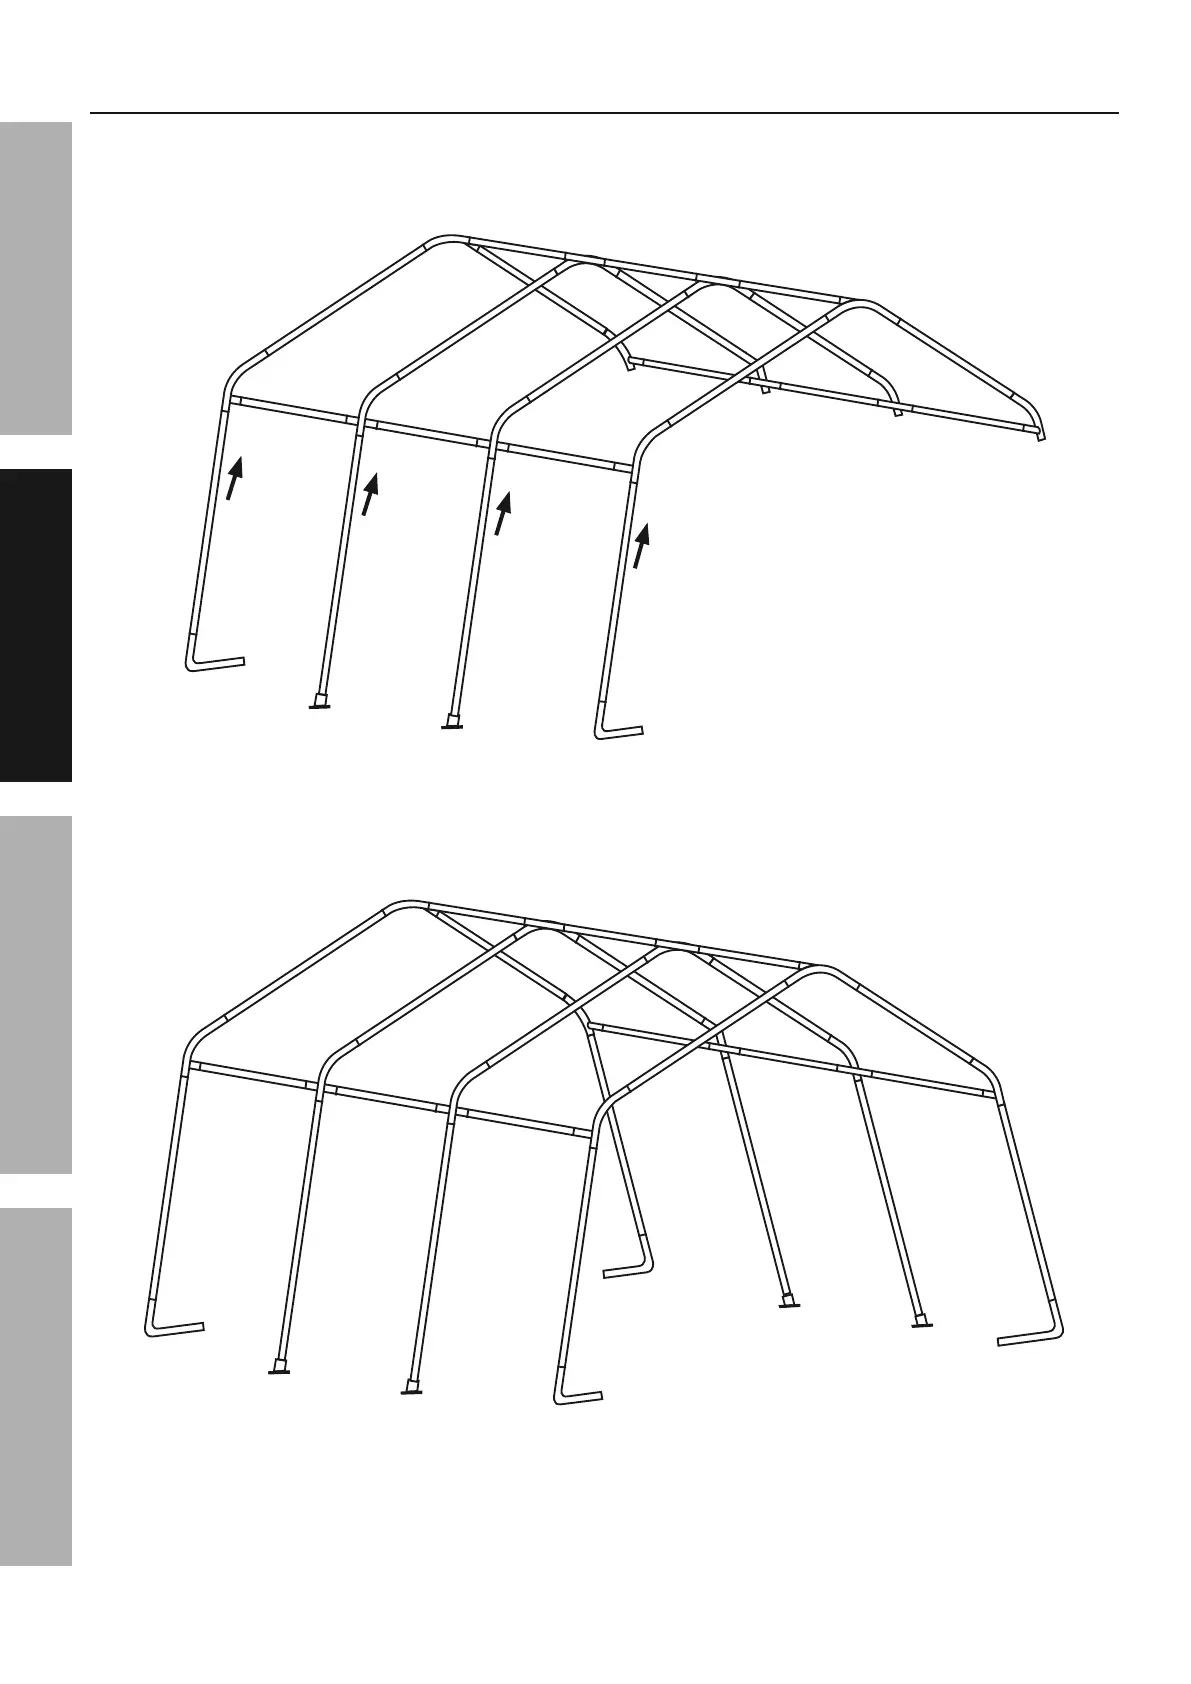
1. With assistance, raise one side of the roof assembly.
2. Install the Center Studs (1) into the 4-Way Side Connectors (B1), and the Corner Studs (2)
into the 3-Way Side Connectors A/B (A1, A2) with the Corner Legs (6) facing inward.
<a
a
O
R
IO
<O
IO
a
O
R
L$7+/"'@3''D*+,'?(.*2&&2*$)(
3. After all four Studs (1, 2) are in place,
rest that side of the assembly on the
ground, and raise the other side.
4. Install four Studs on the other side of the
roof, as explained in step #2, above.
<
I
<a
<O
IO
O
a
b
c
R
<
I
<a
<O
IO
IO
IO
O
O
O
a
a
a
b
b
b
b
b
b
b
c
c
c
c
c
c
c
c
R
R
R
L$7+/"'[3''D*+,.'?(.*2&&",')('I)*#'D$,".-
5. Make sure all parts assembled up to this point are firmly joined together.
Tap parts together gently with a rubber mallet (sold separately) if needed.
Page 8 L)/'*"%#($%2&'M+".*$)(.N'4&"2."'%2&&'OPQQQPQRRPSTUT- Item 62859
D<L9EG JV9=<E?J> H<?>E9><>F9D9EWV