myHARGRAY
DVR USER GUIDE
15
Caller ID
Enabling or Disabling Caller ID
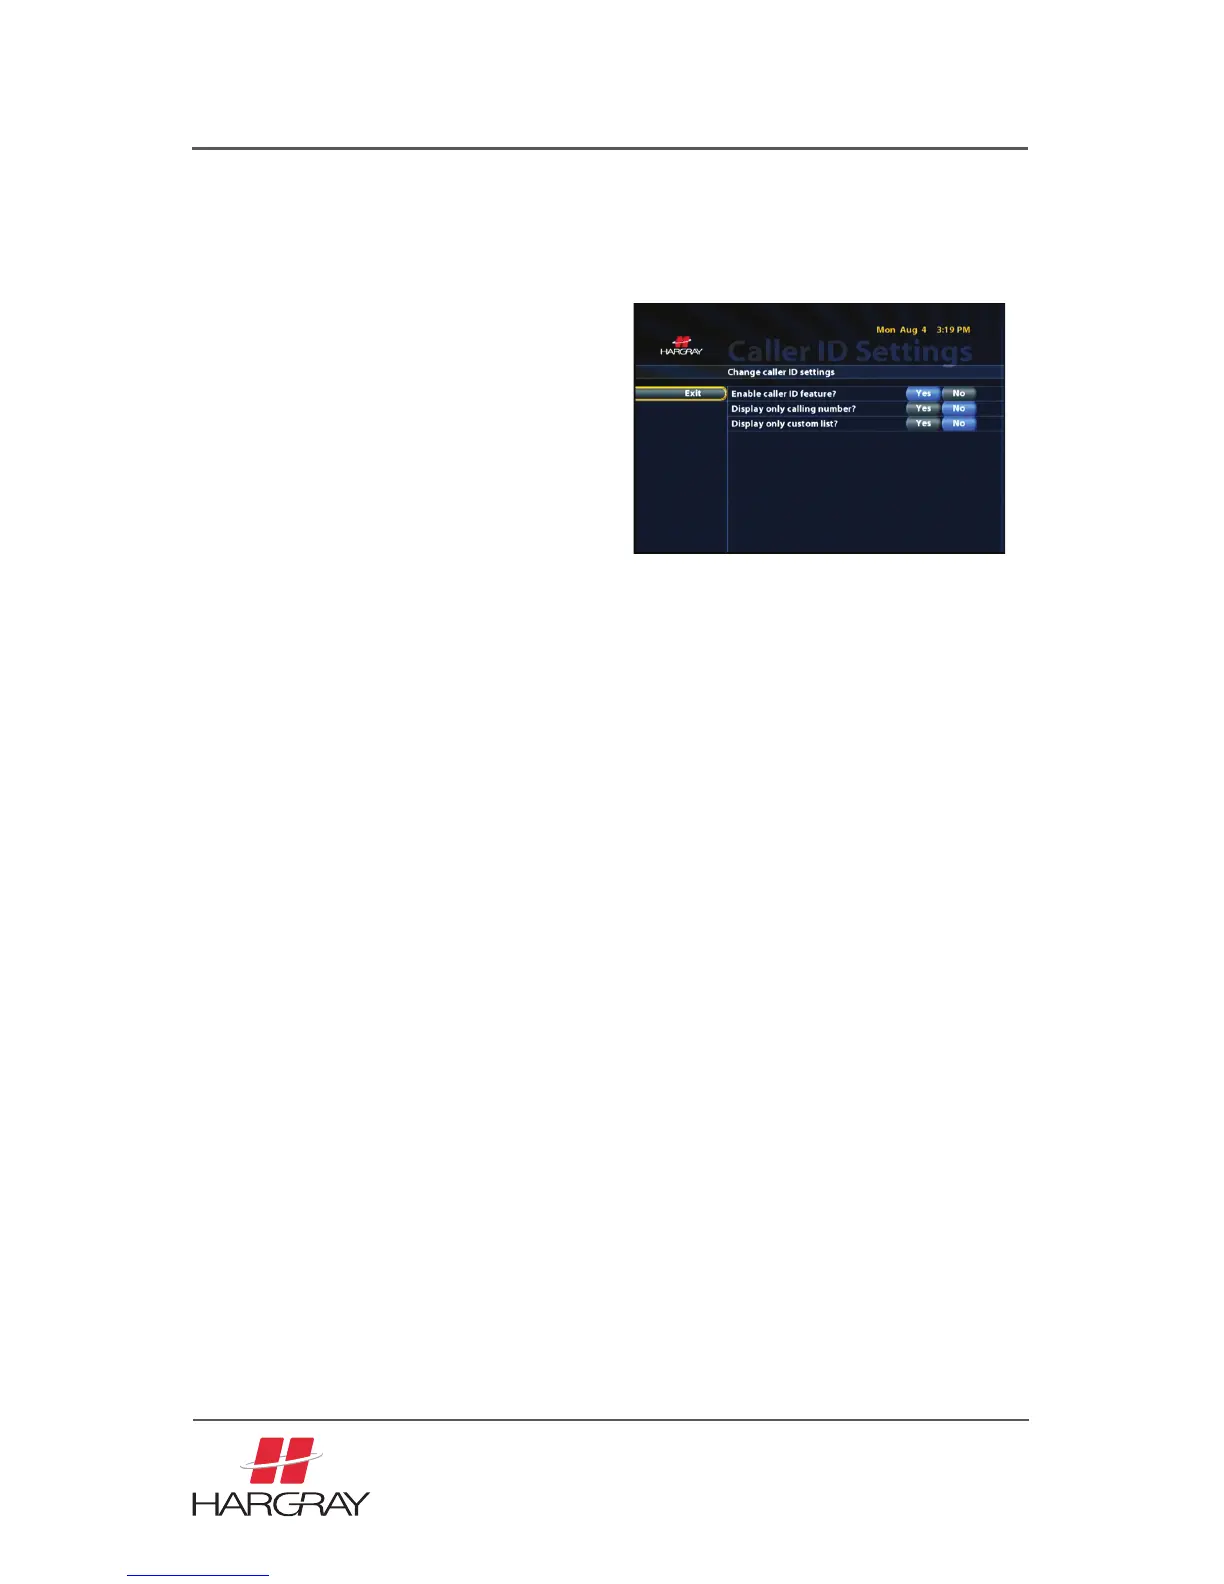
1. Press MENU/SETTINGS on the re-
mote, select Account Info/Settings
and then select Caller ID Settings.
The Caller ID Settings screen appears,
with options to enable and display in-
formation.
2. Turn options on or off, as desired,
by highlighting the desired field and
pressing the SELECT/OK to activate.
3. Once all settings are as desired use
the arrow keys on the remote to high-
light EXIT and then press SELECT/OK
and the new settings are saved.
Reviewing Call History
1. Press MENU/SETTINGS on the remote, and then Select CALLER ID and then
select CALLER ID HISTORY, or press PHONE on the remote and select CALL-
ER ID HISTORY. The Caller ID History screen appears showing the most recent
calls in reverse chronological order. The number of calls is determined by your
service provider.
2. Scroll through the list and review calls.
3. Press EXIT and return to the main menu.
Saving Caller ID History Numbers
1. Press MENU/SETTINGS on the remote, and then select CALLER ID, and then
select CALLER ID HISTORY, or press PHONE on the remote and select CALL-
ER ID HISTORY. The Call History screen appears, showing the most recent
calls in reverse chronological order. The number of calls is determined by your
service provider.
2. Select ADD next to the name/number in Call History you would like to save.
This number will automatically be added to the Caller ID List. Continue for each
number that you would like to save.
3. Press EXIT and return to the main menu