2-8 2005 PDI: Touring Models
Windshield Installation: FLHR/C and
FLHP (Windshield)
CAUTION
Be sure you position the windshield bracket between the
rubber grommets. Incorrect mounting could result in
damage to the windshield.
See Figure 2-9. Insert your fingers into the wireform latch
springs at either side of the windshield and slide the BOT-
TOM windshield bracket notches onto the bottom grommets.
Slide the TOP bracket notches onto the top grommets.
NOTE
If windshield contacts clutch cable, reposition handlebars.
Seat Adjustment: FLHTP
Before applying load to the seat, refer to the Police Models
Owner’s Manual for adjustment procedures of the FLHTP air-
suspension seat. Confirm that air bladder is inflated to 10-psi
(69 kPa) minimum.
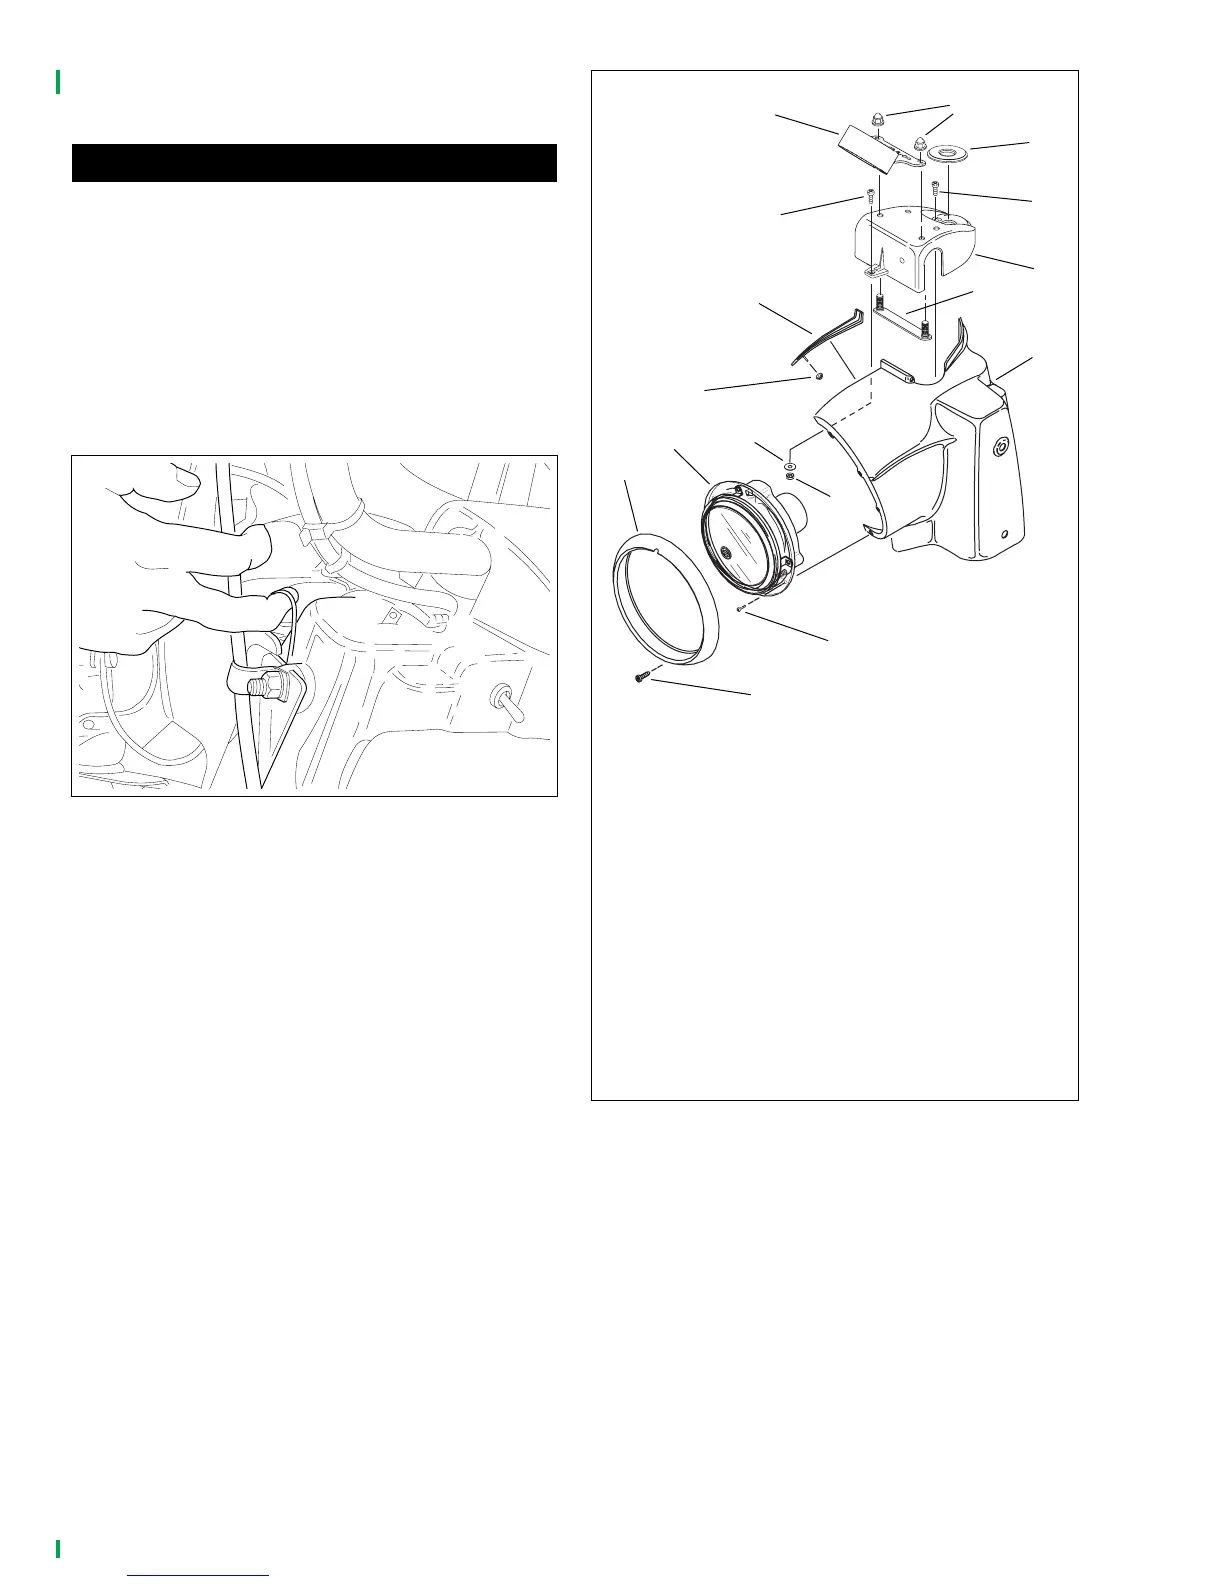
Instrument Mounting Bracket
Installation: FLHP
The FLHP is provided with an instrument mounting bracket.
The bracket relocates the tachometer to allow the addition of
a radio speaker, and control panel.
1. See Figure 2-10. Remove screw (13) securing chrome
ring (12) to headlamp nacelle (8). Remove chrome ring.
2. Remove eight fasteners (11) securing headlamp assem-
bly (10). Squeeze two external tabs (if present) to
remove wire connector at back of headlamp bulb.
Remove headlamp assembly from vehicle.
Figure 2-9. FLHR/C and FLHP Windshield Installation
OMF53
Figure 2-10. FLHP Headlamp Nacelle
pd0227
3
2
1
4
8
1. Nut
2. Nacelle trim
3. Screw
4. Nut
5. Flat washer
6. Fork lock plate
7. Screw (2)
8. Nacelle
9. Handlebar clamp shroud
10. Headlamp assembly
11. Screw (8)
12. Chrome headlamp ring
13. Screw
14. Stud plate
15. Acorn nut (2)
16. Tachometer bracket
10
11
13
12
7
9
14
6
15
16
5
 Loading...