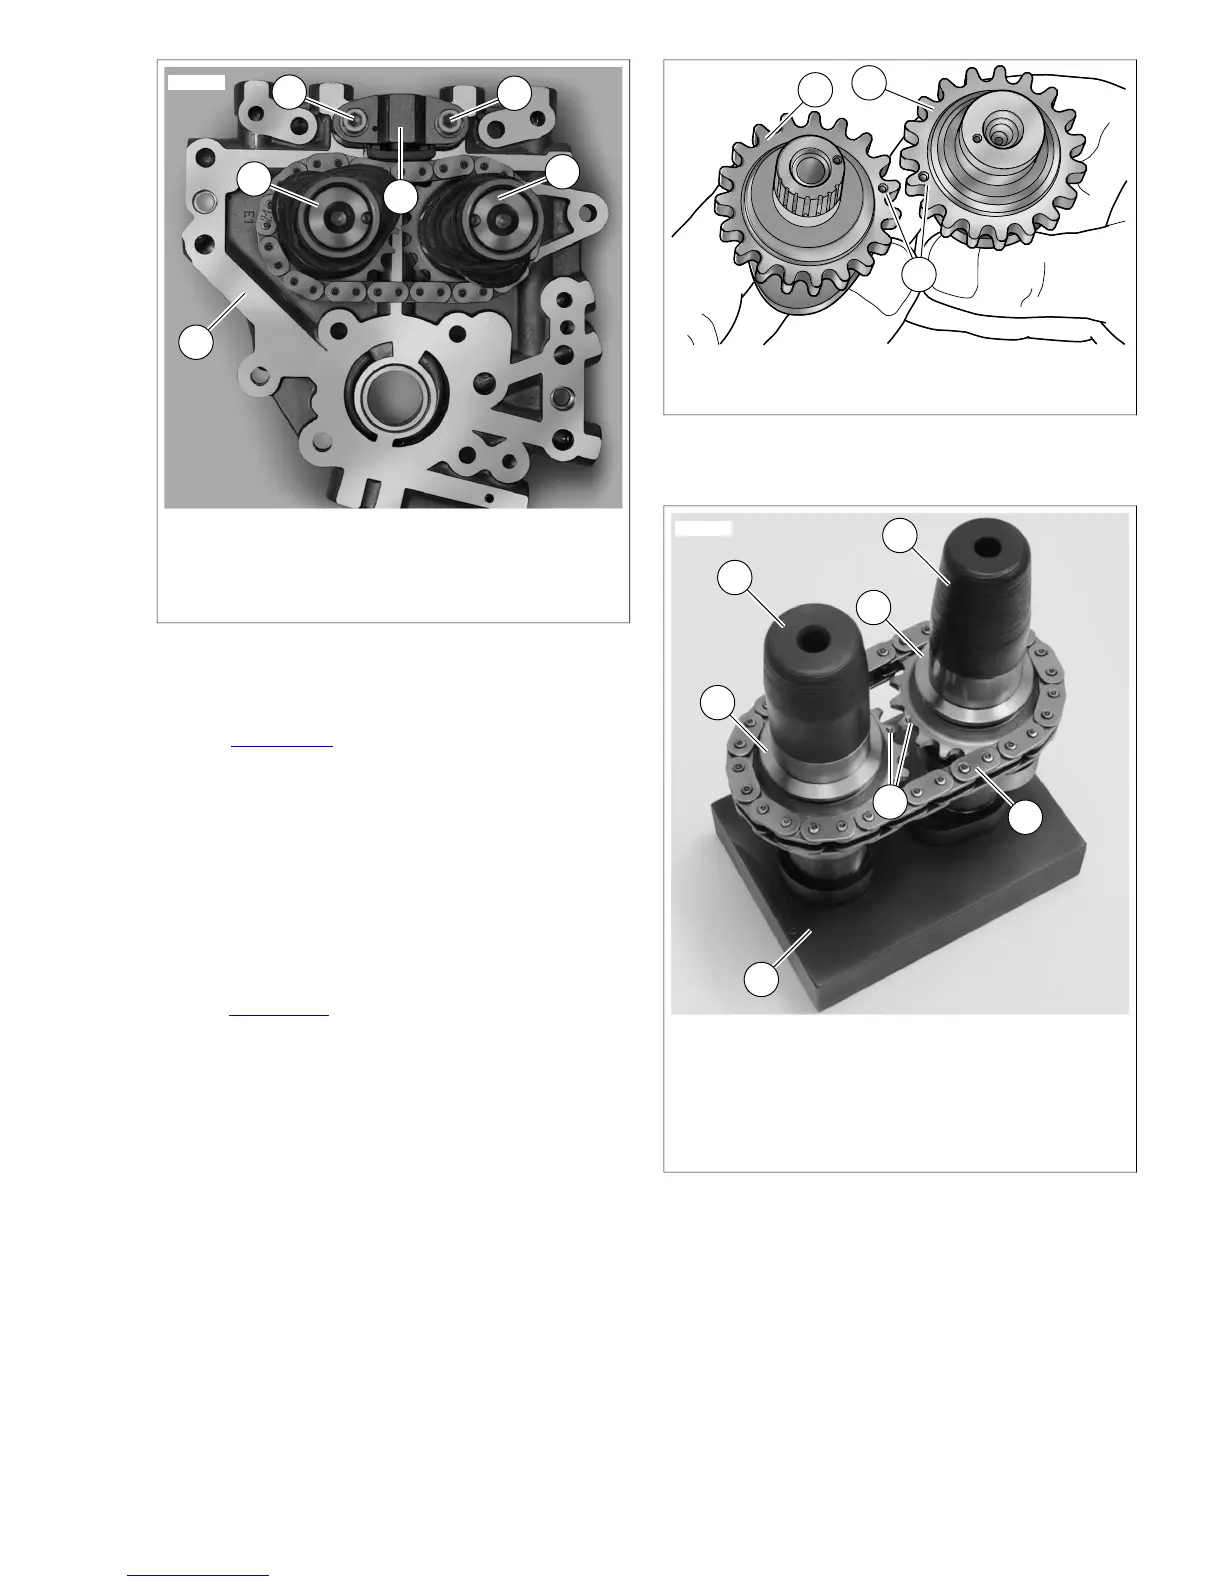
1. Cam support plate
2. Front cam
3. Secondary cam chain tensioner
4. Secondary cam chain tensioner fasteners
5. Rear cam
Figure 3-114. Camshafts
Assembly
1. See Figure 3-115. Align timing marks on teeth of sec-
ondary cam sprockets (outboard faces).
NOTE
Do not mix camshafts during the installation procedure. The
rear camshaft, which can be identified by the splined shaft,
must go into the hole at the rear of the cam support plate.
2. Place the secondary cam chain around the sprockets of
both the front and rear camshafts.To maintain the original
direction of rotation, be sure that the colored mark placed
on the chain link during disassembly is facing opposite
the cam support plate during installation.
3. See Figure 3-116. Orient the camshafts so that they are
positioned on opposite ends of the chain, and then verify
that the alignment marks (6) are still in alignment.
1. Rear camshaft
2. Small guide
3. Front camshaft
4. Large guide
5. Cam chain
6. Alignment marks
7. Base
Figure 3-116. Camshaft Assembly Tool
4. Obtain CAMSHAFT ASSEMBLY TOOL (Part No. HD-
47956). Place crankcase side of camshaft/cam chain
assembly into base (7).
5. While maintaining cam timing mark alignment, place small
guide (2) on rear camshaft (1). Place large guide (4) on
front camshaft (3).
6. Lubricate support plate camshaft cavities with clean H-D
20W50 engine oil.
2008 Dyna Service: Engine 3-83



 To Next Page