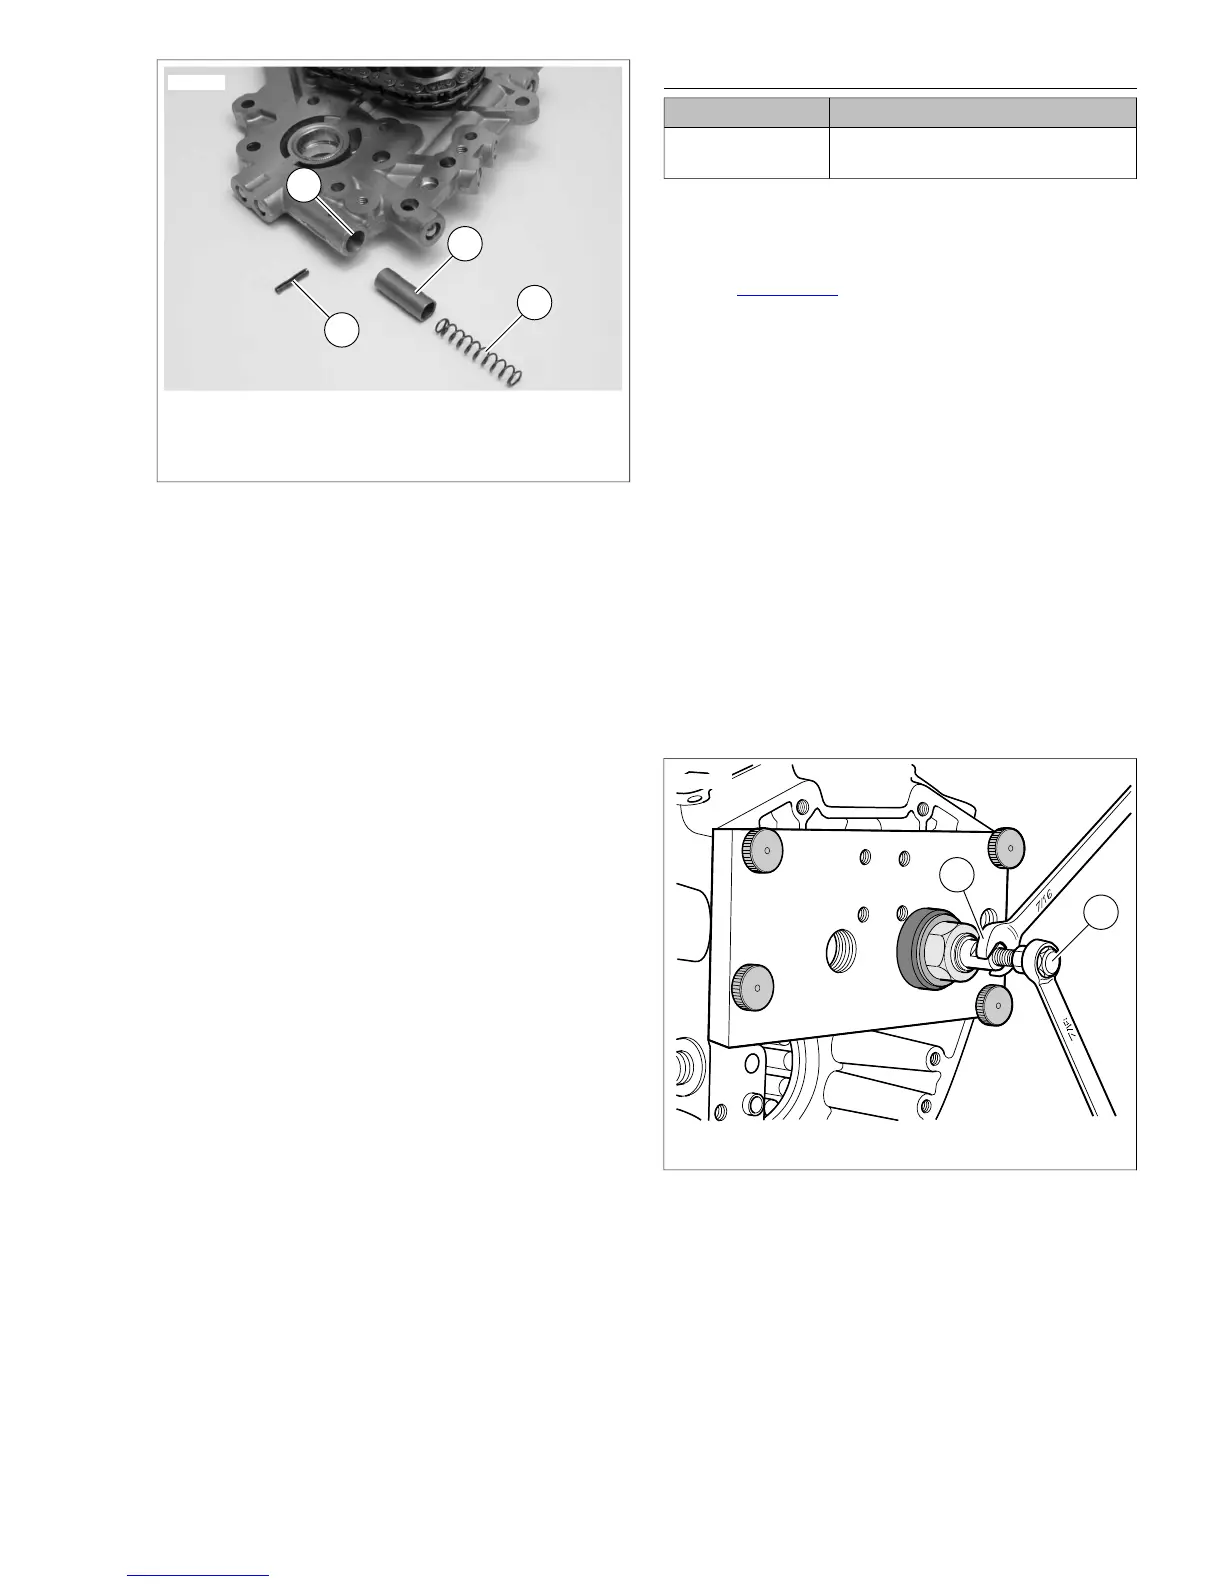
1. Roll pin
2. Spring
3. Valve body
4. Bypass port
Figure 3-119. Oil Pressure Relief Valve Assembly
Inspection
NOTE
If diagnosing low oil pressure, start with step 1. If diagnosing
high oil pressure, then begin with step 2.
1. Insert straight stiff wire into unplugged hole outboard of
roll pin until it bottoms. Mark wire and measure distance
from edge of cam support plate to inboard side of piston.
With piston fully seated in the bore, depth should be
approximately 2.25 in. (57.15 mm). If it is not, continue
with next step.
2. Remove oil pressure relief valve.
3. Inspect spring for stretching, kinking or distortion.
4. Inspect piston and bore for burrs, scoring or other damage.
Look for steel particles or aluminum chips. Replace cam
support plate and piston if any of these conditions are
found.
5. Install piston in bore and measure running clearance. If
running clearance exceeds 0.003 in. (0.076 mm), install
new piston and remeasure. Replace cam support plate if
running clearance still exceeds specification.
CAM NEEDLE BEARINGS
TOOL NAMEPART NUMBER
CAMSHAFT NEEDLE BEARING
REMOVER/INSTALLER
HD-42325-A
Removal
1. Obtain the CAMSHAFT NEEDLE BEARING
REMOVER/INSTALLER (Part No. HD-42325-A).
2. See Figure 3-121. Remove four thumb screws (1) from
threaded holes in support plate (2), if installed.
3. Sparingly apply graphite lubricant (9) to threads of collet
(3) to prolong service life and ensure smooth operation.
4. Slide collet through support plate so that threaded end
exits stamped side of plate.
5. Aligning two large holes in support plate with needle
bearing bores, hang right side of plate on ring dowel in
crankcase flange.
6. Align four holes at corners of support plate with threaded
holes in crankcase flange. Install thumb screws in these
holes to secure support plate to crankcase.
7. Center expandable end of collet in bearing bore and slide
Nice bearing (7) and flat washer (5) on threaded end. Start
hex nut (8) on threaded end.
8. Push expandable end of collet through bearing bore into
flywheel compartment. Feel for inside edge of needle
bearing using end of collet and then back off slightly.



 To Next Page